If you're like me, you always thought the name of this Italian dish was spelled the way it was pronounced: pasta fazool. My friend Betty Coviello (she would know) set me straight many years ago and shared this wonderful and very flexible recipe with me. It remains a favorite of mine.
Betty's Pasta e Fagioli
1 medium onion, minced
2 cloves garlic, minced
1/4 cup olive oil
1 cup sliced celery
4 pork chops or ribs
1/2 tsp salt
1/4 tsp pepper
6 cups chicken broth
1 1/2 cup macaroni
1 can canneloni beans (white kidney beans)
Saute the onion and garlic in the oil until golden. Add the celery and pork chops. Saute about 10 minutes. Add the broth, salt & pepper (I never actually measure these). Simmer for 30 minutes.
Add the macaroni and cook until barely tender. Add the beans and heat through.
I serve this with a salad and garlic bread. It never disappoints us.
Thank you Betty!

Friday, April 30, 2010
Wednesday, April 28, 2010
A BOGO Sale at The Jewelry Box!
My friend Brenda at The Jewelry Box is having a wonderful sale in honor of Mother's Day. The sale is a BOGO Plus sale. The BOGO part is Buy One and Get One at 50% off! How awesome is that? The Plus part is Free Shipping. You can't afford to NOT shop with Brenda this Mother's Day. Her sale will continue through May 9. Don't forget about the graduates on your shopping list too.
Brenda's designs are sweet, feminine and very romantic. Here is one of my favorites from her shop -- a beautiful bracelet for yourself, your mom, your best friend .... anyone would love to receive this as a gift.

Brenda's designs are sweet, feminine and very romantic. Here is one of my favorites from her shop -- a beautiful bracelet for yourself, your mom, your best friend .... anyone would love to receive this as a gift.
Tuesday, April 27, 2010
Brand New Whiskey Quartz Earrings
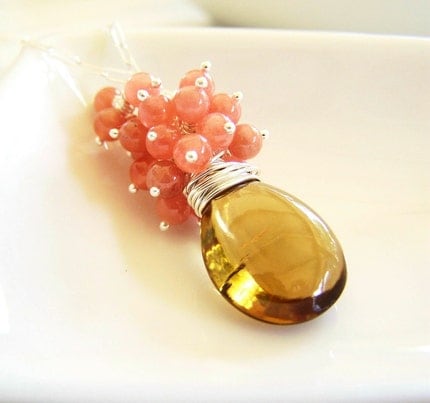
If you read my blog on a regular basis, you know that I love marquis shaped gemstone briolettes. There's just something about the way they taper to a point at the bottom. It is so very graceful and appealing to my eye.
These earrings feature whiskey quartz briolettes in that shape. The color is like warm honey. Working with that warm theme, I added a small briolette of orange-y mandarin garnet alongside each one.
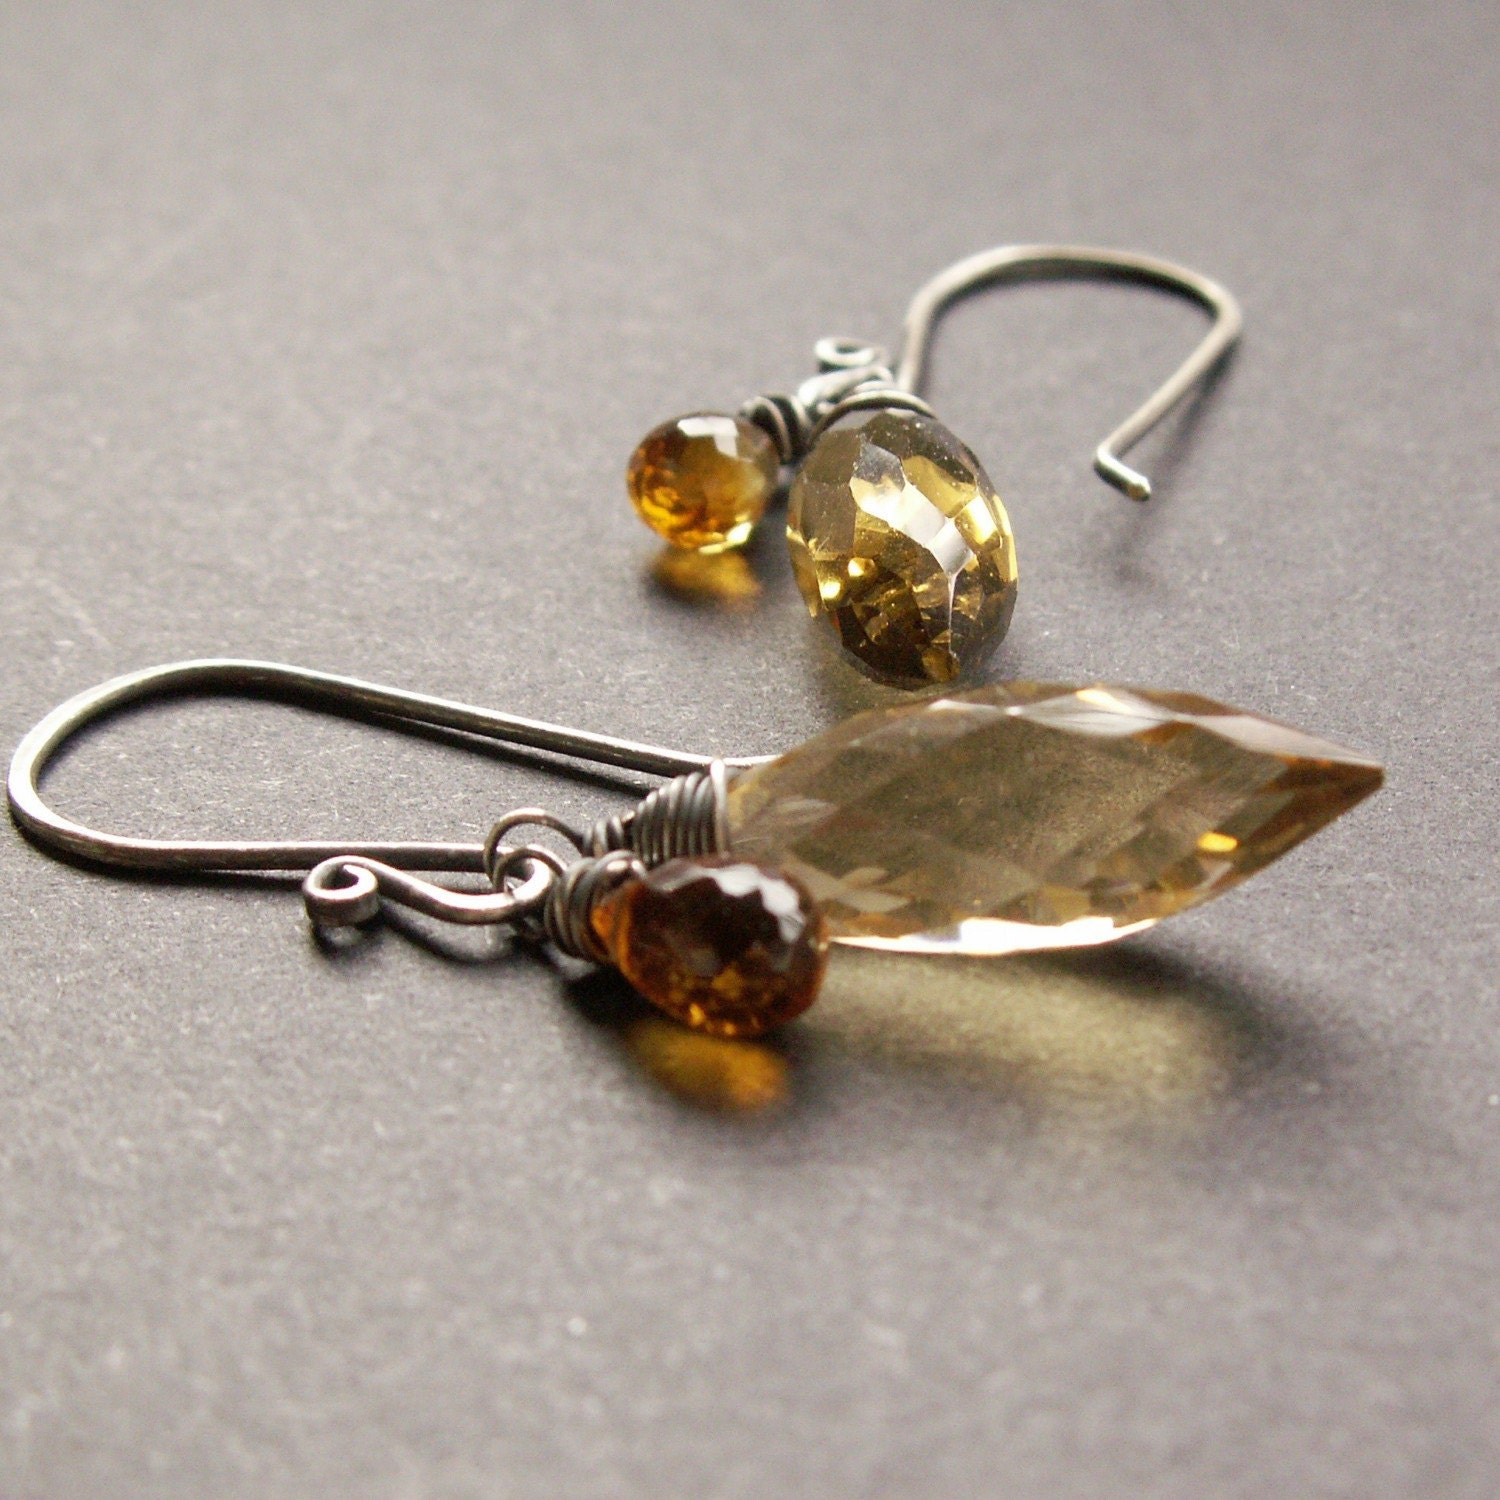 These earrings are for sale in my etsy shop. Click on the photo to go directly to the listing.
These earrings feature whiskey quartz briolettes in that shape. The color is like warm honey. Working with that warm theme, I added a small briolette of orange-y mandarin garnet alongside each one.
Monday, April 26, 2010
Techniques & Tips :: Customized Pliers
Let's start with what this is NOT. This is not a tutorial about how to make a wrapped loop. This is a tip about how to make your wrapped loops just a little bit better.


Creating a wrapped loop (aka secure eye-wrap) is a basic skill that bead artists and jewelry artisans perform quite often. You probably have your favorite means of getting one of these things done – and you’ve done plenty, I’m sure.
At the very least, a wrapped loop requires 3 pairs of pliers: a chain nose for bending and straightening, a round nose for making the perfect loop, cutters for trimming. Here I will introduce you to the 4th pair that I consider indispensable.

This is one of my original pair of chain nose pliers whose springs have long since broken off. I took the tip to the grinder (alright, Rick did it for me, but it was my idea) to make a super sharp point. You will see how handy this modification can be. Here's a close-up of the tips:

After making a wrapped loop and trimming the excess wire, even my best flush cutters often leave an itty bitty end of wire sticking out. When I say itty bitty, I mean really small. Many people will not even notice, but this kind of attention to detail can separate your work from that of others. These super pointy pliers are the perfect tool for pressing that little bit of wire inwards, in line with the main part of your wraps. There is an exaggerated amount of wire in this photo for demonstration purposes. (look just on top of the uppermost bead)


Even when doing a “messier” type of wire wrap, these pliers are the only ones that will successfully “tuck in” the ends of your wire, without disturbing your artful wrap. This is especially useful when working with smaller gauges of wire, such as 24 ga or 26 ga.
Sunday, April 25, 2010
I Made Some Books
A few weeks ago, during one of my jewelry-making breaks, I gathered a bunch of my books on how to make books. I spent 2 days making the 5 books you see in this photo.
 Clockwise from upper left: spiral bound book with clear acrylic covers and random papers, variation on stab binding, spiral bound book with gorgeous green paper on the covers, large black stab bound album type book, small lime green book.
The small lime green book is what most people would picture when the word "book" is mentioned. As you can see from this photo, I need to work on aligning my signatures (book sections) when making this sort of book.

For the stab binding variation book, I selected some of my own marbled paper for edging the covers.

One of the most fun things for me about making books is selecting the papers for the covers and inside plates. I love working with all the colors and patterns available.
Friday, April 23, 2010
Busy as a Bee Necklace
While shopping at Artbeads, I found this really cute brass bee charm. Charms are not usually my favorite thing, but I was taken by this little guy and added a few to my order. The flower shaped filigree is a new piece for me too. I like the way they work together.
Of course, all of the glass beads I selected had to be yellow and black. What else could I possibly use to accompany a bee?
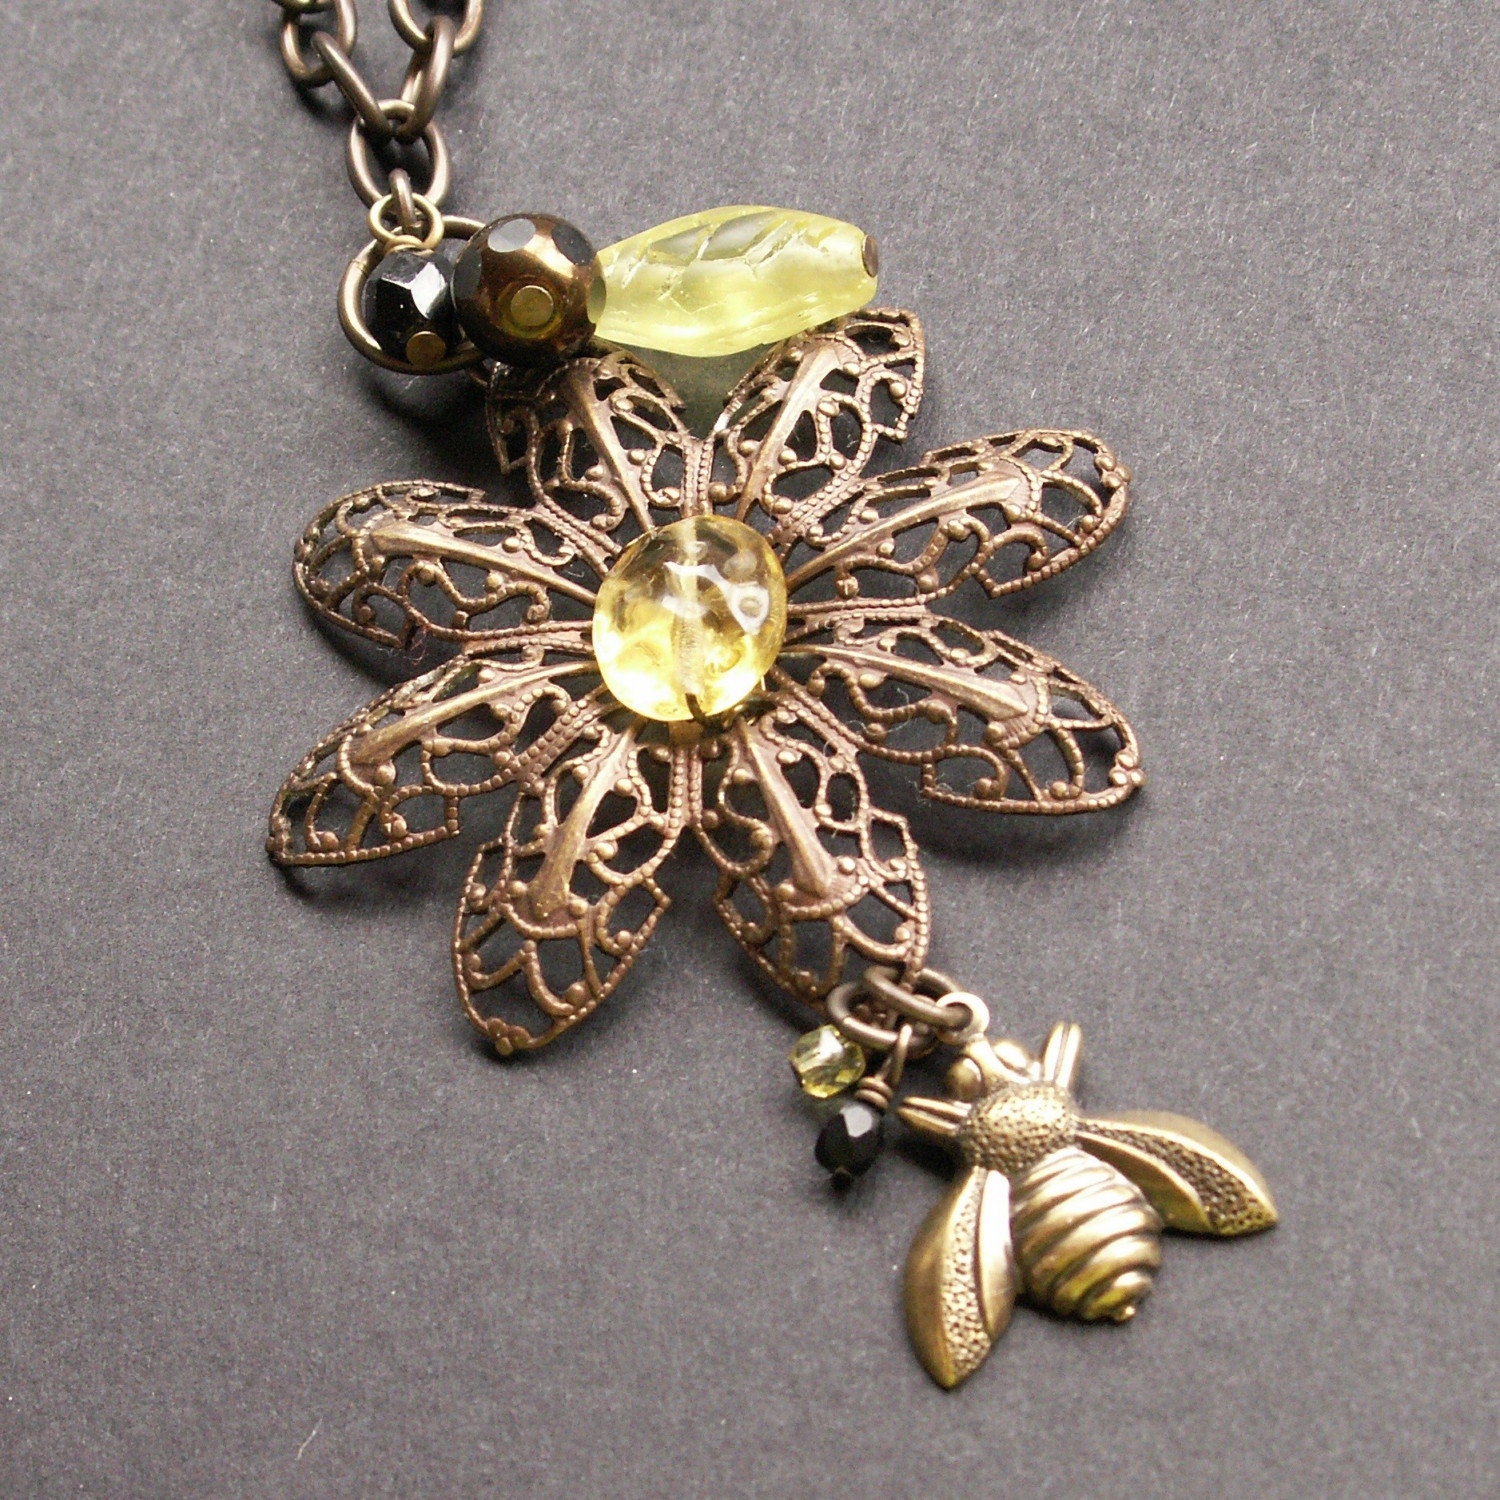
I recently listed this cute necklace in my etsy shop. Click on the photo to go directly to the listing.
Of course, all of the glass beads I selected had to be yellow and black. What else could I possibly use to accompany a bee?
I recently listed this cute necklace in my etsy shop. Click on the photo to go directly to the listing.
Thursday, April 22, 2010
I Like to Measure Things
I'm not sure where this fascination withe measuring comes from. I do have an engineering degree and always excelled in math in school. But I think maybe it's simply the knowing how big something is or how much volume it contains, that I find so satisfying.
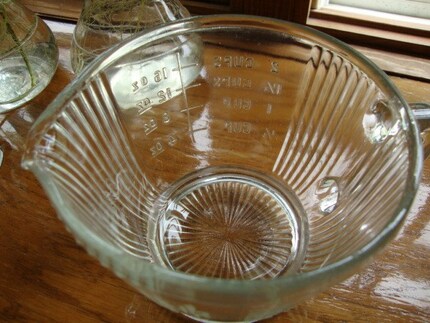
So it's no surprise that I have a nice collection of old measuring cups. I keep them on the window sill in the kitchen and actually use them on occasion. They're mostly glass, but I have a few ceramic ones too.

Some of them came with peanut butter in them and were sold in grocery stores. Must have been some sort of marketing gimmick.

I love the one that says King's Vanilla. It's more like a large shot glass.

I have a small collection of rulers too, but they aren't nearly as interesting, mainly because I have not been collecting them as long. Give me some time.
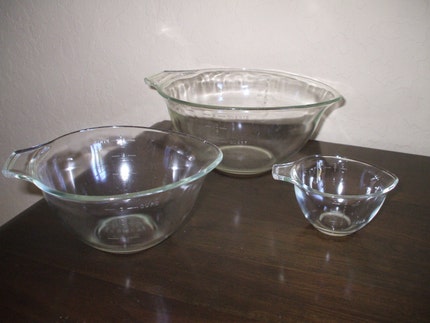
I have my eye on these two selections from etsy's vintage category.
Loving this nesting set.
So it's no surprise that I have a nice collection of old measuring cups. I keep them on the window sill in the kitchen and actually use them on occasion. They're mostly glass, but I have a few ceramic ones too.

Some of them came with peanut butter in them and were sold in grocery stores. Must have been some sort of marketing gimmick.

I love the one that says King's Vanilla. It's more like a large shot glass.

I have a small collection of rulers too, but they aren't nearly as interesting, mainly because I have not been collecting them as long. Give me some time.
I have my eye on these two selections from etsy's vintage category.
Loving this nesting set.
Wednesday, April 21, 2010
Finishing the Outfit
In yesterday's post, I selected a dress from J.Jill and a beautiful necklace from my friend Brandi's etsy shop. Brandi herself found some awesome shoes to go with both. Unfortunately, I can't figure out how to get the image from that website to here, but here's the link for them:
http://www.dsw.com/dsw_shoes/catalog/product.jsp?index=39&sort=&category=dsw12cat740010&prodId=186929&brand=
I did a little searching on etsy and found this bag that I think will complete the outfit. It is from BagItDesigns. You can click on the photo to go directly to the listing.
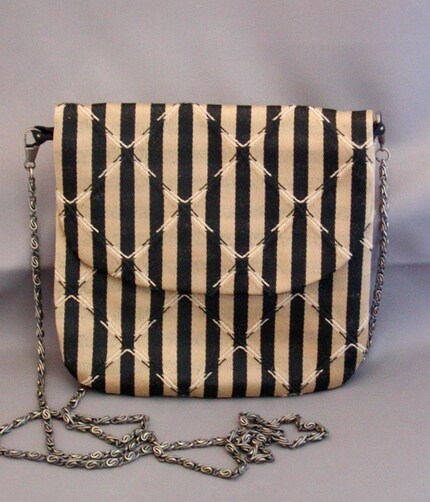
This outfit is pretty casual, considering it contains a dress. Given my lifestyle, a dress usually means serious "dress-up", but I think this one qualifies as casual.
Should we do this outfit thing more often? I think it's kinda fun.
http://www.dsw.com/dsw_shoes/catalog/product.jsp?index=39&sort=&category=dsw12cat740010&prodId=186929&brand=
I did a little searching on etsy and found this bag that I think will complete the outfit. It is from BagItDesigns. You can click on the photo to go directly to the listing.
This outfit is pretty casual, considering it contains a dress. Given my lifestyle, a dress usually means serious "dress-up", but I think this one qualifies as casual.
Should we do this outfit thing more often? I think it's kinda fun.
Tuesday, April 20, 2010
Build an Outfit
I'm a huge fan of the jewelry created by my friend Brandi. There's this one particular piece that I "visit" in her etsy shop quite often, Truffle Necklace. I decided to create an outfit based on this gorgeous necklace.
I don't wear dresses very often, but if I did, a simply styled dress is what I would gravitate towards. I shop often at j.jill and this dress caught my eye. It would look terrific with Brandi's necklace, without overpowering it.

I know what you're thinking, this isn't quite an outfit yet. Help me out -- shop around the web and find me a bag and some shoes, please!
I don't wear dresses very often, but if I did, a simply styled dress is what I would gravitate towards. I shop often at j.jill and this dress caught my eye. It would look terrific with Brandi's necklace, without overpowering it.
I know what you're thinking, this isn't quite an outfit yet. Help me out -- shop around the web and find me a bag and some shoes, please!
Monday, April 19, 2010
Big Moonstone Briolette
When I bought this strand of really large white moonstone briolettes, I envisioned a series of necklaces. Surely they were too large for earrings. I was wrong. Yes, they make a bold pair of earrings, but they're definitely NOT too big.
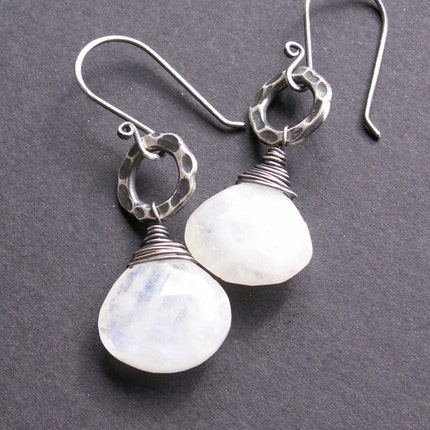
The stones have a nice blue flash to them, when viewed at certain angles, yet they are neutral enough to wear everyday. They are for sale in my etsy shop.
The stones have a nice blue flash to them, when viewed at certain angles, yet they are neutral enough to wear everyday. They are for sale in my etsy shop.
Saturday, April 17, 2010
Lemon Tea Bread
I bought a big bag of lemons at Costco the other day, without any specific plans to use them. Silly me. They don't keep all that well, so I've been doing some serious lemon-recipe-hunting the past few days.
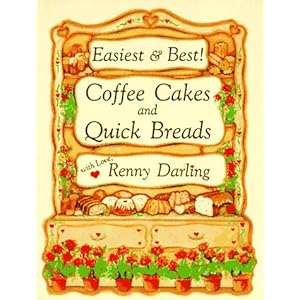
Here's an old favorite from a great cookbook, Coffee Cakes & Quick Breads by Renny Darling. Click the photo to go directly to the listing on Amazon.
Sour Cream Lemon Tea Bread
1/2 cup butter, softened
1 1/4 cups sugar
2 eggs
1/2 cup sour cream
1 lemon, grated, about 3 TBSP (use the fruit, juice and peel. Remove large pieces of membrane)
(I cut the lemon up into about 8 pieces and put it in the blender for a few seconds. So much easier than grating)
2 cups flour
2 tsp baking powder
3/4 cup chopped pecans ( I substituted almonds)
Beat together first 5 ingredients until blended. Combine and add the next 3 ingredients and stir until dry ingredients are just moistened. Do not overmix. (don't you just love simple instructions like those?)
Divide batter between 4 greased mini loaf pans. Bake at 325 for 45-50 minutes. Cool in pans for 15 minutes then remove from pans and continue to cool on a rack.
Drizzle with lemon glaze:
2 TBSP lemon juice
1 cup sifted powdered sugar.
Stir together until blended.
Here's what the lemon looks like when I'm done blending. It's an aerial view from above the blender.

I know you want one of these pans for yourself. It's from Pampered Chef and I love it. So does Rick :)

And the finished products, cooling:

Friday, April 16, 2010
Large Brown Pearl
The pearl I selected for this necklace is large and a deep, chocolate brown. It is hanging from the center of one of my messy wire wrapped elements (aka, twisted tornado). It's a fairly simple design, that takes quite a bit of sterling silver wire to complete.
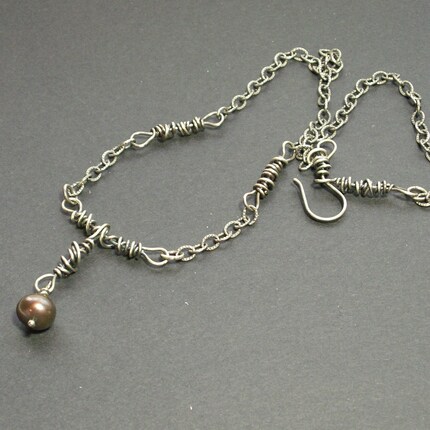
You can click on the photo to go directly to the listing. There is a matching pair of earrings too -- a separate listing.
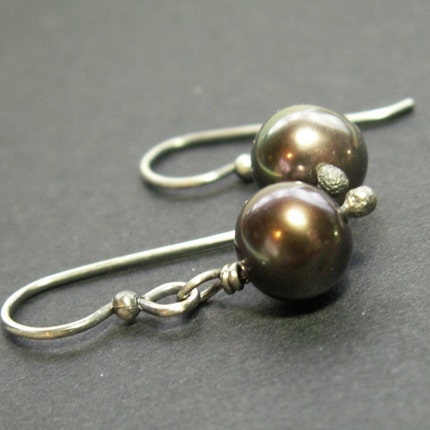
You can click on the photo to go directly to the listing. There is a matching pair of earrings too -- a separate listing.
Thursday, April 15, 2010
Free Earrings Promotion - Extended!
I've decided to extend my free earring promotion. All you need to do is spend $25 in my etsy shop. Select a pair of earrings from the special sale section. After your purchase is complete, I will refund the entire amount of the special sale earrings.
This offer is now valid through the end of April!
This offer is now valid through the end of April!
Tuesday, April 13, 2010
Pietersite Earrings
Over the years, I've been intrigued by the stone Pietersite. Most of the beads I've seen have been brown and black with lots of golden swirls. This particular strand of briolettes I purchased this year in Tucson had no golden color at all. As a matter of fact, they had an unusual wood-grain look to them, even though they are perfectly smooth. They do have the chatoyance that is typical of Pietersite.
Needless to say, I love these earrings and will most likely make a pair for myself before all the beads are gone.
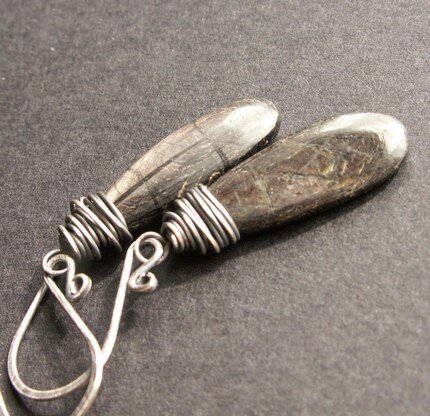 Click on the photo to go directly to the listing in my etsy shop.
Needless to say, I love these earrings and will most likely make a pair for myself before all the beads are gone.
Monday, April 12, 2010
Toll House Bundt Cake
Yes, it's like a giant cookie, but softer, like a cake. Does that make any sense? Anyway, it's a very easy, foolproof recipe. It doesn't need any frosting, but a little chocolate glaze would be nice. Rick isn't a big fan of that, so I never do it.
Toll House Bundt Cake
2 3/4 cup flour
2 tsp baking soda
1 tsp salt
1 TBSP vinegar or lemon juice
milk (enough to make a cup when added to the vinegar or lemon juice)
1 cup butter, softened
1 cup brown sugar
1 tsp vanilla
4 eggs
2 cups chocolate chips (the little ones are great in this, but I only had the regular ones in the house and they worked fine)
In large bowl, combine butter, brown sugar and vanilla. Beat until light and fluffy. Add eggs, one at a time, beating well after each addition. Add flour, baking soda and salt mixture alternately with soured milk. Mix well. Fold in chocolate chips. Pour into greased Bundt pan. Bake in preheated 375 oven for 45-50 minutes. It will be dark golden brown when done.

Sunday, April 11, 2010
Wholesale Order Complete!
I've been fortunate to have a few steady customers for my ivory and jade jewelry. The line I offer these customers is what I refer to as "production" work. There are patterns I can easily repeat, thereby making the resulting pieces quick to produce and quite affordable. They are all combinations of fossilized mammoth ivory, jade, garnet, black onyx, sterling silver and gold filled. These items do well with the tourist market.
One of these steady customers is Three Bear Gallery, in the Denali Park area, owned by artist Shane Lamb and his wife Erin. They recently opened a store in downtown Palmer too. I suspect they will split this order between the two locations.
Erin placed an order the other day requesting it for May 1 delivery. Here are a few photos of the completed order.


Yes, these are laying on a big white garbage bag. I feel the need to explain. I have a rolling art table in my studio. It's covered with the plastic bag because my mixed media and stamping projects can get messy and I don't want to ruin the table. It's sort of located behind the area where I do most of my jewelry work. The art table seems like a good staging area for my finished jewelry before it gets tagged and put away with the rest of the finished stuff.
And you need to understand that my "studio" is extremely tiny, measuring only about 10' x 16'. Every square inch counts. It's amazing what I have crammed this little space. Rick keeps threatening to add a 2nd story, but he's only joking. I think.
Friday, April 9, 2010
A Bunch of Dragonflies
Trying to work efficiently, I decided to make a bunch of these similarly designed dragonfly necklaces. There are actually two distinct styles of necklaces. One batch has the brass dragonflies wired to carved bone buttons. The other batch uses textured copper as the backdrop.
I found the bone buttons at one of the gem shows in Tucson. I was looking for more abalone buttons, but did not find any of decent quality. These bone buttons are interesting and the neutral coloration should make them good sellers. I suspended them on dyed silk ribbons.

I textured the copper with a combination of real, dried leaves and skeleton leaves (the kind you find in the scrapbooking section of the craft store). I had better luck with the skeleton leaves, but this is a destructive process. I went through quite a few leaves. Oxidizing the copper highlights the texture.

I used rivets in the holes I drilled to attach the chain. It gives the pendants a more finished look.

These will be for my shows later in the year, not for the etsy market.
Thursday, April 8, 2010
Rose Quartz . Copper Circles . Earrings
I just listed these earrings in my etsy shop a couple of days ago. You're already familiar with my large circles that I make in sterling, copper and brass. I selected a pair of copper ones for these earrings and suspended the smooth rose quartz briolettes from the bottom. They looked so lonely down there. Their subtle coloration needed a little boost, so I wired on some rose quartz rondelles part of the way up the side. That's better.
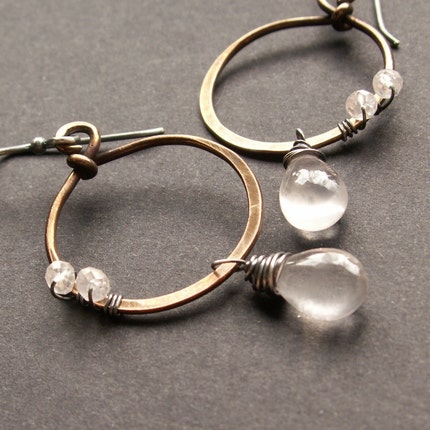 I really like the contrast between the copper, which has a certain rosiness to it, and the quartz. The earwires are my hand formed sterling silver design. These earrings are for sale in my etsy shop.
Wednesday, April 7, 2010
Copper Etching
I learned how to etch copper several years ago and went through a period of non-stop etching. That wore off and I have not used my etching supplies since. When I woke up this morning, I felt like etching! I dug out the supplies: ferric chloride, heating pad, plastic peanut butter jar, wire for suspending the pieces, resist (nail polish, sharpies, etc.), copper shapes, antiquing solution, yada, yada, yada.
I drew my patterns and words with fine-tipped specialty nail polish -- I think these tubes are designed for people who draw detailed designs on actual nails. I also found a pack of Chartpak letters that I know make a good resist also. They need to be burnished onto the surface of the copper very well. I covered the sides and back of the pieces with Sharpie so those places would resist the etching process.
I suspended the pieces in the ferric chloride (in the peanut butter jar) and placed it on the heating pad set to medium. This is not absolutely necessary, but heat speeds up the process. After an hour, I pulled the pieces to check the etch depth. It was good!
Next, I removed all the nail polish and smoothed the rough edges. Now the pieces were ready to be antiqued. I think they came out great!


... except where the nail polish was applied too thickly at the start of the word memory here:
 All in all, a very fun day!
I drew my patterns and words with fine-tipped specialty nail polish -- I think these tubes are designed for people who draw detailed designs on actual nails. I also found a pack of Chartpak letters that I know make a good resist also. They need to be burnished onto the surface of the copper very well. I covered the sides and back of the pieces with Sharpie so those places would resist the etching process.
I suspended the pieces in the ferric chloride (in the peanut butter jar) and placed it on the heating pad set to medium. This is not absolutely necessary, but heat speeds up the process. After an hour, I pulled the pieces to check the etch depth. It was good!
Next, I removed all the nail polish and smoothed the rough edges. Now the pieces were ready to be antiqued. I think they came out great!


... except where the nail polish was applied too thickly at the start of the word memory here:

Tuesday, April 6, 2010
Green Amethyst
The green amethyst I have in my collection are in a variety of shapes and sizes. An extensive inventory allows for more flexibility in design, right? The briolettes I used in these earrings are brand new this season. Carol will probably take credit for picking them out of the multitude of strands on the table (she was surprisingly good at finding unique stones for me!).
They are long and exceptionally chubby, but not really heavy at all. They are hanging from a pair of my hand formed sterling silver earwires. It's just that simple.

They are long and exceptionally chubby, but not really heavy at all. They are hanging from a pair of my hand formed sterling silver earwires. It's just that simple.
Monday, April 5, 2010
Gallery Show at Picture This
Some of you asked for a report after the gallery show on Saturday, April 3 at Picture This is Eagle River. Well, it was fabulous!
When they opened the doors at 10am, there were at least 100 people waiting to get in. I had arrived at 9am to set up my jewelry display, which was plenty of time for such a simple display. At shows, you know it takes me upwards of 3 hours, with tables, lights, etc. This was a breeze in comparison.
Picture This has been doing this spring open house with a free print for about 25 years. This means that there are plenty of "regulars" that know about this and as a result have a great collection of Alaskan art. I think they gave away about 500 prints on Saturday. Susan Watkins (the artist) signed a good portion of those (including mine). She didn't get much of a break all day.
I saw plenty of old customers and made lots of new ones. Once the print giveaway settled into a slower, but still steady stream, which happened at about noon, then people started seriously looking at my jewelry. I sold some of my favorite pieces. Pink (!) seemed to be quite popular, much to my surprise. My most fav piece was a large rose quartz rounded marquis brio topped with a cluster of darker pink tourmaline rondelles. t was a gorgeous necklace and it went to a new home pretty late in the afternoon :D
After a super quick pack-up (I was tired), Michelle, the store manager said she would call to set up an appointment to pick out some new pieces for wholesale. Yay!
I took Sunday off.
Reminder: the free earring deal is still going on in my etsy shop. See my shop announcement for all the details.
Saturday, April 3, 2010
Free Earrings!
Yes, you read it correctly. I'm giving away earrings. All you have to do is spend a minimum of $25 in my etsy shop and you can select a pair of earrings for free. All of the free earrings are conveniently located in the Special Sale Section of my shop.
Be sure to add your free earrings to your shopping cart and pay for them with your other purchases as usual. After the payment is complete, I will refund the appropriate amount to your paypal account. This sale is in effect through April 11.
What are you waiting for? Start shopping!
Be sure to add your free earrings to your shopping cart and pay for them with your other purchases as usual. After the payment is complete, I will refund the appropriate amount to your paypal account. This sale is in effect through April 11.
What are you waiting for? Start shopping!
Thursday, April 1, 2010
A Movie of the Inlet
I decided to experiment with the movie making capabilities of my little camera. Not bad for a first try. I started looking north towards the Matanuska Valley and panned west to Wasilla and Denali in the distance (actually not visible that day), ending south at the mouth of Peter's Creek. The tide was incredibly high and we couldn't do our normal walk along the inlet. We had to take the "inland" route through the woods.
I love the way this video ends -- Xena sniffing the snow :)
I love the way this video ends -- Xena sniffing the snow :)
Art Day
Every few months, my friend Nancy comes over and we have Art Day. This means something different every time we do it. Last fall, we worked on 3 dimensional shadow boxes. This past Tuesday, we did mixed media collage type stuff on flat canvases.
Regardless of what we do, we always have a blast, take a leisurely lunch break and laugh at ourselves.
This first collage is a celebration of the upcoming gardening season. I'm not much of a gardener, but I do love flowers. I used a few hardware items that I found at the Restore a few years ago. For those of you that don't know about the Restore, there's probably one near you. It's a great resource for home improvement supplies. Click here to find one.
 It may look like it was done by an 8 year old, but hey, I had a great time working on the composition.
The next collage is a bit less whimsical. It has an old mail theme. I finally had a chance to use those transparencies I've been collecting. And some old typewriter keys. And some vintage glass gem-type thingies that I now need more of :)

Art Day always refreshes me. I feel like doing more new jewelry designs after an art day diversion.
Regardless of what we do, we always have a blast, take a leisurely lunch break and laugh at ourselves.
This first collage is a celebration of the upcoming gardening season. I'm not much of a gardener, but I do love flowers. I used a few hardware items that I found at the Restore a few years ago. For those of you that don't know about the Restore, there's probably one near you. It's a great resource for home improvement supplies. Click here to find one.

The next collage is a bit less whimsical. It has an old mail theme. I finally had a chance to use those transparencies I've been collecting. And some old typewriter keys. And some vintage glass gem-type thingies that I now need more of :)

Art Day always refreshes me. I feel like doing more new jewelry designs after an art day diversion.
Subscribe to:
Posts (Atom)