There are several ways to cut out discs from metal sheet.
1 . You can saw them by hand using a jeweler's saw. I've done this, and while it is satisfying, it takes a bit of time and the result is almost never a perfect circle. Not that there's anything wrong with an "organic" circle, but it you're looking for a neat disc, this is not the best method.
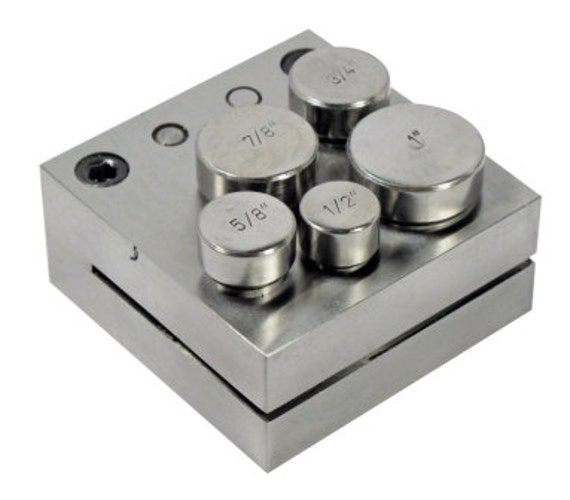
2. A disc cutter like this one from
Evie's Tool Emporium is a great alternative. The prices in this etsy shop are always reasonable and the service is awesome. You can see this listing by clicking on the photo, but be sure to check out the rest of the shop too!
For me, this type of tool is great. It takes quite a bit of strength and a very stable surface to get good, clean circles. I'm working with 20 ga copper sheet, so sometimes it's hard for me to get through with one blow of the hammer.
Enter Rick. He suggested I make the trip out to his shop (it's really not far -- just on the other end of our 2 acres :-). There, he introduced me to the arbor press.
Basically, the arbor press does the hard work for you. You pull down sharply on the lever and it acts as the hammer, punching out he circle with relative ease. I have a video of this , but can't figure out how to upload it to my blog. (This is causing me great frustration, as I can't even find it on my computer. It should be in the cloud file, shouldn't it?)
Anyhoo, here are the little copper circles after I domed them. Even though these discs are small (less than 1" in diameter), I used a large dapping punch because I wanted a very shallow dome. Next step is to drill holes at the top and enamel them. Some will get holes top & bottom so I can do a double-dangle style earring.
As always, thanks for tuning in and check back soon for finished enamel earrings!


.JPG)
.JPG)