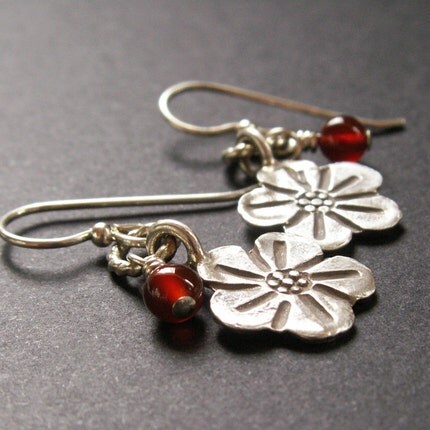
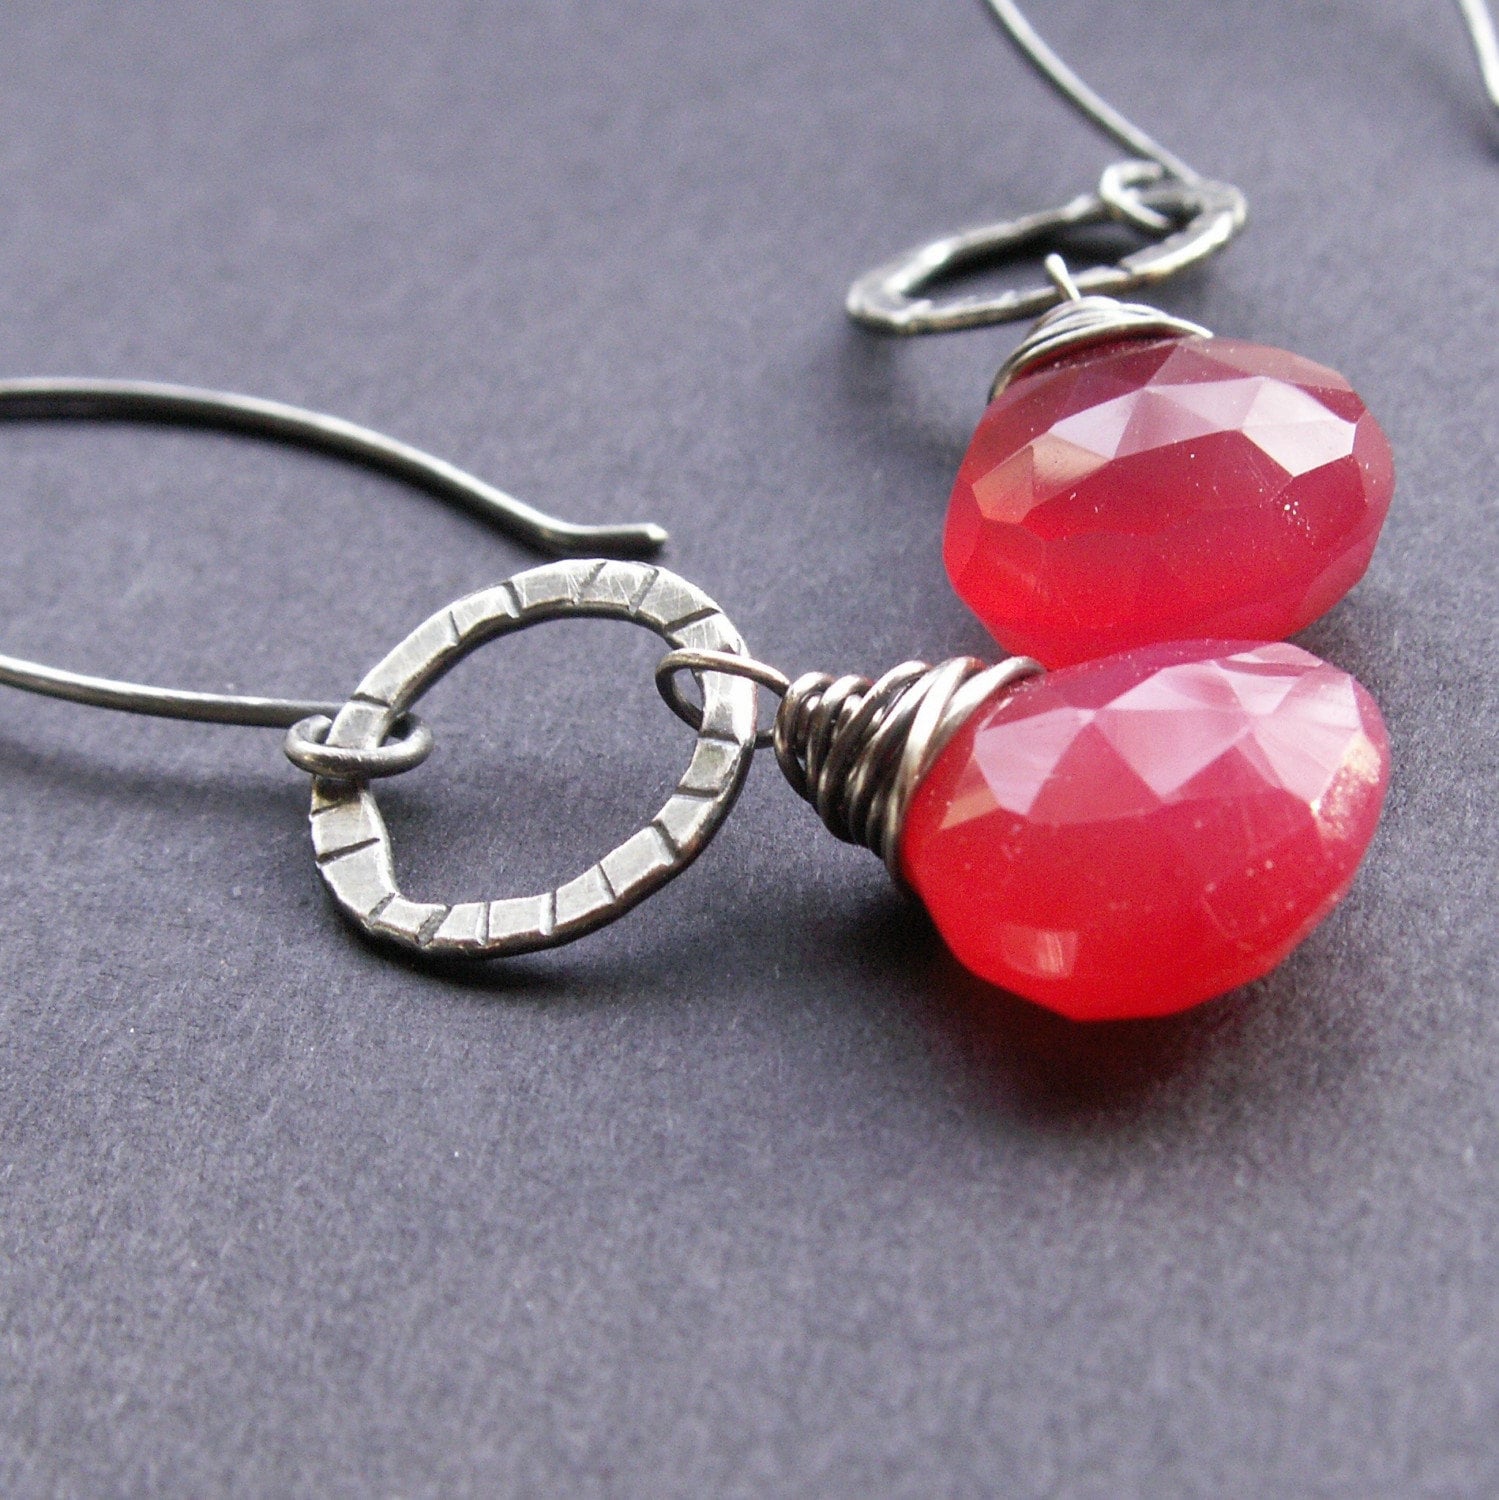
I've had a bunch of these great Thai Hill Tribe flower charms for ages. They never really went over very well, regardless of the fact that I love them. My customers didn't feel the same way, I guess. The other day, I had this idea to use them, while keeping it super simple. Here are the results:
What's not to like, I ask you? Click on the photo to go directly to the listing.
Tuesday, March 30, 2010
Monday, March 29, 2010
Picture This Art Gallery
This coming Saturday, April 3, there is a spring open house at Picture This in Eagle River. They have been doing this open house for many years. One of the main attractions is a free print by a local artist. This year's print is a lovely work of art by Susan Watkins featuring birch trees. You know how I love all things birch!
This year, I was fortunate to be invited to be part of this spring open house. Since beginning to sell my work at Picture This last October, I've been amazed at the reception I've received by the local community. It's been a long time since I had an outlet to sell my work in Eagle River. I used to sell in a gift Shop/Co-op, but that closed over 5 years ago. There are not that many options in Eagle River, so when I approached Picture This last year, I was thrilled that they agreed to sell my work.
Here's the postcard that they sent to their extensive mailing list:
As you can imagine, I've been making jewelry like a mad-woman ever since returning home from Tucson. After all, if you haven't made it, it can't sell!
I'll report back after the show.
Sunday, March 28, 2010
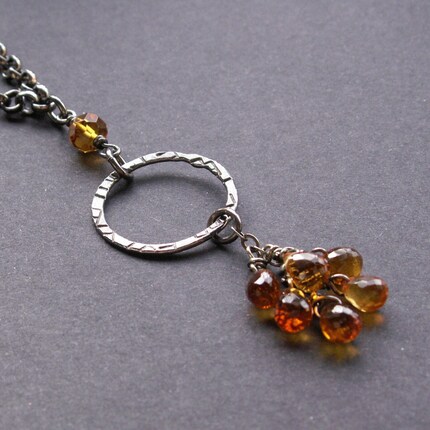
Mandarin Garnets . Circle . Necklace
I recently listed this new necklace in my etsy shop. It features a cascade of orange-y mandarin garnets at the bottom and a larger one a bit higher up.
I fused the circle from find silver and textured it with a geometric pattern. If you look real closely, you can see that I used the letter "E" from a metal stamping set I purchased from Evies Tool Emporium.
Click on the photo to go directly to the listing.
I fused the circle from find silver and textured it with a geometric pattern. If you look real closely, you can see that I used the letter "E" from a metal stamping set I purchased from Evies Tool Emporium.
Click on the photo to go directly to the listing.
Saturday, March 27, 2010
Chicken Piccata
I know you can probably find a gazillion recipes for chicken piccata, but this one has recently been taste-tested right here in my kitchen and I can guarantee it is delicious. Don't rely on reviews by people you don't even know!
1/4 cup flour
salt & pepper
3-4 TBS olive oil
1 cup sliced mushrooms
2 TBSP capers
1/4 - 1/2 cup dry white wine
1/2 cup fresh lemon juice
2 TBSP butter
1/2 cup diced tomatoes (I used canned)
Dredge the chicken in the seasoned (with s & p) flour. Heat oil in large skillet. Add chicken and brown on each side. Remove chicken and keep warm.
Add mushrooms, capers and wine. Scrape browned bits with spatula. Cook about 15 minutes. Add the lemon juice and cook for about another 10 minutes, until liquid is reduced by half. Add the butter and tomatoes. Whisk until smooth. Add the chicken back and cook until done. This should not take long.
(My dinner guest was late and I left the heat on low for about 1/2 hour and it was just fine)
I served this with the Three Grain Pilaf and roasted zucchini. Yum!
Chicken Piccata
4 boneless, skinless chicken breasts, pounded (to thin a bit and tenderize)1/4 cup flour
salt & pepper
3-4 TBS olive oil
1 cup sliced mushrooms
2 TBSP capers
1/4 - 1/2 cup dry white wine
1/2 cup fresh lemon juice
2 TBSP butter
1/2 cup diced tomatoes (I used canned)
Dredge the chicken in the seasoned (with s & p) flour. Heat oil in large skillet. Add chicken and brown on each side. Remove chicken and keep warm.
Add mushrooms, capers and wine. Scrape browned bits with spatula. Cook about 15 minutes. Add the lemon juice and cook for about another 10 minutes, until liquid is reduced by half. Add the butter and tomatoes. Whisk until smooth. Add the chicken back and cook until done. This should not take long.
(My dinner guest was late and I left the heat on low for about 1/2 hour and it was just fine)
I served this with the Three Grain Pilaf and roasted zucchini. Yum!
Friday, March 26, 2010
Looking Up
Each year about this time, we are bound to get some beautifully sunny days. Blue skies with some puffy white clouds -- if there wasn't still tons of snow on the ground, I would love it even more. On a day like today, when my outdoor thermometer reads about 50 (a heat wave for sure!) I like to grab my camera and look up. There's a reason my neighborhood is called Birchwood.
Then I turn a bit to my left and look up again.
Now I look down and find a cranberry bush with some new growth, but still hanging on to last season's shriveled berries.
These are sure signs that spring will indeed arrive sometime soon.
Then I turn a bit to my left and look up again.
Now I look down and find a cranberry bush with some new growth, but still hanging on to last season's shriveled berries.
These are sure signs that spring will indeed arrive sometime soon.
Thursday, March 25, 2010
Three Grain Pilaf
When plain old rice just won't do, this can be your go-to recipe for a quick, but tasty side dish. I make it quite often as a side dish for grilled fish or chicken.
Three Grain Pilaf
2 TBSP butter
1 medium onion, minced
1 clove garlic, minced
1 1/2 cups chicken broth
1/4 cup bulgur
1/4 cup rice
1/4 cup barley
3 dashes Tabasco sauce
Melt butter in saucepan. Add onion and garlic. Saute until soft. Add broth and grains. Bring to a boil. Reduce heat. Cover and simmer about 30 minutes, until all liquid is absorbed. Stir in Tabasco.
Wednesday, March 24, 2010
A New Pearl Mix Necklace
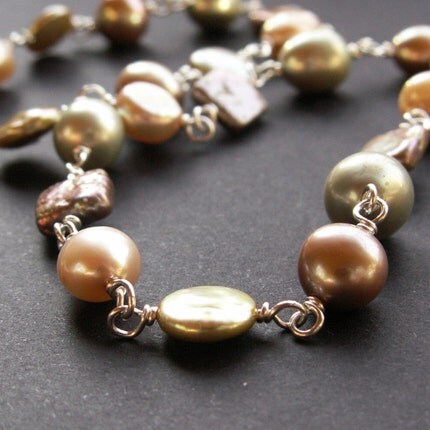
I love making these pearl-mix necklaces. I spend lots of quality time selecting just the right combination of pearls for each necklace. Me and my pearls -- a match made in heaven. Hehe.
For this necklace, I selected peach irregular rounds, green coins and green pyramid-like pearls. Next came a creamy beige roundish pearl followed by a cocoa brown square pearl. Once the selection of 5 different pearls (yes, it's always 5) is made, I play with the arrangement. The pattern I select will continue all around the necklace. In this case, it goes on for 16 inches.
Click the photo to go to the listing in my etsy shop to see the whole necklace.
Tuesday, March 23, 2010
As Bright as the Blazing Sun!
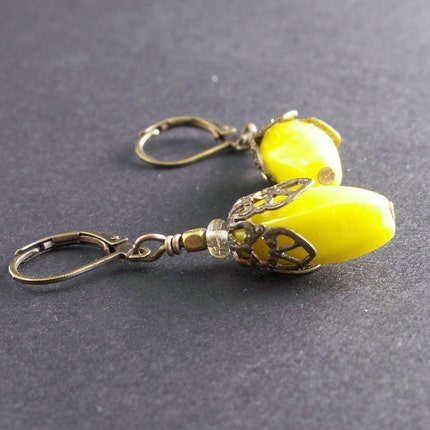
Let me start by saying that at this point in my life, I love all colors. I didn't always feel this way. I had certain prejudices and some colors would go in and out of favor with me. One of my formerly unfavorite colors was yellow. These days, I kinda like it. Very much. Even so, these earrings are a bit over the top for me.
These beads are from a vintage glass necklace I dismantled. Not only was the necklace in poor condition, but it was really, really ugly. Something about these beads however, spoke to me. I love their shape, but the color is a bit too bright for me to wear. Over the past couple of years, I've sold several pairs of earrings using them. This is my latest pair to feature these sunny beads.
They are for sale in my etsy shop.
Monday, March 22, 2010
Jewelry Making Tip :: Front and Back
After stacking beads on a headpin for creating a pair of earrings, we most often make a wrapped loop in order to attach the drops to earwires. I make 2 types of wrapped loops: neat and messy. But that's a topic for another post. This post is about the neat type of wrapped loop. Chances are, you have a favorite method of creating said wrapped loop. Take a close look at the last pair of earrings you made. You will notice that they do not look the same when viewed from the front as they do when viewed from the back.
This first photo shows one drop facing one way and the other drop facing the other way. Can you see the difference in the wrap? This may seem like a minor point, but in a simple pair of earrings, if each one is not suspended from the earwire in the same direction, it can really stick out like a sore thumb.

I won't try to tell you which way is right and which way is wrong, I only suggest that you assemble both earrings the same way. I always hang my drops as seen below, because I see this side of the wrap as "the front". You may see it the other way. Just be consistent!

This first photo shows one drop facing one way and the other drop facing the other way. Can you see the difference in the wrap? This may seem like a minor point, but in a simple pair of earrings, if each one is not suspended from the earwire in the same direction, it can really stick out like a sore thumb.

I won't try to tell you which way is right and which way is wrong, I only suggest that you assemble both earrings the same way. I always hang my drops as seen below, because I see this side of the wrap as "the front". You may see it the other way. Just be consistent!

Saturday, March 20, 2010
Mitten Giveaway! -- We Have a Winner
I put all of the entrants names in a big bowl -- remember, extra entries were earned for following, tweeting, etc. I closed my eyes and pulled out a name:
Pricilla!!
Now, I don't know if these mittens will fit on your hooves, but I'm sure the publicist will wear them if you aren't able. Congratulations Pricilla!
Pricilla!!
Now, I don't know if these mittens will fit on your hooves, but I'm sure the publicist will wear them if you aren't able. Congratulations Pricilla!
Friday, March 19, 2010
Denali
Some of you may know it by it's old name, Mount McKinley, but here in Alaska, it's called Denali (Athabascan for The Great One). Most morning, Rick, Xena & I go for a long walk, regardless of the weather. What that weather allows, we walk down to the inlet (Cook Inlet), which is just a 5 minute walk from our home.
This morning, we were surprised by a pretty nice view of Denali. This means that the sky was clear and cloud free for the 350 miles (give or take) between here and there. I've decided to try and get a photo of the mountain from the same vantage point throughout the year. It will make a nice montage when I get a whole bunch of them.
Here's the first photo.
Thursday, March 18, 2010
Monday, March 15, 2010
Mitten Giveaway!
I knitted and felted these great mittens some time last year, but they are definitely too small for me. I would classify them as an adult small or child's large. I've never worn them, and never will, so I've decided to give them away. They are 100% wool and have a knitted inner cuff that fits snugly on the wrist to keep the breeze out. It's a great design.
The wool is variegated in color, but is primarily neutrally creamy. The other colors are pale blue, peach, cocoa and saffron yellow. The mittens measure 8 1/4" from tip to cuff. They are about 3 3/4" wide when measured lying flat.
As you can see, they're pretty cute!
This last photo shows the inner cuff best.
To enter this giveaway, please visit my etsy shop and let me know what your favorite item is. Please put a link to it in your comment. Be sure to include your email address in your comment so I can contact you if you are the winner! Here are some ways to get additional entries into this giveaway:
2. Follow me on twitter and tweet about the giveaway (one per day). Provide a link to my blog in the tweet - @vickiorion is giving away a pair of handmade wool mittens http://vickiorion.blogspot.com #giveaway
The wool is variegated in color, but is primarily neutrally creamy. The other colors are pale blue, peach, cocoa and saffron yellow. The mittens measure 8 1/4" from tip to cuff. They are about 3 3/4" wide when measured lying flat.
As you can see, they're pretty cute!
This last photo shows the inner cuff best.
To enter this giveaway, please visit my etsy shop and let me know what your favorite item is. Please put a link to it in your comment. Be sure to include your email address in your comment so I can contact you if you are the winner! Here are some ways to get additional entries into this giveaway:
1. Follow my blog publicly. If you already follow, just say so. And thank you.
2. Follow me on twitter and tweet about the giveaway (one per day). Provide a link to my blog in the tweet - @vickiorion is giving away a pair of handmade wool mittens http://vickiorion.blogspot.com #giveaway
This giveaway will close on Friday, March 19 at midnight Alaska time. Good luck!
Sunday, March 14, 2010
Butterscotch Chewy Cake
This recipe first appeared as a 2nd Prize Winner in the 6th Pillsbury Bake-Off Competition in 1955. I have made it plenty of times because it is so, so easy and extremely delicious.
Butterscotch Chewy Cake
4 eggs
2 cups brown sugar
1 TBSP butter
1 1/2 cups flour
1 1/2 tsp baking powder
1 1/2 cups coarsely chopped pecans
1 tsp vanilla
Beat the eggs in the top of a double boiler just until blended. Add the brown sugar and butter. Place over rapidly boiling water, stirring constantly, just until hot. This should take about 5 minutes. Remove from heat.
Stir in flour and baking power all at once. Mix until well blended. Stir in nuts and vanilla.
Turn into greased 13" x 9" pan. Bake at 350 for about 30 minutes.
This cake is so simple, yet incredibly tasty. It does not need frosting, as it is quite sweet. A little topping of ice cream would be great!
Enjoy!
Saturday, March 13, 2010
Freeform Beadwork Necklace
I received a call a few weeks ago from a customer who had purchased one of my freeform beaded necklaces at the Half Moon Creek Gallery -- we're talking 3 or 4 years ago! His wife loves it so much, he wanted to surprise her with another one, in a different color scheme. Would I make one??
I repliedhell, no "I may have something in my inventory that would suit your needs." He doesn't have to know that this "new" one is equal in age to the one he purchased so long ago, right?
To make a long story short, here's the necklace. I met him in Anchorage today (I do a lot of business at the coffee shop in the Barnes & Noble!). He took the necklace, I took the cash. I headed straight to the shoe store, if you must know.
In the center of the focal part of the necklace is a highly polished shard of fossilized walrus ivory. I purchased a whole bunch of these beauties from a local native man who has connections on St. Paul Island. I drill several holes in them to secure the beadwork. Well, I used to. I don't think I have much patience for this type of work anymore.
I replied
To make a long story short, here's the necklace. I met him in Anchorage today (I do a lot of business at the coffee shop in the Barnes & Noble!). He took the necklace, I took the cash. I headed straight to the shoe store, if you must know.
In the center of the focal part of the necklace is a highly polished shard of fossilized walrus ivory. I purchased a whole bunch of these beauties from a local native man who has connections on St. Paul Island. I drill several holes in them to secure the beadwork. Well, I used to. I don't think I have much patience for this type of work anymore.
Friday, March 12, 2010
Brand New Victorian Styled Earrings
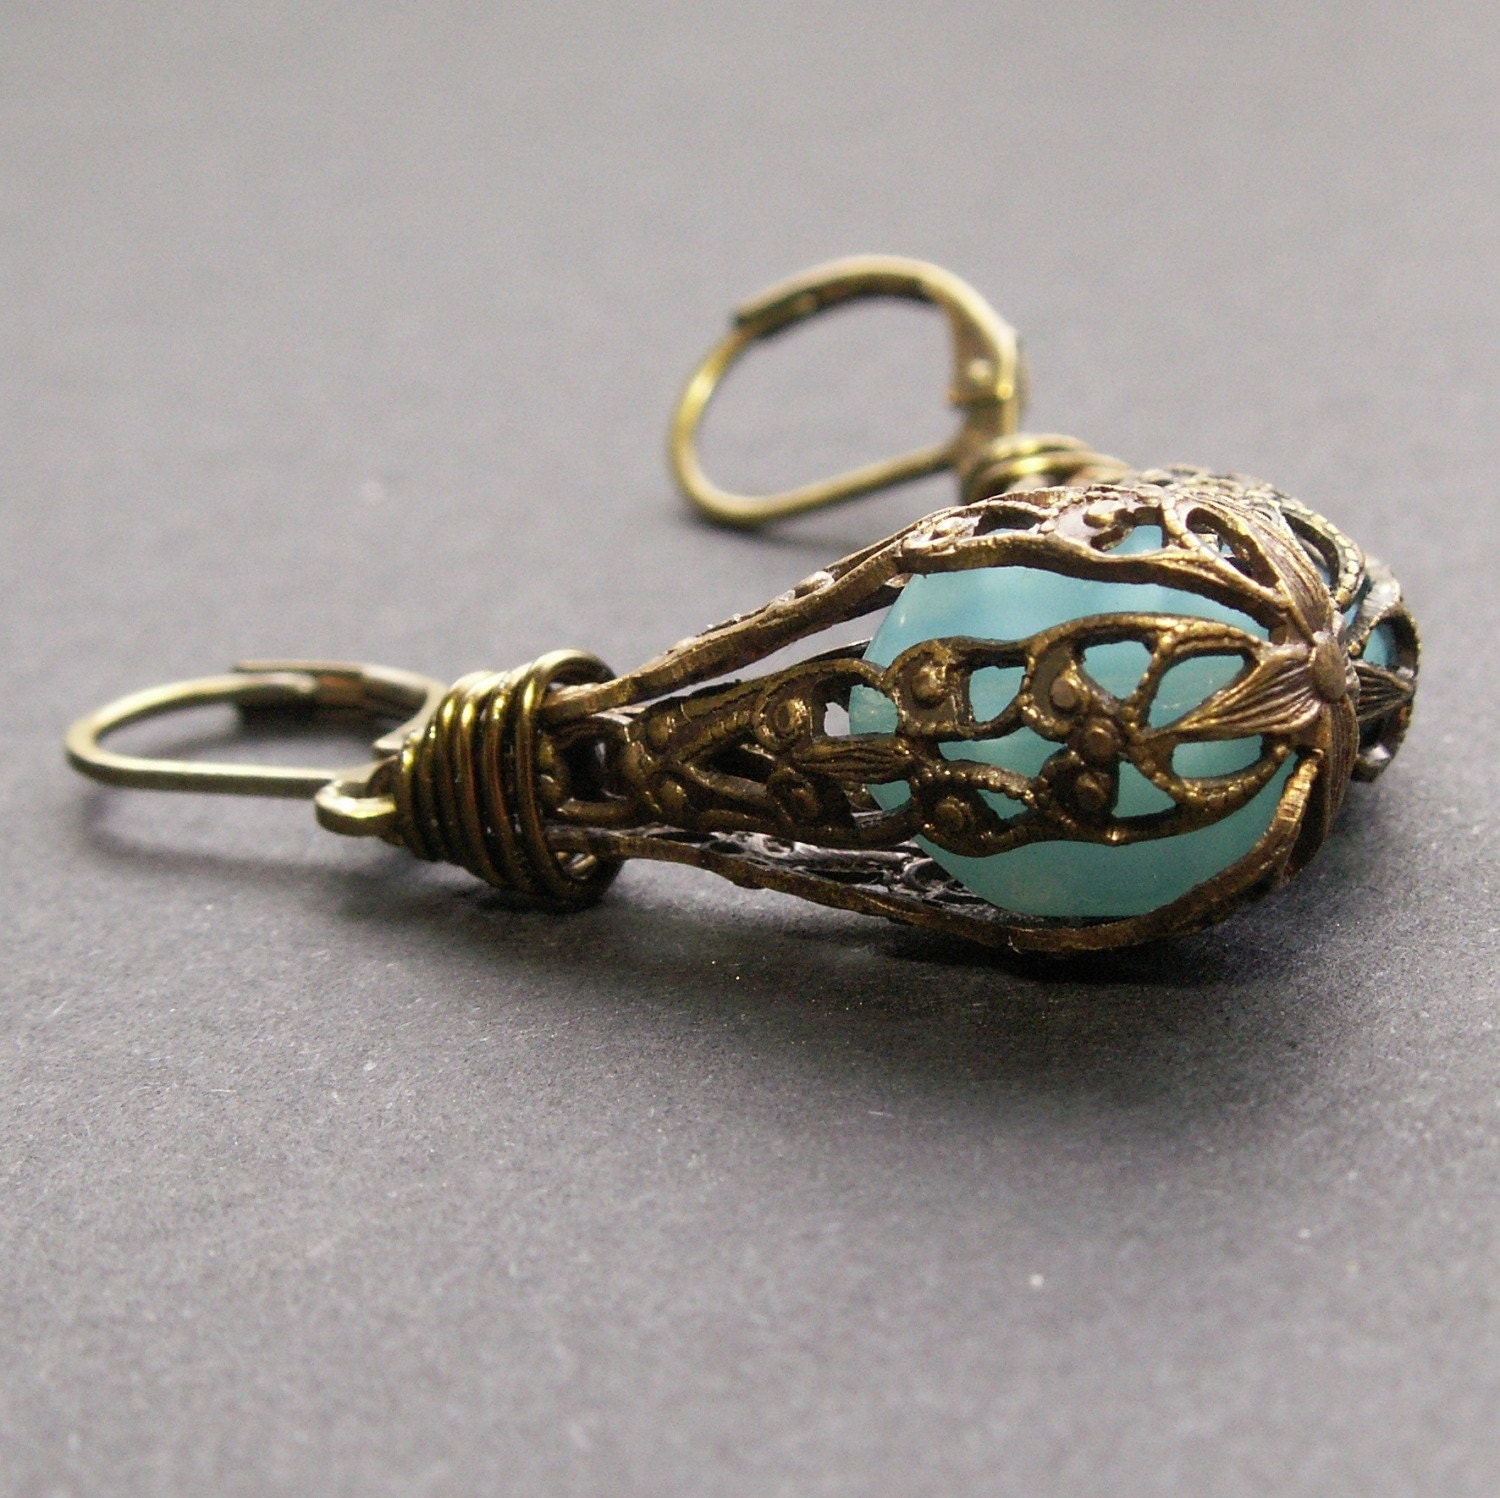
I recently came up with a new earring design using some of the antiqued brass filigree that I have fallen in love with. Brass is affordable and gives me the opportunity to use elaborate components without resulting in a pair of earrings that would cost $80 or more. These same filigree teardrops in sterling silver would be extremely expensive. I like to offer a wide range of designs to my customers and my brass collection has opened up a whole new world.
I gently pried open the teardrop and inserted a glossy aqua glass bead. After closing the teardrop at the top, I wrapped it with some brass colored wire. This really gives the earrings a more finished look.
They are for sale in my etsy shop. Click on the photo to go directly to the listing.
I gently pried open the teardrop and inserted a glossy aqua glass bead. After closing the teardrop at the top, I wrapped it with some brass colored wire. This really gives the earrings a more finished look.
They are for sale in my etsy shop. Click on the photo to go directly to the listing.
Thursday, March 11, 2010
Blue Scarf in Progress
I started knitting a new scarf a few days ago. This yarn is variegated in all shades of blue. It's 100% alpaca and is from Chile. It's soft and such a pleasure to work with. I have a ton of it because, well, it was on sale from one of my favorite yarn websites. To get the sale price, you had to buy a ton. With big plans of sweaters and such, I went ahead an bought the ton.
Now, I see no sweater in my future with this yarn. I tried. It just wasn't draping in a way that was appropriate for a garment. Oh well.
The pattern is full of slipped stitches, which give the scarf the woven look, which is best seen in the 2nd photo.
What do I do with all these scarves I knit? I sell some at my booth at the State Fair. I TRY to sell them in my second etsy shop, A Peaceful Life and I give lots of them away to friends.
Monday, March 8, 2010
New Amazonite Necklace
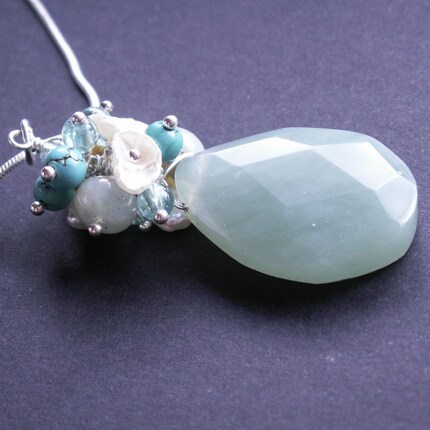
This necklace features a style I've done several times over the past two years. I start with a good sized briolette. I secure the top with sterling silver wire and begin stacking gems and pearls on top. It's a fun design to execute.
This particular piece starts with an amazonite briolette. I topped it with white keshi pearls,turquoise rounds, apatite rounds and Peruvian opal rondelles. I like this style best when hanging from sterling snake chain.
Click on the photo to go directly to the listing in my etsy shop.
This particular piece starts with an amazonite briolette. I topped it with white keshi pearls,turquoise rounds, apatite rounds and Peruvian opal rondelles. I like this style best when hanging from sterling snake chain.
Click on the photo to go directly to the listing in my etsy shop.
Saturday, March 6, 2010
Chicken Scarpariello
After a visit to New York three years ago to visit my elderly aunt and favorite cousins, I was determined to recreate a dish I had eaten in an amazing Italian restaurant on Arthur Avenue in the Bronx. All of the recipes I found online contained sausage and peppers. The dish I had at the restaurant did not contain these things. This sounded more like Chicken Murphy, which I've only seen on menus in Italian restaurants in New Jersey. Don't worry, I don't get it either.
But, I digress. Back to the Chicken Scarpariello. I read bunches of recipes and took a little from here, and a little from there to come up with a version that's pretty close to my Arthur Avenue experience.
chicken parts (I used about 3 lbs of thighs, with the bone, without the skin)
1 cup flour
salt & pepper
1 tsp oregano (dried)
4 TBSP olive oil
3 cloves garlic, sliced
1 small onion, chopped
1 tsp rosemary (if I had fresh I would have used it, but alas, I only had dried)
3 cups chicken broth (I used the kind in the box)
1/2 cup white wine (plus another half cup for sipping while you cook)
juice of 1 lemon
3 TBSP butter, melted
1 TBSP flour
Combine the flour, salt & pepper and oregano. Dredge the chicken in this mixture.
Heat the olive oil in a large frying pan (I use my electric frying pan). Brown the chicken on both sides. Remove the chicken and set aside.
Add onion and garlic. Saute until soft and translucent. Add wine and reduce by about half.
Add broth. Bring to a boil. Add rosemary and put chicken back in the pan. Spoon some of the sauce over the chicken.
Turn heat to very low and cook until chicken is done. This can take anywhere from 30-45 minutes, depending on the size of the chicken parts. The meat should be starting to fall off the bones.
Remove chicken. Bring remaining sauce to a boil. Add lemon juice. Mix melted butter and the 1TBSP flour. (Please don't skip this part because you're scared of the butter.) Whisk this into the sauce. Pour over the chicken.
I serve this over pasta -- a shape with lots of nooks and crannies to hold the sauce.
Of course, I forgot to take pictures while making this the other night.
But, I digress. Back to the Chicken Scarpariello. I read bunches of recipes and took a little from here, and a little from there to come up with a version that's pretty close to my Arthur Avenue experience.
Chicken Scarpariello
chicken parts (I used about 3 lbs of thighs, with the bone, without the skin)
1 cup flour
salt & pepper
1 tsp oregano (dried)
4 TBSP olive oil
3 cloves garlic, sliced
1 small onion, chopped
1 tsp rosemary (if I had fresh I would have used it, but alas, I only had dried)
3 cups chicken broth (I used the kind in the box)
1/2 cup white wine (plus another half cup for sipping while you cook)
juice of 1 lemon
3 TBSP butter, melted
1 TBSP flour
Combine the flour, salt & pepper and oregano. Dredge the chicken in this mixture.
Heat the olive oil in a large frying pan (I use my electric frying pan). Brown the chicken on both sides. Remove the chicken and set aside.
Add onion and garlic. Saute until soft and translucent. Add wine and reduce by about half.
Add broth. Bring to a boil. Add rosemary and put chicken back in the pan. Spoon some of the sauce over the chicken.
Turn heat to very low and cook until chicken is done. This can take anywhere from 30-45 minutes, depending on the size of the chicken parts. The meat should be starting to fall off the bones.
Remove chicken. Bring remaining sauce to a boil. Add lemon juice. Mix melted butter and the 1TBSP flour. (Please don't skip this part because you're scared of the butter.) Whisk this into the sauce. Pour over the chicken.
I serve this over pasta -- a shape with lots of nooks and crannies to hold the sauce.
Of course, I forgot to take pictures while making this the other night.
Friday, March 5, 2010
More Spring Inspired Jewelry
The rest of my package of goodies from Artbeads was a bunch of Hill Tribe Silver Beadcaps. I've used these before and I'm in love with them for the way they dress up any old bead. The ones I chose have a floral motif engraved on them -- so perfect for spring.
I made this bracelet (yes, I'm keeping it for myself!) using white and peachy-pink freshwater pearls. These beadcaps don't make a tight fit on the pearls I chose, but that's ok. It gives the bracelet a more casual look.
If you are a regular blog reader, you already know that I like asymmetrical designs. This bracelet embraces that. I have included a small section of chain, from which I dangled a bunch of smaller white freshwater pearls. I think the effect is lovely.
And here's a photo of the entire bracelet, which I finished with a simple toggle clasp.
Disclosure: Artbeads invited me to join their blogging community. I receive these products free of charge in return for honest reviews. I have not been paid for doing this.
Thursday, March 4, 2010
The Beauty of Spring
While spring is still a long time away for me, Artbeads has given me the opportunity to enjoy it a bit early. I made some choices from their website that evoked feelings of spring.
I chose some old favorites, Swarovski Pendants, from the Swarovski Crystals section of the Artbeads website. I adore the flat briolette shape and selected some in spring colors: ruby, light rose and olivine. I had a friend in college named Jane. Jane's mother shared this wisdom with her at an early age: the color green goes with everything because it's the color of the stem of a flower. You would never claim that a flower "clashed' with it's stem, would you? I can find little to argue with here.
These earrings feature the briolettes in olivine and I've topped them with 2 other Swarovski beads: the lovely flower shaped margarita and a traditional bicone.
On a more traditional note, colorwise, these two additional pairs of earrings use those same briolettes. I can't get enough of them.
Tune in tomorrow (or the next day!) to see what I've done with some lovely Hill Tribe silver floral beadcaps.
Disclosure: Artbeads invited me to join their blogging community. I receive these products free of charge in return for honest reviews. I have not been paid for doing this
Wednesday, March 3, 2010
Artbeads Sweepstakes!
Artbeads is has a fantastic offer going on right now. It's their 10th Anniversary Sweepstakes which is for a $1000 shopping spree. How cool is that?
The sweepstakes is open to US and Canadian residents (except Quebec). Entrants must be over 18 years of age. The sweepstakes closes on Thursday, March 4 at 11:59 PM (PST).
Follow this link to enter:
Artbeads Sweepstakes
Good luck!
The sweepstakes is open to US and Canadian residents (except Quebec). Entrants must be over 18 years of age. The sweepstakes closes on Thursday, March 4 at 11:59 PM (PST).
Follow this link to enter:
Tuesday, March 2, 2010
Moose on the Loose!
I was recently whining about how I haven't seen many moose this season. Then, suddenly a moose appeared in my yard yesterday morning. We think he/she spent the night somewhere on our property and we caught it getting a bit of breakfast.
The last photo shows the moose exiting our driveway and heading across the street where our neighbors have a nice pile of willow branches ready to be munched on.
Of course, I forgot to set my white balance before I started taking pictures, so I had to do a bunch of editing afterward. Not so pleased with those results. Oh well.
Later that same day ... the moose was still hanging around the neighborhood. I took this photo through the kitchen window.
Monday, March 1, 2010
Brand New Fluorite Earrings
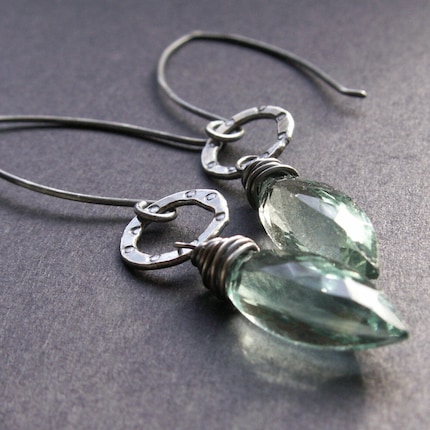
I've been having more fun with my new beads. I created these lovelies with the cardamom (?) cut fluorite briolettes. I can't find any reference to this cut online, so I think that gem dealer may have made it up! We're just going to call it a marquis cut, k?
Anyway, I wrapped them and suspended them from some of my fine silver fused circles. After fusing the circles, I hammered them flat and patterned them with little circles. I think it's kinda cute.
The only bad part about those fluorite briolettes is that those 2 pictured above is one of only 2 pairs I was able to get from that strand. The rest don't seem to be close enough matches to make pairs. The rest are destined to become necklaces. Oh well.
Click on the photo to go directly to the listing!
Subscribe to:
Posts (Atom)

