Friday, December 30, 2011

Sapphire and Seed Pearl Necklace

Each year, right about now, I donate a piece of jewelry to be auctioned during the KAKM Art Showcase.  KAKM is our local public tv station and the art auction is a huge fundraiser.  It is televised for three consecutive nights in mid February.  I find it very exciting to watch my handcrafted jewelry getting ever increasing bids during this live auction every year.

The piece I selected for this year's auction features lots of little sapphire briolettes and a series of tiny white seed pearls.  The base is a piece of sterling silver wire that I shaped by hand and hammered flat for strength and to make a nice surface for the seed pearls to rest on.


Emerging from the top of the wire work are small rondelles of crystal quartz, leading to sterling silver oval rolo chain, one of my favorite chain styles.


And a couple more photos of it:


I don't usually do that type of wire wrapping because it takes a lot of patience.  Patience that I generally lack.  But this time, the piece really needed it and once I put my mind to it, it didn't take as long as I thought it might.

Monday, December 19, 2011

Chocolate Sambuca Cookies

Yes, I had to buy a bottle of Sambuca (the tragedy of being completely out of Sambuca is something I'm still coming to terms with) to make this recipe.  Of course, Rick had to take a sample sip before I used it in the cookie recipe, just to make sure it was up to par.  By the way, the finished cookies do NOT have an overwhelming licorice taste ... it's just right.

Chocolate Sambuca Cookies

12 oz semisweet chocolate (I used 1 1/2 cups of chips)
1/4 cup butter
1/2 cup + 2 TBSP flour
3/4 tsp baking soda
1 cup almonds, ground pretty fine
3 eggs
1/2 cup sugar
1/4 cup + 2 TBSP Sambuca

1/2 cup sugar
1/2 cup powdered sugar

Melt the chocolate & butter in the top of a double boiler (or in the microwave).  Allow to cool a bit.  Beat together the eggs, 1/2 cup sugar.  Stir in combined flour, baking soda, almonds, melted chocolate and Sambuca.  Chill for several hours or overnight.

Put 1/2 cup sugar and 1/2 cup powdered sugar in 2 different small bowls.  Roll 1/2 TBS of dough into balls.  Coat with regular sugar, followed by powdered sugar.  Set on ungreased cookie sheets about 2" apart.  Bake at 350 for 10-12 minutes.  They will puff up and have a lovely cracked finish.  Cool on cookie sheets for a few minutes before transferring to racks.

Sunday, December 18, 2011

Brazilian Coffee Cookies

This is another new recipe for me.  I've had this recipe marked in one of m y cookbook pamphlet thingies for several years and decided this was the year to finally try them.  Now I wish I had done it sooner!


Brazilian Coffee Cookies

1/2 cup sugar
1/2 cup brown sugar
1/3 cup butter
1 TBS milk (or cream)
1 1/2 tsp vanilla
1 egg
1 1/2 cups flour
2 TBS powdered instant coffee (I used Folger's crystals and I like the look of the specks in the dough!)
1/4 tsp salt
1/4 tsp baking soda
1/4 tsp baking powder

Mix sugars, butter, milk, vanilla and egg until well combined.  Stir in remaining ingredients, blending well.  Shape into 1" balls (mine were bigger, so I didn't get the correct yield).  Place about 2" apart on ungreased cookie sheet.  Flatten to about 1/8" thickness: grease the bottom of a glass, dip in sugar and press on each cookie, re-sugaring as needed.  Bake at 400 for 7 - 8 minutes.

These cookies are crisp on the outside and nice and chewy on the inside.  What more can you ask from a cookies??  If you're sensitive to caffeine, you might want to use decaf.


Thursday, December 15, 2011

Lemon Bars

As promised, I will share with you my latest recipe for Lemon Bars.  I know I've made them before, but never with this recipe.  I think I like these better than any I have ever made previously!


Lemon Bars

Crust:
1 cup flour
1/4 cup powdered sugar
1/2 cup butter

Cut butter into mixture of flour & sugar until all pieces of butter are quite small.  Press into ungreased square pan.  Bake at 350 for about 15 minutes

Filling:
2 eggs
1 cup sugar
2 TBSP flour
2-3 tsp grated lemon peel
1/2 tsp baking powder
2 TBSP fresh lemon juice

Combine eggs & sugar, mixing well.  Stir in remaining ingredients until combined.  Pour over partially baked crust.  Bake for about 18-20- minutes.

Allow to cool completely before cutting.

Yummy lemony goodness

Wednesday, December 14, 2011

Chocolate Truffle Cookies

I started my holiday baking today, but I'm not foolish enough to think that the things I baked today will actually last until Christmas.  I live with Rick, after all.

Lemon Bars were first on the list, but I haven't cut them yet, so I'll share that recipe with you when I can get a photo of an individual bar.  A photo of the uncut bars, still in the pan would be dumb.


The second thing I baked were these lovely cookies.  They sort of melt in your mouth ....


Chocolate Truffle Cookies

1 cup butter (at room temperature)
1/2 cup powdered sugar
1 1/2 tsp vanilla
1 oz (1 square) of unsweetened chocolate, melted
2 1/4 cups flour (I used King Arthur's White Whole Wheat, but you can certainly use white)
1/4 tsp salt
1 cup chocolate chips

1/4 cup powdered sugar
2 TBSP cocoa powder

Cream butter and 1/2 cup powdered sugar until smooth.  Blend in vanilla and melted chocolate.  Add flour and salt, blending until smooth.  Fold in chocolate chips.  Shape into 1" balls and place on cookie sheets.  I did not grease the cookie sheets because I have non-stick ones.  If you don't have those, you probably want to grease your sheets.  Bake at 375 for 10-12 minutes.  Cool completely (this can be done on the cookie sheets -- no need to transfer to cooling rack).

In a small bowl, combine the 1/4 cup powdered sugar and cocoa.  Roll the cooled cookies in this mixture.

Makes about 4 dozen.


If you're admiring the lovely leaf plate holding the cookies, I purchased it at the Bad Girls of the North craft show from Lynn Marie Naden (Contours by Lynn Marie).  She has a shop in Homer, Alaska and can be found at several galleries around the state.

Sunday, November 27, 2011

Leftover Turkey

Those of you that have read (and possibly made) some of my recipes, know that I do not often turn to pre-packaged or canned goods.  This recipe for leftover turkey is an exception that I'm happy to share with you because it is SO GOOD!

The original recipe was given to me by a friend in Reno, but I've made several changes that I think make it much better.  It makes a huge casserole, so get out your largest baking pan!

Turkey Pasta Casserole

1 lb pasta of your choice (I've done this with bow-ties, ziti, rotini -- they all work well)
6 cups of cut up, cooked turkey
4 stalks of celery, cut up
1 onion, diced
1 red pepper, diced
8 oz mushrooms, sliced
1 can cream of mushroom soup
1 can cream of celery soup
1 can tomato soup
2 cups grated sharp cheddar cheese

Cook pasta until slightly underdone. Saute the vegetables in a small amount of oil until tender.  Mix all of the ingredients (except the cheese) in a large bowl and turn into a large, greased baking pan.  Bake for about an hour at 350.  Sprinkle the cheese on top and heat just until melted.

This recipe originally called for spaghetti, but I like it much better with any of the shapes I referenced above.

I hope all of you had a wonderful Thanksgiving and that you still have some left over turkey so you can try this recipe.  If not, you can always use chicken.

Tuesday, November 8, 2011

Sale in My Etsy Shop!

That's right folks, I'm having a 20% off sale in my etsy shop.  Follow these simple instructions and your discount will be applied automatically!

When making your purchase, use the code NOV20 in the coupon code field.  Click the blue "Apply Shop Coupon Code" (it will be on the right hand side of your screen) and enter the code in the box that appears.  Don't forget to click "apply". 


This Coupon Code will be available through end of day Saturday, November 12.  Happy shopping!

Friday, October 28, 2011

The New Floor .... and a little bit of Jet

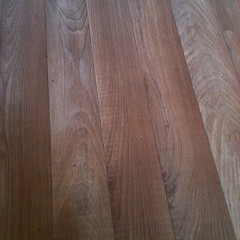
I LOVE MY NEW FLOOR!  Yes, I screamed that at the top of my lungs.  I feel like a grown-up now that my floors are not made of plywood any more.  We're no longer living in a house known for it's dorm-room-chic qualities.  Alright, we still have some funky things going on, but for the most part, the house is done.  Amen.  It's only been 14 1/2 years.


You probably think this is a nice hardwood floor.  You would be wrong.  It's linoleum.  Yup, linoleum.  The manufacturer uses a photograph of wood and somehow adheres it to some really heavy duty linoleum.  There's even real wood-like texture going on here.

A friend of Rick's, who has installed many hardwood floors over the years, made the comment: "Why would anyone get real wood?"

And here's Jet on his new bed, after his grooming yesterday.  I wuv him.


Friday, October 21, 2011

New Earrings in My Etsy Shop -- Finally!

Now that the Great Flooring Installation of 2011 is complete, I'm finally back to work in my studio.  There's nothing like a little renovation to get me motivated again.  My studio was completely empty for several days as the floor was installed, so I took the opportunity to sort through stuff, clean and rearrange a bit.  While it looks the same (to the untrained eye), it feels very different to me.  In a very good way.

Without any further delay, I'll share with you two new pairs of earrings in my etsy shop.


Stay tuned -- I have more earrings to come.  The photos need to be edited, blah, blah blah.  As usual, click on the photos to go directly to the listings in my etsy shop.

Sunday, October 9, 2011

A Brief Update

I know you have all missed me and my posts terribly.  And I do feel bad about being absent from my blog lately.  But I actually have some good reasons, which I will cover in a minute.

First, I'd like to report that our Bad Girls of the North craft show in Fairbanks was a huge success.  We think that there was a record turnout on Friday evening.  If I was a shopper, I think I would have left!  I don't do well with huge crowds.

My house is a disaster zone.  In preparation for new flooring (actually, it's my house's first real flooring ever -- we've been living with plywood floors for 13 years.  very embarrassing to admit this here), most of our belongings and furnishings are packed up and living on the deck under blue tarps.  For those of you not familiar with this strategy, it is very Alaskan to use a multitude of blue tarps, wherever and whenever you can.  I'm not a fan of this look, but given what we need to do, this is a necessity.

As many of you know, my studio is located inside my house.  Yes, my entire studio has been dismantled and will not be back to normal for a few more days.  This timing is far from brilliant, as we are in the middle of craft show season.  The actual floor installation will take place on Monday and Tuesday.  It is only after that, that our lives begin to get back to normal.  Rick is certain that I will be searching for missing items all winter long and he's probably right.

No pictures of this disaster are available.  I'm not proud of how our house and deck look right now.  The neighbors are concerned for our mental stability at this point.

On a brighter note, Jet is having a blast running around the near-empty house.  There are few places where his toys can get stuck!

Thanks for sticking with me through my long absences.

Monday, September 26, 2011

Preparing for the Bad Girls show in Fairbanks

Later this week, we drive north for our 12th annual Bad Girls of the North craft show in Fairbanks.  It's a long, long drive that takes most of the day.  We will leave on Thursday and get up early to do the show layout on Friday morning.

I made several small adjustments to my jewelry display last year, so I have no new display items for this year.  But I will change it up a bit so it doesn't look stale.  And most all of my jewelry is new and fresh.  There is one strategy change I will introduce, that I'll try to explain here.

One of my best selling necklace styles are my pearl mixes.  As a refresher, you can look at this post from a few years back.  The earrings that I make to go along with the necklaces are usually simple, single pearl drops, matching one of the pearls in the necklace.  They are sold separately from the necklaces, but I display them together.  It never fails -- there are always several customers who purchase only the earrings, leaving the necklace without a matching pair of earrings.  This year, I decided to make about 20 pairs of varied single pearls drop earrings for these people to choose from!  I will display them all together in a little basket.  Hopefully, this will prevent the lonely necklace syndrome.

We'll see.

Wednesday, September 21, 2011

Jet has a Play Date!

Jet is now 11 months old and weighs in at about 82 pounds.  That's a lot of dog, isn't it?  He's finally big enough for a "fair" play date with Murphy.  Murphy is the gorgeous labradoodle that lives across the street.  He's about 120 pounds!

Last week, I snapped some photos of them playing together in Kathryn & Timer's Murphy's backyard.

Looks rougher than it is.


Rick with Jet and Timer looks on.

(Murphy's not really biting Jet -- it just looks that way)

After only 10 minutes, the two of them are panting like, well, like dogs.


Poor Blitzen had to stay in the house.  She doesn't play well with others.  And she's old.


Monday, September 5, 2011

State Fair -- Food Photos

I only have time for a quick post with some photos of some of the food we've eaten during the past week.

Blue Corn Tamale (with all the toppings)


Pork Chop on a Stick (after a few bites)


Baked Potato topped with Cheese, Bacon and Sour Cream


And I decided to live-on-the-edge and get a feather hair extension.  I kind of love it.  The gorgeous earrings are from my friend Brandi at Caties Blue.

Saturday, September 3, 2011

The Great Pumpkin Scandal of 2011

Alaska is famous for the giant vegetables that grow here.  Each year at the State Fair, the pumpkin weigh-off is a very big deal.  The same with the cabbage weigh-off, but we'll just focus on the pumpkins for now.

A 1723 pound pumpkin (can you say HUGE?) was disqualified because of a tiny hole.  I really don't get this.  Why does a hole disqualify a pumpkin?  This was not adequately explained for me.  I guess pumpkin judging rules are quite severe.

The winning pumpkin was a mere 1287 pounds.  Still pretty unreal looking.  Not at all attractive in the traditional pumpkin sense.  Beauty is in the eye of the beholder, I guess.

This is a photo of a completely different pumpkin, which weighed only 859 pounds.  I must have missed the bigger ones.  How could I??


If this tale really captivates you, you can read the full story here.


Thursday, September 1, 2011

Pigs and Bonsai

Here are some more highlights from my stroll around the barn the other day at the Alaska State Fair.

There is something super cute about baby pigs.  Can't explain it.  It just is.  The mama pigs, not so much.


And a different set (litter?)


The bonsai display was amazing, as always.


I forgot to take a picture of the unique lunch item we found yesterday.  It was called a Chicken Parfait and not only was it clever, it was quite yummy.  In a clear plastic cup, make layers of mashed potatoes and shredded barbequed chicken.  Top it with a cherry tomato and barbeque sauce!

Later in the day --  I guess you could call it dinner -- we had the most fabulous crab bisque and shared an order of coconut crab patties.  Delicious!

Wednesday, August 31, 2011

In the Barn at the Alaska State Fair

Yesterday was a slow sort of day at the Alaska State Fair -- the crowd was light until after the Charlie Daniels concert.  And even then, the demographic was all wrong for the kind of things we sell. 

I took the opportunity to visit the animals in the barn.  Ever since I've gotten to know Pricilla and Abby, there is a special place in my heart for goats.

The goats were especially cute this year.  They love a little head scratch.


And fresh hay is always welcome.


How about this little cutie?


Who added this sheep to the mix?  He/she was exceptionally soft.


As I said, yesterday was slow, so we ate a lot.  We ate a seafood platter (fried, of course) and it was delicious.  We also enjoyed a bunch of Macho Nachos with the works - chicken, beans, guacamole, olives, cheese, jalapenos, sour cream and salsa.  And the day wouldn't be complete without a batch of freshly baked cookies from the Hoop 'n Hula cookie booth.  They provide hula hoops for you to practice with while you wait for your cookies to finish baking.  Quite a treat, really.

If you are interested in all the food we have to choose from, have a look at this page.  Every day involves quite a few decisions.  And just in case you were curious, we did indeed eat a bucket of donuts from the Rollin' Donuts booth the other day.  The bucket was cute and now it's empty.

Monday, August 29, 2011

Alaska State Fair -- The Weekend Report

Opening weekend at the fair is always crazy-busy.  The unseasonably cold cool weather and rain on Friday and Saturday made those days a little less crazy-busy than usual, but that's ok.  Sunday was gorgeous and warm.  The crowd was huge and in a buying mood.

I took this set of photos before we opened last Thursday.

These are our short sleeve t-shirts.  Love the colors we chose.


And our long sleeve t-shirts.  Not loving these colors as much.


Cindy's metal art is always a great attention getter.  We've already sold the sheep that you see between the 2 doors, the rooster on the ramp and one of the "Bad Dogs".


I have not yet eaten a pork-chop-on-a-stick, but I did have chicken-on-a-stick (from the same booth) last night for dinner.  It was steaming hot in my mouth, hence the stupid look on my face :)


You don't really want the whole list of stuff we ate during the first 4 days of the fair, do you?

Wednesday, August 24, 2011

Alaska State Fair

I've been very busy getting ready for the Alaska State Fair, which opens tomorrow.  Eek!  Our fair building is pretty much ready to do business, with just a few last minute details to take care of.  I managed to remember to take a few pictures of my jewelry displays in the booth.

Here's the main part of my display.  Above, you can see one of Cindy Shake's metal ravens, which have proven to be top sellers for us over the past few years.  They practically fly out of the building -- yes, I made a funny.  Below, I've displayed some of my hand knit scarves (on a cleverly disguised broom stick).


This is a smaller jewelry display area, which tends to be a bit dark.  I love the green lamp Carol contributed to the display.  Above is a view of our ceramic mugs, insulated travel cups and plastic water bottles (BPA free, of course).  The color selections on those items were wonderful this year.


Lastly, my earring display, with another metal raven for protection!  Off to the left you can see a snippet of our brand new lovely pink fleece vest.  We're hoping it will be a big seller for us.


I plan to share more photos of the inside of the building and of the fairgrounds in general. And my coverage of the fair wouldn't be complete without a photo of me eating a pork-chop-on-a-stick!

Tuesday, August 2, 2011

Work Table Update

Now that the necklaces are completed, priced, tagged and stored, it's time to get back to making earrings.  I spent most of last Sunday making pairs of gemstones, adding to the batch you saw in the necklace post.  I really have my work cut out for me with this huge number of pairs!  It will probably take most of a week to complete this batch of earrings.

Click on the photos to see some finer detail.


Do you see any pairs you really, really love?  Most of these pairs will end up in my inventory, waiting for craft shows, the state fair or wholesale/consignment orders.  A few will probably get photographed for my etsy shop.

Friday, July 29, 2011

Golden Summer Cake

Rick came home from the store the other day with a buttload lot of nectarines.  Who asked him to get any nectarines?  I didn't.  Once I got close to the bag of said nectarines, I knew exactly why he bought them.  They smelled heavenly.  But they were all ripe, so I had to spring into action and figure out how to use a bunch of them fast.  There was no way we could eat them out-of-hand fast enough.

A quick search located this really great recipe.

Fruit Topped Golden Summer Cake (my name, not theirs)

1 cup flour (thanks to my friend Patty's recommendation, I used King Arthur's White Whole Wheat)
2 tsp baking powder
1/4 tsp salt
1/2 cup softened butter
3/4 cup sugar
2 eggs
1 tsp vanilla
1/4 tsp Fiori di Sicilia (this is my addition to the recipe and I must say that it made a huge difference, but it is completely optional -- you could try some lemon extract instead or leave it out entirely)

2 nectarines, cut up
1/2 TBSP sugar mixed with 1/2 tsp nutmeg.

Cream butter and sugar until smooth.  Add eggs and mix completely.  Add flour, baking powder and salt, stirring to combine.  Turn into greased 9" x 9" pan.  Scatter fruit over the batter and sprinkle with sugar/nutmeg mix.  Bake at 350 for 45-50 minutes.


I know what you're thinking:  those don't look like nectarines!  and that isn't a square pan!

The first time I baked this cake, I used nectarines, but had to double the recipe to be able to use more than 2 nectarines!  The next time I baked it, not only did I double it, but I was finally running low on nectarines, so I added a bunch of fresh cherries -- a delightful combination!  The latest version (in the photos) uses both blueberries and cherries -- another delightful combination!

I really overloaded it with fruit, which doesn't seem to affect the recipe, but the berries did sink a bit.  I don't see this as a problem.


This cake is especially good topped with some vanilla ice cream. 

Sunday, July 24, 2011

What's on my Work Table?

While Jet is still taking huge chunks of my time, I'm forced to figure out how to get some actual work done in preparation for the Alaska State Fair and my fall show season ... and keep up with consignment orders and hopefully some additional wholesale orders. Just typing all that has exhausted me. I'm getting old.

Since earrings are the "bread & butter" of my business, I've spent what time I could keeping those earring boxes full. The boxes are finally bursting at the seams so I recently switched to making some sterling silver necklaces.

What you see here, in the two bottom rows, are a bunch of pendants -- trios and duos -- ready to be put on chains. The pendants are fun to put together. I enjoy finding interesting groupings of gems. The cutting of the chain (I buy the chain in bulk and cut it to length, then add a clasp) and assembling the necklaces is quite boring.


In the two rows above the duos and trios are paired gemstones for earrings.  As I said, I'm taking a reprieve from the earring making, so these will have to wait!

*Hint -- click on the photo to get a much better look at some of my gemstone combos!


Tuesday, July 19, 2011

Making Earring Cards

One of the less glamorous aspects of making jewelry (seriously though, are there any truly glamorous aspects?) is the need for earring display cards.  I've always made my own, using Corel Draw. 

Three times in the past 14 years, I have had to upgrade my version of Corel and I live in fear that my existing files will not be compatible with the newest version.  I did my last upgrade this past December and all went well, so I'm probably safe for another 5 years or so.

Since I have not been able to give up this task to a commercial printer, I continue to buy 80 lb cover cardstock and print my own.  Cutting them has become a science for me.  I'll take you through the process and if you fall asleep, I'll wake you when I'm done.

Each sheet (printed front and back) is printed with 12 cards on it.  The cards will measure 2" x 3 1/4" when cut.


First I cut them vertically.


Then I cut them horizontally.


My not-so-heavy-duty paper cutter will only cut 3 sheets of this cardstock at a time, so I print in multiples of 3.  This batch was 9 sheets.  Why don't I get a heavier paper cutter, you ask?  I don't have a good answer for you.

The completed stack.


And the back, printed with "Sterling Silver".  I leave space under that to write the names of the stones in each particular pair of earrings.


ARE YOU STILL AWAKE?!?  PAY ATTENTION -- THIS IS EXCITING STUFF!

Now I bet you're wondering how I put those little holes in the cards that hold the earrings.  I'll tell you anyway.

Years ago, when I first started this silliness, Rick saw me using a safety pin to poke holes in the cards.  Granted, I didn't need very many cards back then, but still, this was the height of ridiculousness.  He built me this little low-tech gizmo that works like a charm.


It is simply 2 pieces of plywood connected with a hinge.  On the right, there are 2 small nails.  I put a batch of cards upside down over the nails and close the little "book".


Why upside down? Because the nails make a bit of pokey-outie when they go through the paper and that looks terrible on the front of the cards.

Now they're ready for earrings!


A funny story:

I customize the back of the cards with either Sterling Silver, Gold Filled or Niobium.  One time, I printed a small batch (3 sheets) of Gold Filled cards with a serious typo.  I left out the "l" in Gold.  Yes, there were some God Filled earrings out there.  I have no idea how many people even noticed.  I didn't until I used the last card.