Thursday, December 5, 2013

SALE Time!

For those of you that did not see this on Facebook, I'm having a big sale in my etsy shop.

Use coupon code DEC20 to get 20% off your entire order! Don't forget to click "Apply" after you enter the code.

This sale will be going on through December 15.

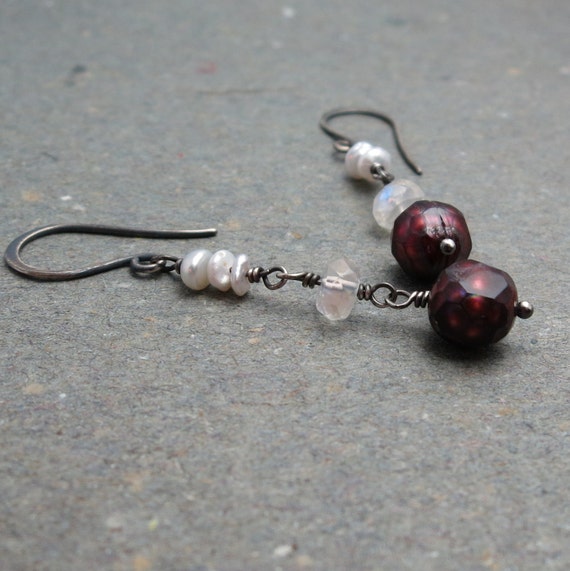
This is a new pair of earrings in my shop, perfect for the holidays!


https://www.etsy.com/listing/171849625/red-pearl-earrings-moonstone-keshi-pearl


 Click the photo to go directly to the listing.


Friday, November 22, 2013

New Earring Display

I've mentioned before how I revamped my craft show set-up this year. Here's a little detail on the new earring display I bought from Rio Grande.

My earrings are generally displayed on cards and hang on plastic coated earring racks. I have room for 3 of these racks in my display. While reviewing my craft show sales for the past few years, I realized that earrings comprise at least 75% of my sales. Intuitively, I knew this, but seeing the numbers convinced me to do something to extend my earring offering.

I invested in this little number from Rio Grande:

It holds 48 pairs of carded earrings and does not make a huge "footprint" on my table. I use each side to highlight a specific earring design. I chose 4 designs that deserve to be highlighted: glass triangles, just pearls, hoops and enamels.

I like the way this has worked for the first 3 shows of the season. I have one more show on the schedule. Local people -- I will be at Crafts Weekend at the Anchorage Museum on Friday, Saturday and Sunday of Thanksgiving weekend.  Remember museum members always get 10% off!


Wednesday, November 13, 2013

Customer Expectations

Many of you know that I have been selling my jewelry on etsy since 2007. My 7th anniversary is coming up in February. I've been selling my jewelry for much longer than that in person -- since 1997.

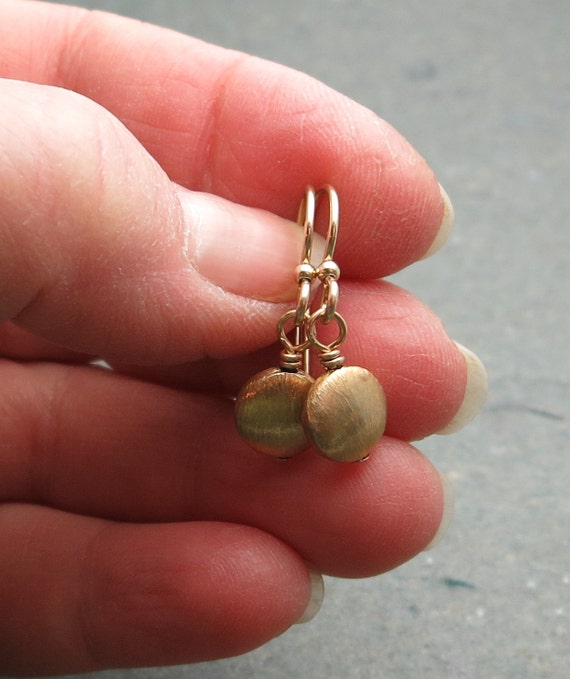
Something happened fairly recently that I'd like to share with you. I have had 3 customers in the past 3 months express surprise at the length (or lack thereof) of the earrings they purchased from me. One of these customers returned a pair because they were too small. The other simply let me know how surprised she was.

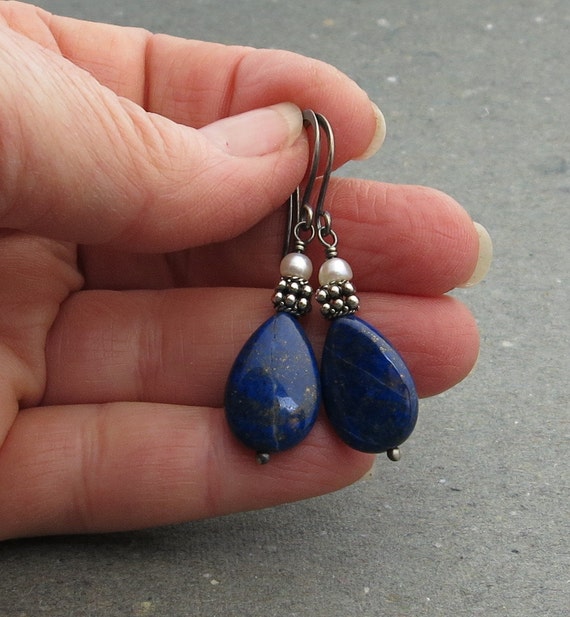
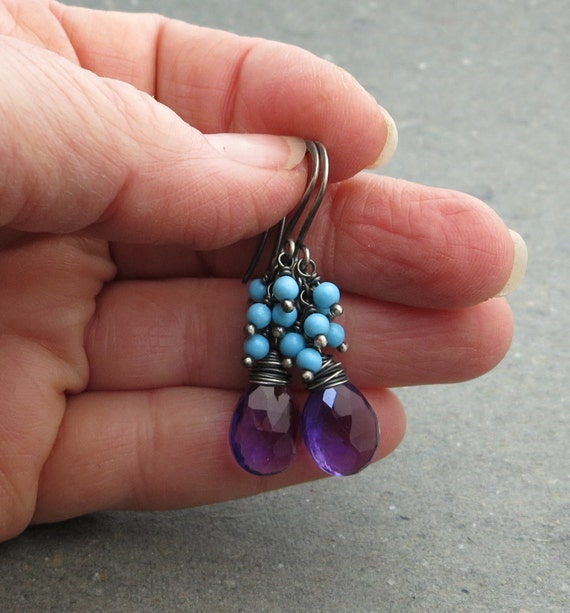
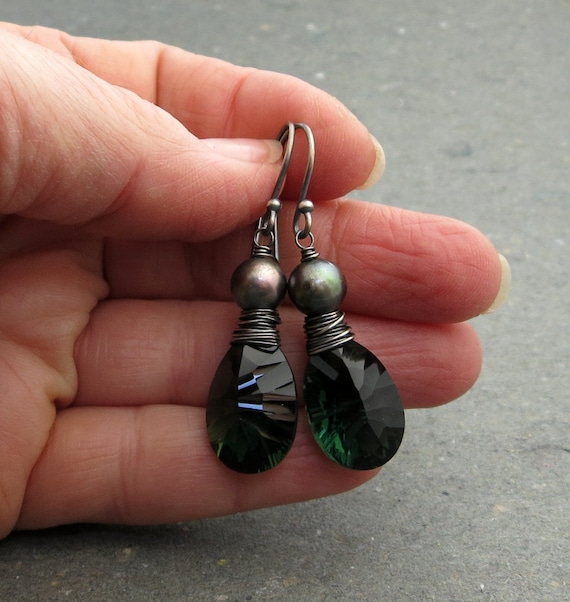
Since the beginnings of my online selling, I've included length measurements in inches and centimeters. Is it possible that people have stopped reading descriptions thoroughly? Or is it that reading the phrase, "these earrings are 1 1/2" long" has no meaning without a visual?

Whatever the reason, I decided to add a new type of photo to each of my new listings. I will not go back and add this photo to all of my existing listings. That would make me pull my hair out!

Here's a sampling of what I've added:

https://www.etsy.com/listing/169067493/lapis-white-pearl-earrings-nautical


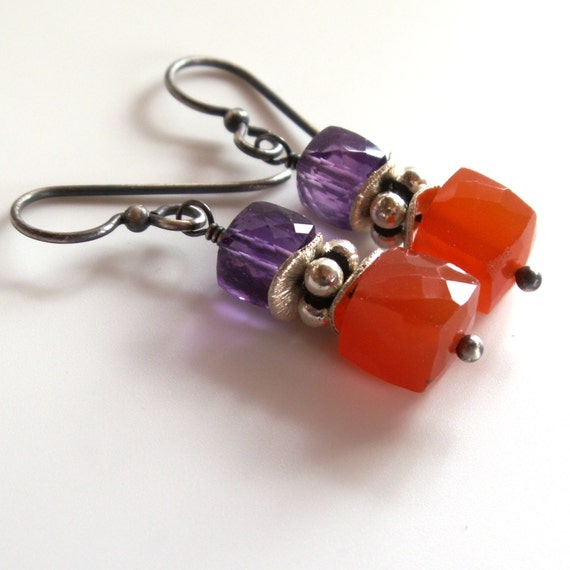
https://www.etsy.com/listing/168426920/purple-amethyst-turquoise-earrings


https://www.etsy.com/listing/117487572/emerald-green-earrings-concave-cut


https://www.etsy.com/listing/166992370/gold-drop-earrings-petite-beaded


What do you think? I would really appreciate some feedback on this. I think the photos of the earrings in my hand not only demonstrate how big or small they are, but they also create a subtle connection to handmade.

All of these earrings are new in the shop. You can click on the photos to go directly to the listings.

Saturday, October 26, 2013

Enamel Components

I've been working on some simple enamel components for earrings and necklaces. I want the focus of these pieces to be the color, hence the super-simple designs. I did a blog post a week or 2 ago about making copper circles for this enameling session. Now I'll show you how some of them look with COLOR.


Each pair you see here will be a pair of earrings. The small circles are the ones I made in the above referenced blog post. They were domed very slightly. I used some dome up, some dome down. Both orientations seemed to work fine. The long teardrops are shapes that I purchased. All of the pieces are counter enameled with black on the back. This provides stability to the enamel.

I have another earring series to complete. These will be double dangles -- one circle hanging below another. I'm planning some very fun color combinations for those!

Another shape that I purchase as-is are these cute flowers. These will be put on a brass jump ring and hang from antiqued brass chain. This will help me keep the price point low ($24). I have some customers who have purchased several as gifts because of this attractive price.


I also offer these necklaces with hearts, which are on order. I hop they are in Monday's mail so I can get a bunch done before the Bad Girls of the North show next weekend! 


Thursday, October 24, 2013

Triple Ginger Pound Cake

What's better than fresh ginger? Well, crystallized ginger, powdered ginger and fresh ginger all together!

Get thee to the store and get all 3 gingers so you can hurry up and make this wonderful cake.

Triple Ginger Pound Cake

3 1/2 cups flour
1 TBSP ground (powdered) ginger
2 1/2 tsp baking powder
1 tsp salt
2 cups sugar
1 cup butter
2 eggs
2 egg yolks
1 TBSP vanilla
1 1/4 cups milk
1/2 cup minced crystallized ginger
4 TBSP grated fresh ginger

Cream sugar & butter until fully combined. Add eggs & yolks, one at a time, incorporating each one before adding the next. Add vanilla. Mix in combined dry ingredients alternately with milk. stir until smooth. Lastly, stir in the gingers.

Bake in 2 greased loaf pans for about 1 hour at 350. Cool in pans for about 20 minutes before removing.


As you can see, these cakes did not rise much. I suspect that if I had slightly smaller loaf pans, the cakes would be a bit taller. In any case ... yum!!


Wednesday, October 16, 2013

Making Copper Circles

There are several ways to cut out discs from metal sheet.

1 . You can saw them by hand using a jeweler's saw. I've done this, and while it is satisfying, it takes a bit of time and the result is almost never a perfect circle. Not that there's anything wrong with an "organic" circle, but it you're looking for a neat  disc, this is not the best method.

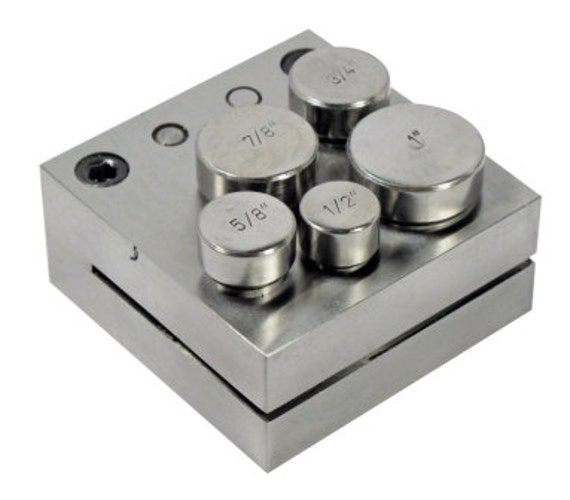
2. A disc cutter like this one from Evie's Tool Emporium is a great alternative. The prices in this etsy shop are always reasonable and the service is awesome. You can see this listing by clicking on the photo, but be sure to check out the rest of the shop too!

For me, this type of tool is great. It takes quite a bit of strength and a very stable surface to get good, clean circles. I'm working with 20 ga copper sheet, so sometimes it's hard for me to get through with one blow of the hammer.

Enter Rick. He suggested I make the trip out to his shop (it's really not far -- just on the other end of our 2 acres :-). There, he introduced me to the arbor press.


Basically, the arbor press does the hard work for you. You pull down sharply on the lever and it acts as the hammer, punching out he circle with relative ease. I have a video of this , but can't figure out how to upload it to my blog. (This is causing me great frustration, as I can't even find it on my computer. It should be in the cloud file, shouldn't it?)

Anyhoo, here are the little copper circles after I domed them. Even though these discs are small (less than 1" in diameter), I used a large dapping punch because I wanted a very shallow dome. Next step is to drill holes at the top and enamel them. Some will get holes top & bottom so I can do a double-dangle style earring.


As always, thanks for tuning in and check back soon for finished enamel earrings!


Friday, October 11, 2013

Romance is Alive!

Have no fear my friends, romance lives. At least in Alaska.

I received an email from a local guy -- in my head, he's young, very cute and athletic -- asking if I could replace a pair of earrings that his girlfriend lost. He purchased them from me 4 years ago. He remembers that specifically. I have no recollection of these earrings, but when he describes them, I kind of know what he's talking about.

He decided to send me a rough sketch of the earrings:

Rough sketch??? That's a drawing he did with some sort of CAD program, right? Bottom line, I knew exactly what he wanted. Lucky for him (and his girlfriend), I had 2 (yes, only 2) of those marquis cut prehnite stones left. They weren't quite a matched pair, but when I was done with the wire wrapping, they were indeed a pair :-)

These are the completed earrings:


This is the response I received from him when he saw this photo:


They look almost exact. 
I'll take them. 

Am I good, or what?
 
The next email I received from him:
 
Thank you so much. I called her and told her to expect replacement ear rings and she teared up on me. Those ear rings had kind of come to symbolize the first couple months of our relationship. When they were lost a few days before we had to say good bye. It was rough on her. 

Thank you so much. It made my year.
 
 
Of course, that made me tear up too. It's so special to be able to have an impact on the lives of others with something so simple as a pair of earrings. Now I need a tissue ...

Viva Romance!


Monday, September 30, 2013

Fairbanks Bad Girls of the North Show

Well, I survived the first craft show of the season. My new set-up took longer, but I think it was worth it. The raised tables, while not something immediately noticeable, made it easier for customers to see my work without bending over.

The backdrop was certainly a great improvement. In addition to lessening the distractions, the white fabric allowed the true colors of the jewelry to show themselves.

Here's the only really good photo I took of the new booth:


Remember, this is a ballroom usually used for dinners, banquets, weddings, etc. The chandeliers look like they are directly above my booth, but they are actually in the next row over. I had to turn off my own lights in order to get a decent photo. The smaller table in the foreground is the checkout area that Carol & I share. I keep a selection of boxes and bags there in addition to my iPad for credit card purchases.

A nice shot of the table on the right:


A blurry shot of the table on the left:


The new display items I purchased worked out well too. They are too small in these photos for you to appreciate them, but they are nicely finished wrought iron from Rio Grande.

All in all, the show was a good one. We always get such a great turn out in Fairbanks. They appreciate the care with which we select our artists. Thank you Fairbanks for encouraging us to continue traveling north to see you each September. This was our 13th year for this Fairbanks show. Where does the time go??


Wednesday, September 25, 2013

First Craft Show of the Season

We are driving to Fairbanks tomorrow for our first craft show of the season. The show is Friday evening and all day Saturday. This is a Bad Girls of the North show, one that my business partner & I produce. So not only do we need to be concerned with our own booths, but the Bad Girls booth is our responsibility as well. That's where we sell our awesome t-shirts, sweatshirts, hats, tot bags, travel cups, etc.

With the help my Rick, we have done some work on my booth. I've resisted this for a couple of years, but finally gave in and did it. I'm raising the tables -- that was the easy part. I hated seeing people hunch over my tables just to see my jewelry. I purchased 2 sets of these simple risers:

I bought them locally at Fred Meyer, but they are available at Target too. Higher tables requires longer skirting. Off to JoAnn Fabrics I went. I always go for a fabric that packs well without wrinkling. Crushed panne does the trick -- skirting in black, table toppings in rich chocolate brown (not shown).

Adding a backdrop was the most challenging change, but will have the greatest impact. I think. I usually do a "come-into" booth, so adding a backdrop will lessen the distractions of whatever is behind my displays. Rick rigged some 2"x2" gizmos that will be clamped to the tables. I'll drape white crushed panne over the wooden framework, thus creating a background for my work.

Basically what I've done is increased my set-up time from 2 1/2 hours to, well, a lot more time.

I will post some photos after I'm all set up on Friday evening. This better pay off!

Wednesday, September 18, 2013

A Bit of Wire Wrapping

I don't normally do this type of wire-wrapping. Anyone who does it regularly must be a bit insane. It's time consuming and the wire is persnickety. I use fine silver wire to keep the persnickety-ness to a minimum. It doesn't work harden the way the sterling silver does.

This first pair of earrings is super long. They look like twigs to me. I wrapped them with a series of  seed pearls and tiny faceted garnets.


For my next pair, I did a more daring color combination: apatite and golden tourmaline. These are shorter, but just a little more elaborate.


I don't have plans to list these in my etsy shop. I have 4 (ack, what was I thinking?!?) craft shows coming up and I need these earrings to keep my selections varied. You may see them on etsy later in the season, f they don't sell. But I hope they do!

Saturday, September 14, 2013

Vintage Metal Components

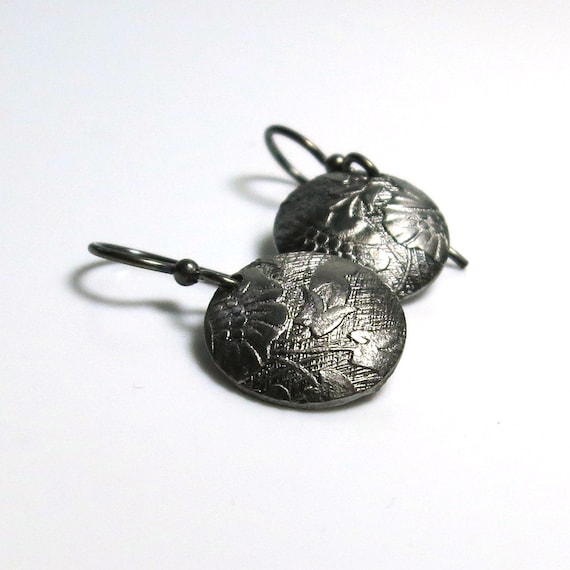
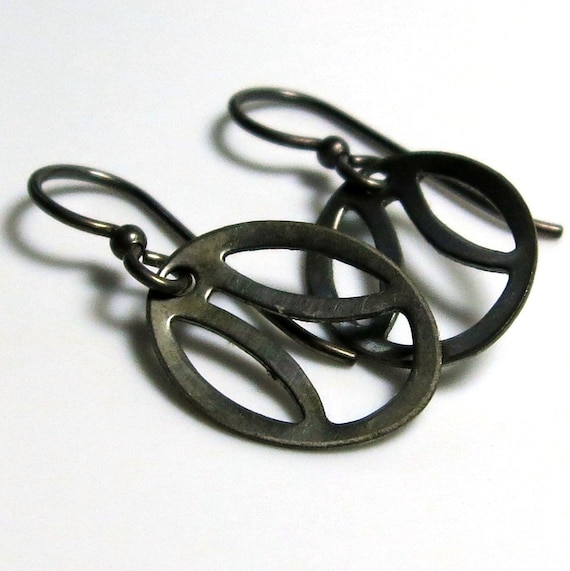
While at the Tucson gem shows earlier this year I found a booth selling some very unique vintage components. They were heavy gauge and not your typical overstocks from now defunct jewelry manufacturers. From their weight, these pieces seemed almost industrial. The whimsical patterns on some of them had me questioning what kind of industry might use such things.

Once I decided to not care what their original purpose in life was, I scooped up a small batch of them to use in some simple earring designs.

I bought a whole series of these domed steel charms. The patterns vary, but are floral, overall. They must have been stamped from a large sheet of a continuous pattern. They're really pretty cute.


How about these? They're like a cross between a peace sign and Pi. I heart them.


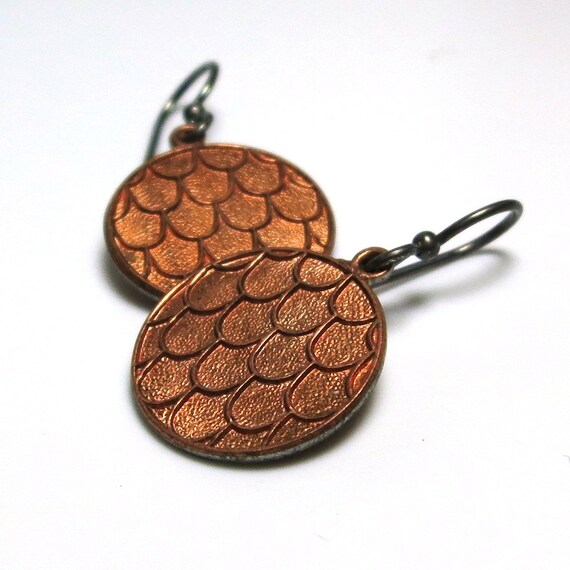
This next pair is different -- they're copper and are embossed with a stylized scallop pattern. The natural patina adds another level of interest.


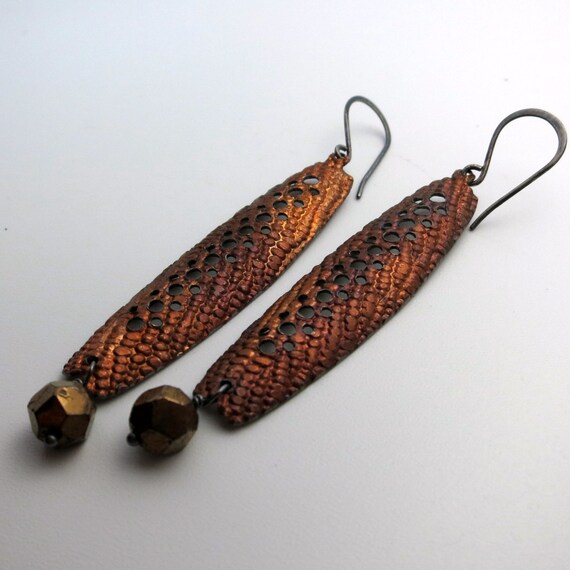
And now for my favorites. These copper charms are heavily patinated and are dramatically long. I spent quite a bit of time deciding what to do with them. As with the other charms, I finally decided that simple was best.


If you have any idea what these may have been used for in their former lives, please let me know! In the meantime, I love them as jewelry components.

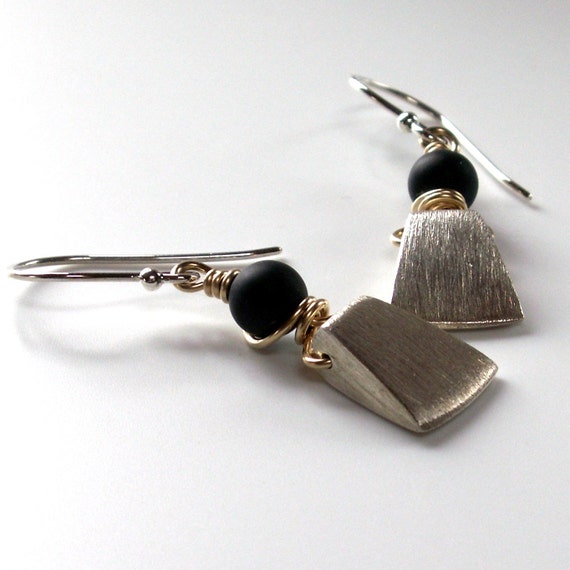
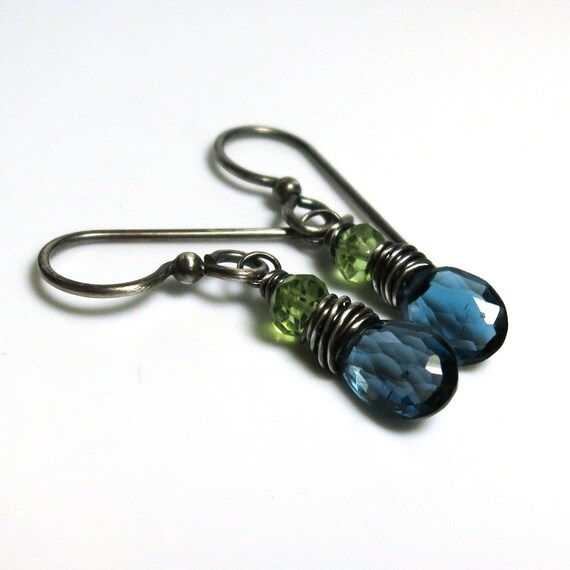
Click on the photos to go directly to the listings in my etsy shop!

Tuesday, August 13, 2013

Mocha Fudge Pie

I made this pie for the first time a couple of weeks ago. It was so delicious that I made it again 2 days ago. It's just about gone. It is that good. And so easy.


Mocha Fudge Pie

6 Tbsp butter
1/3 cup cocoa powder
1 can sweetened condensed milk (this is not as disgusting as it sounds -- it is simply mil & sugar)
1/3 cup water
2 eggs, lightly beaten
3 Tbsp instant coffee
1 cup chocolate chips
1 cup walnut or pecan pieces
1 tsp vanilla

1 unbaked pie shell (I made my own regular old crust, but I think this would be good with a graham cracker crust too)

Melt the butter in a saucepan. While still on a low flame, stir in cocoa until dissolved. Stir in sweetened condensed milk, eggs, instant coffee dissolved in the 1/3 cup water and the chocolate chips. Whisk until completely blended and the chips have melted. Remove from heat. Stir in nuts and vanilla. Pour into pie crust.

Bake at 350 for about 50 minutes.

This is such a rich pie that I recommend slim slices! I tried to capture the density of this pie in the photo, but I wasn't very successful.


Sunday, July 14, 2013

A Sale in My Etsy Shop!

Hey guys -- I'm having a sale in my etsy shop. You can use coupon code SUMMER20 to get 20% off your entire order through Tuesday July 16! If you haven't visited recently, there are plenty of new items for you to choose from.

Here's a small selection of what you will find in my shop.


Happy Shopping!

Saturday, June 29, 2013

Color Challenge

My friend Brandi at Brandi Girl Blog issued a color challenge a while back. Click HERE for the specific post. I should have thought to post this earlier, but there's still time to enter. It's open through July 10.

I used seed beads and a simple herringbone weave to create my entries for the challenge. The first bracelet I made followed color palette #2 from Brandi's choices. Admittedly not a color combination I would have chosen on my own, while I worked on the piece I grew to love it!


Next, I chose color palette # 5. This one turned out too red/white/blue looking and I chose not to submit it for the challenge, hence no photos.

Lastly, I tackled color palette #1, which I like to call Mixed Lettuce.


This one, I love!!

Wednesday, June 19, 2013

New Ideas -- They're Always a Surprise!

Most of you know that I've been doing this jewelry thing for a long time. 16 years. Many times in those 16 years I've felt as if I'd used up all of my ideas. Like there was a lifetime quota that I could not exceed and that I'd used my quota. Luckily, those moments passed and something new was created in my studio.

That very thing happened again today. I was busily building inventory for the State Fair, wholesale accounts and my fall craft shows. For some reason, I was working at a frantic pace, even though there is no deadline currently.

... and when I say frantic pace, that's relative ... I never work at the kind of frantic pace that comes to mind when one uses the term frantic pace ...

Suddenly, I was staring at these beautiful white pearls in a rondelle shape. I bought them many years ago in Tucson because they were lovely, different and had wonderful luster. I gave no thought to how I might use them, as that shape always gives me trouble. I never did figure out how to use them effectively. Until today.


As you can see, it is a fairly simple design that really shows off the luster. I vaguely remember trying to use them on a headpin in a stack sort of arrangement. They never looked good or right that way. Plus they would sometimes wobble in an unattractive manner. 

Then I located some long forgotten chunky sugilite rondelles and really beautiful smooth turquoise nuggets. I dare you to guess how long I spent going through those irregular pieces of turquoise trying to find acceptable pairs.


The frantic pace was no more. As a matter of fact, the turquoise nuggets are still spread all over my table screaming at me to make more pairs!

Thursday, June 6, 2013

Lampwork + Gemstones = COLORPLAY

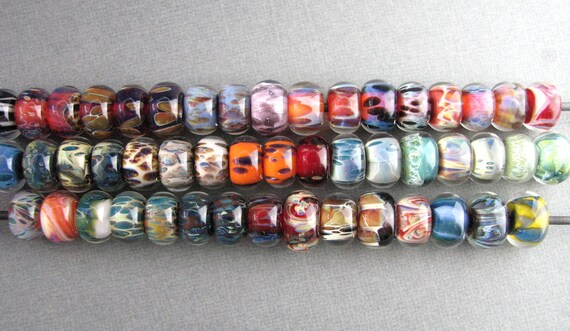
One of the funnest things about creating jewelry is the color play involved. Gemstones are full of natural color. Pearls can be naturally colored, dyed or heat-treated to attain wonderful colors. And lampwork beads? Where do I begin to describe the amazing colors and combinations thereof that are found in these art glass beads?

Just about a year ago, I purchased a bunch (49 to be exact) orphan lampwork beads from Firelily on etsy. Here's a photo of the whole lot.


They are amazing and they've been sitting on my worktable for a full year. I would occasionally fondle them or just peer into their awesomeness. Inspired by something I saw on etsy the other day, I finally decided to use some of these works of art.

First, I sorted through them to separate out the pairs, to be saved for earrings. I know they are all supposed to be orphans, but I definitely found lots of pairs. With some of the remaining beads, I made a series of pendants. Each bead is paired with a gemstone (also orphaned) and made into one of two styles of pendant. In one style, the lampwork bead and the gemstone are wired together in chain-like fashion, making for an articulated pendant. The other style hard-wires the two elements together.

These photos capture most of the 21 necklaces I made.


I do not plan to list these in my etsy shop, so if you see something you like (or would like to see more photos of), let me know and we can work something out. Enjoy the colors!

Thursday, May 30, 2013

A Walk In the Woods

Every morning the three of us go for a walk. Lately we've been going through the woods near our house. There are trails to the inlet, but it has been very muddy and slippery there, so we've been sticking to the "overland" route. In an attempt to make the walk more hike-like, we decided to forge a new trail. Rick armed himself with a machete and I continually yelled for Jet to get out of the way. I don't want him to find out the hard way that a machete is dangerous!

We found some concrete survey markers with brass plates dating back to 1922. For some reason, this excited me to no end. To think that my little rustic neighborhood was being explored back then kind of gave me the chills. Who were these people that did the surveying?

This is the first one we found:


If you can't read it, it says US Coast & Geodetic Survey. Click on the photo to get a larger image and you can read the rest of the information.

Here's the second one:


Kind of cool if you ask me!


Thursday, May 16, 2013

COLOR!

I don't know about you, but I love color. I love almost all colors and I love most of them together. Some of my most popular earrings feature what some would consider bizarre color combinations. Even when these pieces are not big sellers, they are certainly eye-catching and draw customers to a display of all of my jewelry, like at a craft show.

This is what I'm talking about:


And this too:


If you really want to learn about color theory, get some reasoning behind why these combos work (or don't) you need to head over to my friend Brandi's blog. Not only does she explain color theory in perfectly understandable terms, she offers up some really delicious color palettes based on lovely pieces of art. She also talks about design and photo editing. Trust me, you'll like it over there. She also has a fun Facebook page here.

Wednesday, May 8, 2013

Working on a New Design

Every once in a while an idea strikes and we must drop everything and work on it RIGHT NOW. That exact thing happened one day last week. I was literally in the middle of making a pair of earrings when an image of this pendant popped into my brain. I had to try and make it.


I planned it all out: used a Sharpie to mark where to drill the holes, made 3 copper headpins with the torch (quench them in ice water to get that pretty pink color), cut the lengths of sterling and brass wire. Of course, the last hole I drilled didn't go so well and I scratched the sterling disc very badly. That's OK, this is only the prototype.

The part I didn't plan at all was how to finish the piece. In other words, the back is a mess! The copper headpins became rivets and they are neatly hammered flat on the back. The other wires? They're just there. I'm thinking I need another disc, a bit larger and made from copper, for contrast, that I can rivet to this main piece. I will do it with a spacer of some sort so the wires on the back have a place to hide.

If you have a more creative and artistic idea for how to finish this, I would love to hear it!

Wednesday, May 1, 2013

New Earrings and a New Keyboard!

My online activities have been limited for the past 8 days because my keyboard broke. No, it didn't break all by itself. Jet was under my desk, the cable got stuck on his head somehow, he got spooked and ran. The keyboard suffered.

I went directly to amazon (On my iPad because without a keyboard, going anywhere online is difficult. Couldn't believe amazon.com WAS NOT in my browser history!) and ordered a new, wireless one. It is a dream!! And it wasn't even expensive.

In the meantime, making listings on etsy was tricky business. I had to create the listing on my iPad and save it to draft mode. Then, I would go to my computer and add the photos to the listing. Tedious to say the least. What I learned is that it IS possible, just very inconvenient.

Anyway, here are a couple of pairs of earrings I listed in the past week.


You can click on any of the captions or the photos to go directly to the listings in my etsy shop!