I've never liked the thought of relying on just a couple of sources of income for my little jewelry business. This means that I am forever analyzing (some would say over-analyzing) my business. I study my sales trends, my pricing, my expenses. You name it, I study it. One of the statistics that I find most interesting is how my sales pie is divided between wholesale, consignment, retail shows and etsy.
Here's some data showing how my sales are divvied up:
2007 2008 2009
Retail Shows 58 % 49 % 46 %
Consignment 25 % 25 % 25 %
Wholesale 15 % 12 % 10 %
Etsy 2 % 14 % 19 %
What information can I glean from this little chart? First of all, I like the trends in general. My retail shows are becoming a bit less critical to the success of my business, while etsy grows some in importance. Retail shows are tons of work and as I get older, they're becoming more taxing on me. Some day, I'd like to not do any at all. Of course this won't happen until I'm ready to abandon the Bad Girls of the North business. I don't anticipate this happening in the next few years!
I like the consistency of the consignment percentage over the past 3 years. The wholesale number is a little disturbing, but completely understandable. One of my main wholesale accounts is a gift shop in Denali Park and is driven almost 100% by the tourism trade. Tourism in Alaska was way down in 2009 and this account did not even place an order with me last year. I did pick up 4 new wholesale accounts, but their initial orders were small. This too is understandable. I was an unknown to them and 2009 was a sort of "test run" for my work. I fully anticipate my wholesale numbers to be back around the 15% mark, or close to it, in 2010.
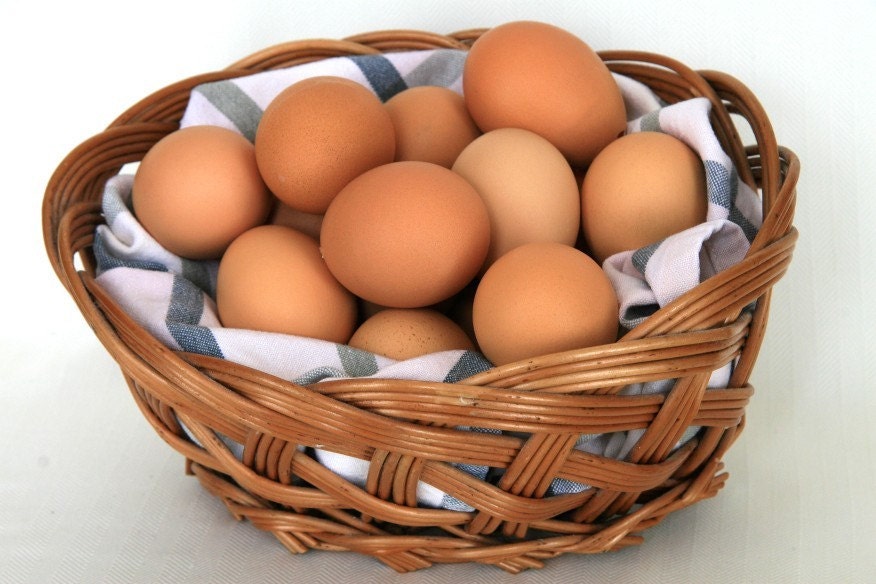
I'm glad I have my eggs spread around in many baskets. One never knows when one source of income will fail to materialize in any given year.
This photo is courtesy of EggArt.
*This post was updated on 4/1/10 to correct an error in the 2009 numbers.
Sunday, January 31, 2010
Friday, January 29, 2010
Tucson Shopping List
Next Tuesday night (right after the 1st episode of the last season of LOST!) I will go to the airport and fly to Tucson for the annual bead/gem/mineral shows. This year, Rick will stay home and my friend Carol will come with me. After 4 days in Tucson, shopping for beads, we will spend 5 days in the Phoenix/Scottsdale area.
Last year, Rick and I discovered Celebrate Art, in north Scottsdale. Carol & I plan to spend a day at that wonderful exhibit. We will also visit the Queen Creek Olive Mill for a tour and possibly lunch one day. I used to live in Scottsdale, so I know there are plenty of great eateries there. We will visit as many as is humanly possible!
Back to the subject at hand, a shopping list for the bead shows. So far, I've noted that I absolutely need the following items:
peridot: briolettes and large rondelles
prehnite
iolite
garnets: large briolettes
smoky quartz: anything that catches my eye
tourmaline: large briolettes
cabochons for filigree wrapping
Noticeably absent from the list are pearls. I have so many pearls, that I don't think I could use them all in my lifetime.
What else do you think I need?
Thursday, January 28, 2010
Finishing a Necklace with Bead Tips
Finishing a strung
Using chain nose pliers, make a bend in your string material, leaving about a 1” tail. Insert this bend into a small crimp bead. Crimp, using 2-stage crimping pliers. This will leave the crimp bead round-ish.

String a bead tip so that the crimp is nestled inside the clamshell and both ends of stringing material go through the hole. Close the bead tip gently, but securely with chain nose pliers.
String the first bead, embedding the tail end through it. Trim that tail end close. String the remainder of your beads, ending with another bead tip. Tie an overhand knot and using a heavy needle or an awl, work the knot into the bead tip as far as you can. Tie another overhand knot OVER the first one. This can be tricky and may take some practice. Use the needle – it will help direct the knot where you want it. Insert the tail end of the wire back through the hole in the bead tip and through the last bead strung.
Add a generous dab of glue to the knot. I use Hypo-Cement because it has a narrow applicator which is perfect for inserting into the bead tip. Close this bead tip as you did the other.
Your piece is now ready for the clasp set of your choice.
Tuesday, January 26, 2010
The Look of Love . Mixed Media Necklace
The team I belong to on etsy, Artisan Beaders Street Team, has started a Valentine's Day themed challenge. This is not a promotional challenge, just an design challenge, hopefully to get us off our butts and create something new!
I thought about the idea and decided to go a little unconventional. I created a mixed media necklace featuring a vintage photo of a married couple from an earlier time. Click on the photo to go to the listing and find out a bit more about the materials and techniques I used to make this one-of-a-kind necklace.
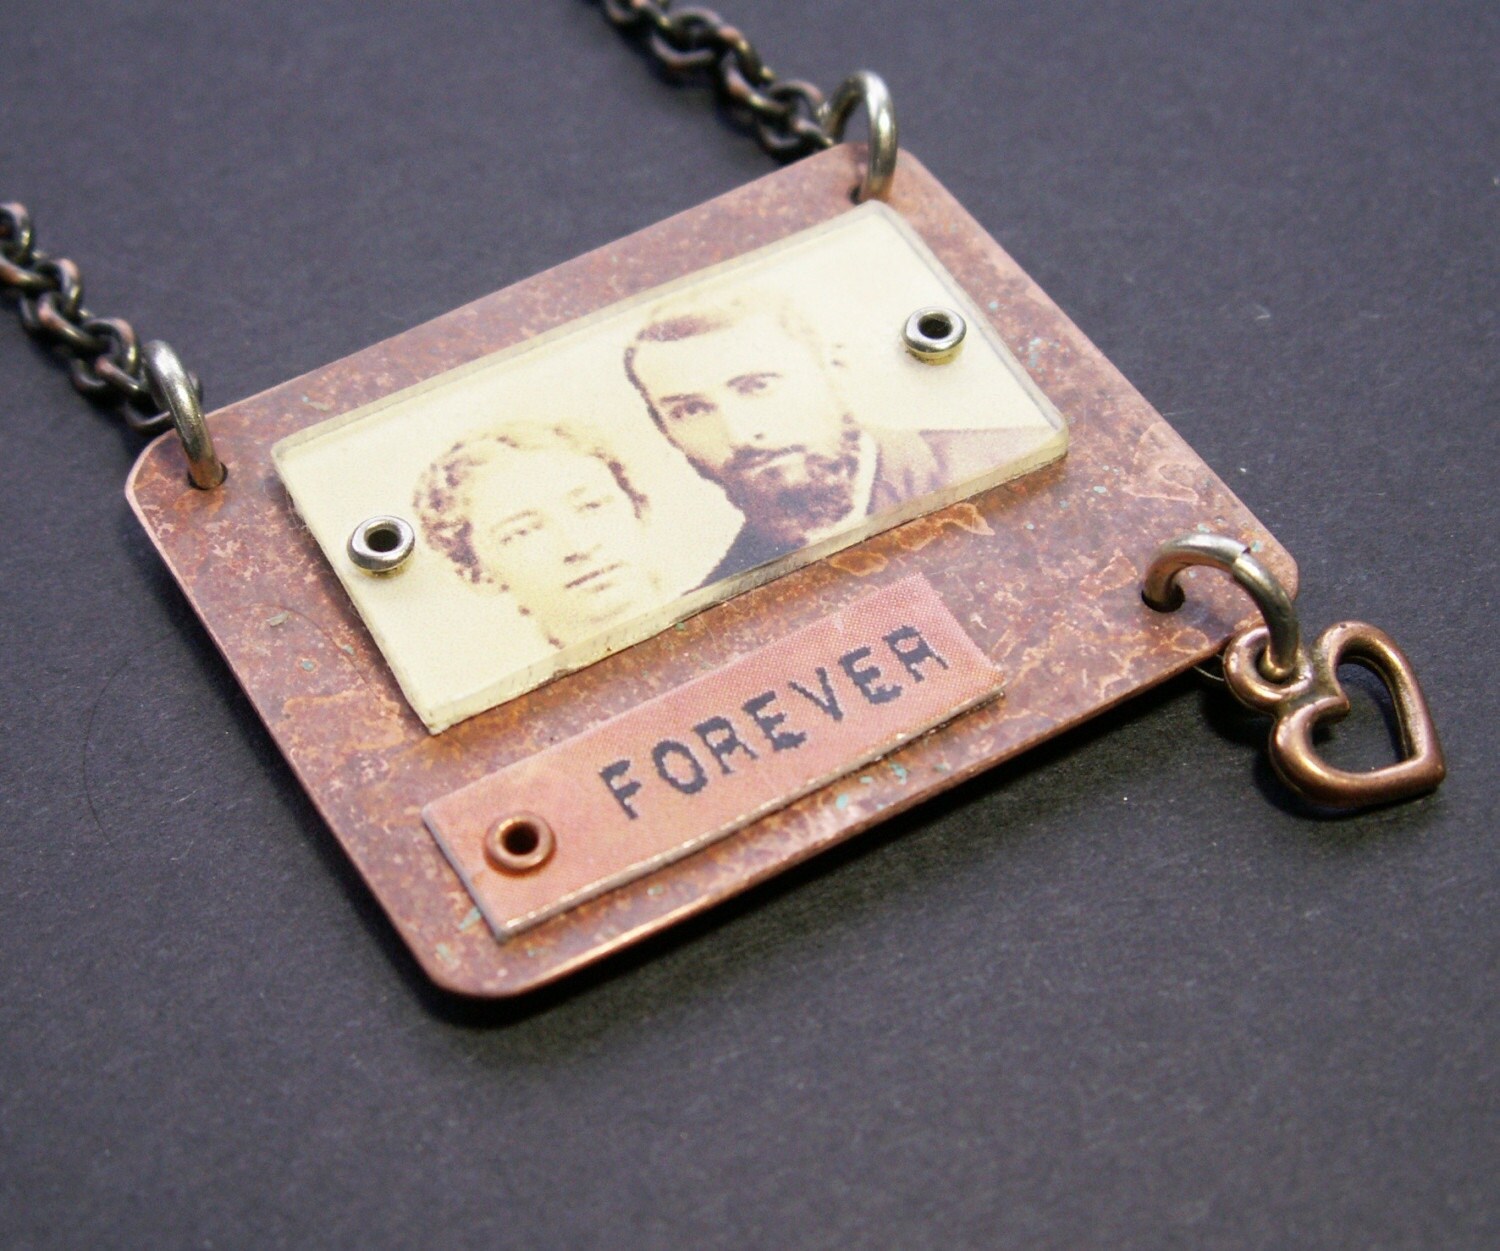
I thought about the idea and decided to go a little unconventional. I created a mixed media necklace featuring a vintage photo of a married couple from an earlier time. Click on the photo to go to the listing and find out a bit more about the materials and techniques I used to make this one-of-a-kind necklace.

Monday, January 25, 2010
We Made Cupcakes (and Marshmallows)
My BGOTN business partner Carol, and I continually fantasize about having a food booth at the State Fair. Deep down, we know we don't have the energy or the inclination to really do this, but that doesn't keep us from dreaming up the perfect fair food.
We had been discussing cupcakes baked in ice cream cones for several months now. It's perfect for the fair, no? It does not require utensils and it can be eaten with one hand. The other day, I went to her house for a day in the kitchen. We experimented with this concept. The cupcakes were easy enough to bake. While we did not decorate them, we knew this would be vital to their success. They tasted fine when just cooled.
The experiment had to go further, however. How would these things taste after they sat for a few hours? The answer is: disgusting. The cone part absorbs quite a bit of moisture from the cupcake and becomes, well, beyond soggy. Again, disgusting.
We also made marshmallows -- 2 different recipes. These were absolutely delicious and have kept quite well, even after several days. How about 3 of these on a skewer -- marsh-kabobs anyone? These too can be eaten with one hand and do not require any utensils.
Carol of course made me the most delicious lunch: a Tuscan tart. That's really the best reason to spend the day at Carol's. She's absolutely the best cook I know. (Patty - I'm sure your cooking is on par with Carol's, but since I have not tasted it, Carol has to get The Gold!)

We had been discussing cupcakes baked in ice cream cones for several months now. It's perfect for the fair, no? It does not require utensils and it can be eaten with one hand. The other day, I went to her house for a day in the kitchen. We experimented with this concept. The cupcakes were easy enough to bake. While we did not decorate them, we knew this would be vital to their success. They tasted fine when just cooled.

The experiment had to go further, however. How would these things taste after they sat for a few hours? The answer is: disgusting. The cone part absorbs quite a bit of moisture from the cupcake and becomes, well, beyond soggy. Again, disgusting.
We also made marshmallows -- 2 different recipes. These were absolutely delicious and have kept quite well, even after several days. How about 3 of these on a skewer -- marsh-kabobs anyone? These too can be eaten with one hand and do not require any utensils.
Carol of course made me the most delicious lunch: a Tuscan tart. That's really the best reason to spend the day at Carol's. She's absolutely the best cook I know. (Patty - I'm sure your cooking is on par with Carol's, but since I have not tasted it, Carol has to get The Gold!)

Sunday, January 24, 2010
Cajun Meatloaf
When I was a kid, the thought of meatloaf was enough to make me gag. If, in answer to the question "what's for dinner?", my mother's answer was meatloaf, my brother and I would run in to the other room making nasty faces. I have grown up to love meatloaf. Sorry mom.
Sometime during this period of growing up, I discovered this wonderfully different meatloaf recipe. I don't remember the source, but I suspect it was a magazine. I didn't take a photo because meatloaf just doesn't photograph well. It looks kind of gross. I'll spare you.
Cajun Meatloaf
1-2 TBSP oil
2 carrots, peeled and diced (and I do mean small dice)
1 stalk celery, diced
1 red bell pepper, diced
1 onion, finely chopped
2 cloves garlic, pressed
2 lbs ground beef
1/2 cup ketchup
2 eggs
1 cup breadcrumbs (I use Progresso with Italian seasoning)
1/4 cup milk
1 TBSP Worcestershire sauce
1 tsp salt
1 tsp ground cumin (this is the secret ingredient)
1/2 tsp pepper
1/2 tsp thyme
1/2 tsp nutmeg (this is the other secret ingredient)
1/2 tsp cayenne pepper
Saute all the vegetables in the oil until tender. Cool. Add the garlic. In a large bowl, mix the meat, ketchup, eggs, bread crumbs, Worcestershire and spices. Add the cooked vegetables. Place in large loaf pan. Bake at 375 for 1 hour and 15 minutes. Let stand 15 minutes before slicing. It will hold together better on the second day.
Friday, January 22, 2010
Alaska Bead Society Meeting
This past Tuesday evening was Techniques Night at the Alaska Bead Society meeting. Each time we have a techniques night, there are several tables set up with volunteer demonstrators. Members can select which techniques they would like to learn. I was asked to be one of the demonstrators and I agreed. I've done this before and really enjoyed it.
I taught several members how to make their own sterling silver earwires. Everyone had their own tools, but I supplied the materials, hammer, bench block and Dremel.
This is the first session. Left to right: Kim, me, Linda and Stetson.
 During the next session, we did a different style of earwire. Left to right: Linda (hands only), Stetson, JoEllen, Kim, me.
 We had some overlap in our sessions, so everyone could make both styles. All in all, it was a really fun evening. Especially when Julie came by with a bucket of those delicious bite-sized cream puffs!
I taught several members how to make their own sterling silver earwires. Everyone had their own tools, but I supplied the materials, hammer, bench block and Dremel.
This is the first session. Left to right: Kim, me, Linda and Stetson.
 During the next session, we did a different style of earwire. Left to right: Linda (hands only), Stetson, JoEllen, Kim, me.
 We had some overlap in our sessions, so everyone could make both styles. All in all, it was a really fun evening. Especially when Julie came by with a bucket of those delicious bite-sized cream puffs!
Thursday, January 21, 2010
Red Beans!
I bet you thought this was another food post. Nope, not.
The shape of the glass beads I used for these earrings remind me of beans, red beans. They're actually a bit brighter than the last batch of red beans I cooked :)
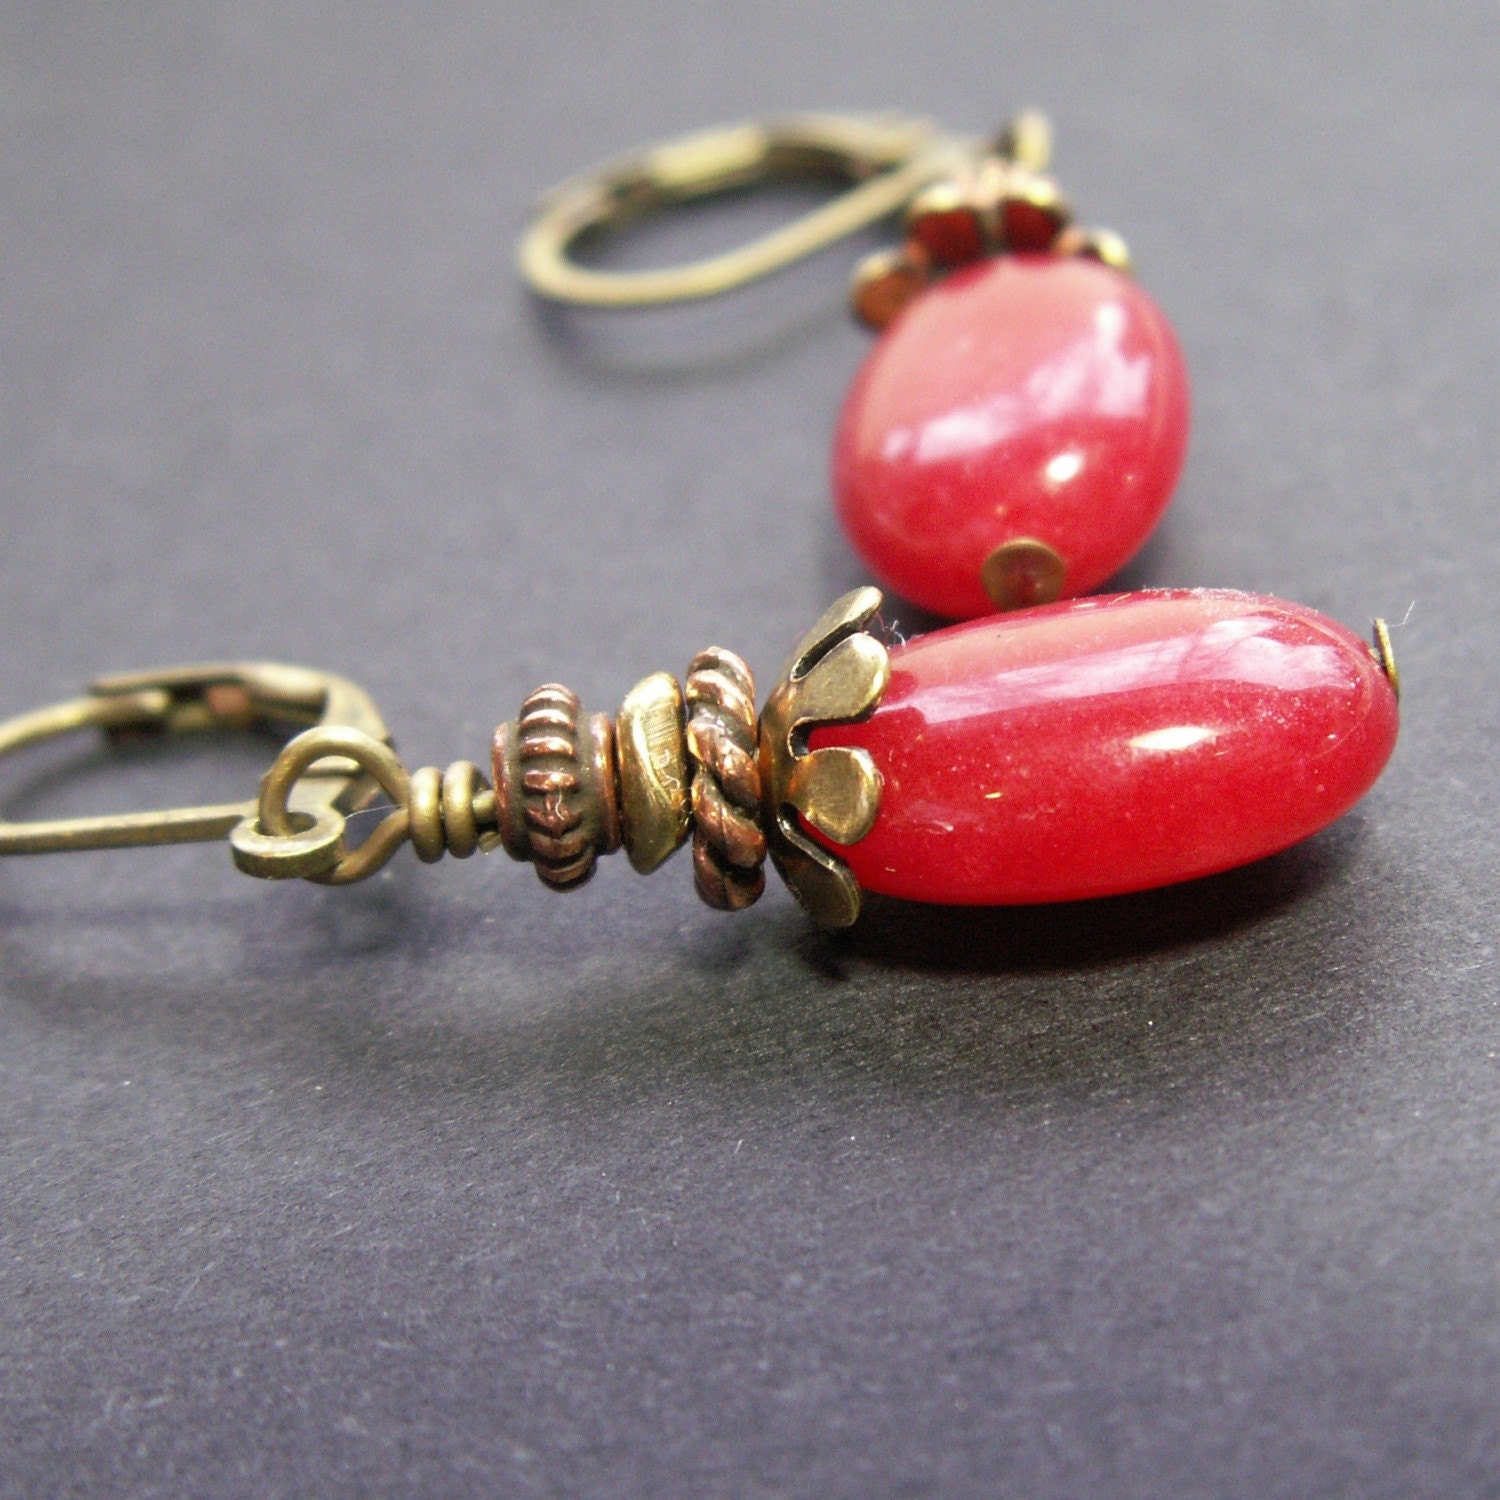 The beads are smooth an glossy. I've teamed them with copper and brass beads for a great look. They are for sale in my etsy shop.
The shape of the glass beads I used for these earrings remind me of beans, red beans. They're actually a bit brighter than the last batch of red beans I cooked :)
 The beads are smooth an glossy. I've teamed them with copper and brass beads for a great look. They are for sale in my etsy shop.
Wednesday, January 20, 2010
Finishing a Multi Strand Cord Necklace

I make lots and lots of multi-strand necklaces with nylon cord and glass beads. This is one of the products that I wholesale in large quantities, so it was in my best interest to develop a surefire method of finishing these necklaces.
There are several brands of strong nylon cord on the market. My favorite by far is C-Lon, which I purchase from Marion Jewels in Fiber. My local bead store carries it too, but Marion stocks the entire range of colors, which is astounding.
After you've strung your beads, align your cords and tie an overhand knot with all 3 (or however many you have) strands. Tighten this knot.

Tie a second overhand knot directly over the first one. Before tightening this knot, insert a 2 1/2" - 3" length of wire (I use 22 ga sterling silver) through it. Pull this knot tight, incorporating the wire.

Bend the wire around the double knot and make a wrapped loop.

Add a very generous amount of glue (Hypo Cement is my glue of choice) all over and around this knot. Be sure to get some glue on the wire as well. Don't worry about how this looks -- it will all be hidden from view. Trim the excess cord to about 3/8". Don't forget to clean the glue off your trimmers or your scissors!

Before the glue on the cord is completely dry, insert the wire into a cone end. I use 1/2" sterling silver cones. Be sure to get the entire knot and the loose cord ends into the cone. If necessary, push the loose ends in with a toothpick or wooden skewer, or whatever is handy!

Make a wrapped loop at the very top of the cone. Repeat this process on the other end of the necklace.

Add your clasp of choice and your necklace is ready to be worn.

Tuesday, January 19, 2010
Two New Scarves
I've been knitting up a storm lately. Knitting is my evening activity. I do it while watching movies or the few tv shows I actually like. I wish I could say that it keeps me from snacking in the evenings, but that would be a lie.
This first scarf is a multi-directional diagonal pattern and it looks much more difficult than it is. It's the very first pattern I ever knitted, about 4 years ago. It is well suited to a variegated yarn, such as Cashmere Island from Noro, which is what I used here. Over the past few years, I've knitted this pattern with several other variegated yarns: Silk Garden and Kureyon, also from Noro.

This next scarf is the simple seed stitch. It's a time consuming stitch, but the effect is well worth the time. It's very bumpy and when done with a substantial yarn like Mirasol (merino wool, alpaca and silk) it has quite a cushion-y feel. My guess is that this scarf would keep you warm when it's -20 degrees! The color is also quite incredible. At first glance, you might think it is simply brown. When viewed closer, you can see undertones of burgundy.


*Thanks to all of you who expressed concern for Xena's well being. She is doing better, but this thing is not over yet. We're keeping a close eye on her and continuing with the current medicines. I'll keep you posted.
This first scarf is a multi-directional diagonal pattern and it looks much more difficult than it is. It's the very first pattern I ever knitted, about 4 years ago. It is well suited to a variegated yarn, such as Cashmere Island from Noro, which is what I used here. Over the past few years, I've knitted this pattern with several other variegated yarns: Silk Garden and Kureyon, also from Noro.

This next scarf is the simple seed stitch. It's a time consuming stitch, but the effect is well worth the time. It's very bumpy and when done with a substantial yarn like Mirasol (merino wool, alpaca and silk) it has quite a cushion-y feel. My guess is that this scarf would keep you warm when it's -20 degrees! The color is also quite incredible. At first glance, you might think it is simply brown. When viewed closer, you can see undertones of burgundy.


*Thanks to all of you who expressed concern for Xena's well being. She is doing better, but this thing is not over yet. We're keeping a close eye on her and continuing with the current medicines. I'll keep you posted.
Sunday, January 17, 2010
New Year :: New Designs
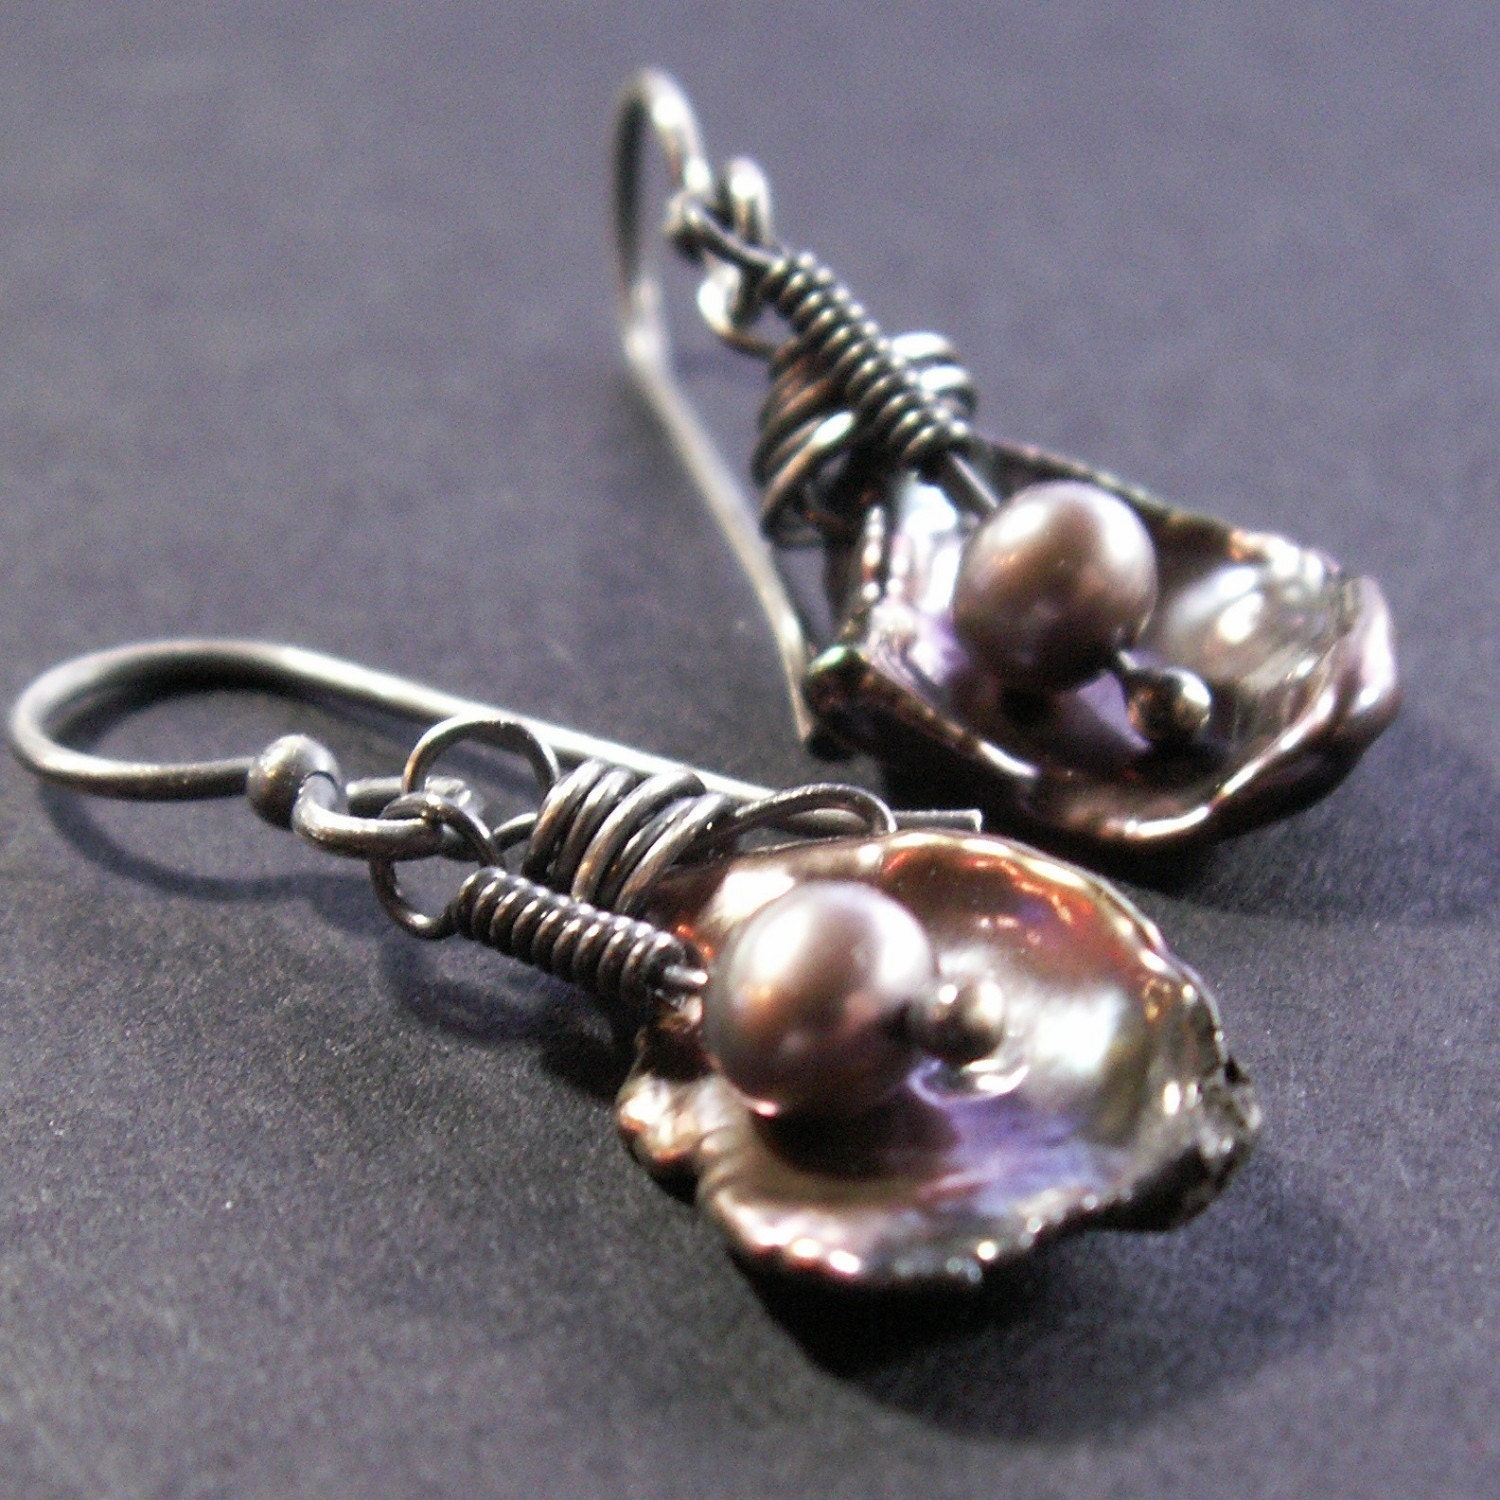
This is the time of year when I try to come up with new jewelry designs. I feel like "time is on my side" and I can just try out some new ideas without worrying about upcoming shows or building tons of inventory.
These new earrings feature pearls that have been in my possession for quite some time. It's amazing to me that I've been looking at these keshi pearls for at least 4 years and never thought to use them like this before. Lesson learned -- look at your supplies with a fresh perspective. You never know what may come of it!
Click on the photo to go directly to the listing in my etsy shop. You may want to consider signing up for my newsletter (form is to the right). I'm having a huge sale right now!
Saturday, January 16, 2010
The Xena Report
Hi. Woof. Xena here. I've been under the weather for over a month now. But don't worry, mom and dad have the best doctor on my case and he's determined to figure out what's wrong with me.

I've been having, well, lots of tummy distress. I've been throwing up. A lot. Sometimes twice a day.
We first went to thebad place doctor in mid December. Mommy had to get me some Pepcid-AC. I think it's people medicine, but dogs can take it too. All I know about pills is that they always come wrapped in cheese. Yum, cheese.
That stuff worked for a couple of weeks and then I started getting sick again, even while on the medicine. We went back to the doctor on Christmas Eve and he gave us (well, the doctor never really GIVES us anything) some new medicine to take. That worked for a couple of weeks and then I starting getting sick AGAIN. This is especially troublesome when it happens in the middle of the night. Sorry mom and dad. I feel really bad about this, but it's not my fault.

Yesterday we went to the doctor yet again and got a new liquid medicine. Mommy said it smells like cake. If that's what cake tastes like, I sure don't know what all the fuss is about. We all hope that this new medicine works. Oh, and I'm still taking the other 2 medicines too! That's a lot of cheese.
One of the bad side effects of this sickness is that they've completely taken me off cookies. No cookies at all. Never. This is just cruel. My appetite is still strong and I need even MORE food since I've been losing it so frequently. This is not fair. The doctor said dog cookies are the equivalent (big word for a dog, huh?) of donuts for people. I disagree. Donuts are deep fried and greasy, from what I hear. Dog cookies are baked and very dry. Sheesh, will someone please talk to this so-called doctor?

Nobody is sure what caused this in the first place. One of the ideas is that when I lick my paws to get rid of the snow and ice, I've ingested (another big word) some road salt, which could cause this to happen. Now I have to wear these stupid little booties on my feet when we walk along the road. They make me look like an over-groomed poodle. Pffft. I wouldn't let anyone take my picture wearing those ridiculous things.
*All of these pictures are pretty old. I'm much more beautiful now.
Thanks for listening.
Love,
Xena

I've been having, well, lots of tummy distress. I've been throwing up. A lot. Sometimes twice a day.
We first went to the
That stuff worked for a couple of weeks and then I started getting sick again, even while on the medicine. We went back to the doctor on Christmas Eve and he gave us (well, the doctor never really GIVES us anything) some new medicine to take. That worked for a couple of weeks and then I starting getting sick AGAIN. This is especially troublesome when it happens in the middle of the night. Sorry mom and dad. I feel really bad about this, but it's not my fault.

Yesterday we went to the doctor yet again and got a new liquid medicine. Mommy said it smells like cake. If that's what cake tastes like, I sure don't know what all the fuss is about. We all hope that this new medicine works. Oh, and I'm still taking the other 2 medicines too! That's a lot of cheese.
One of the bad side effects of this sickness is that they've completely taken me off cookies. No cookies at all. Never. This is just cruel. My appetite is still strong and I need even MORE food since I've been losing it so frequently. This is not fair. The doctor said dog cookies are the equivalent (big word for a dog, huh?) of donuts for people. I disagree. Donuts are deep fried and greasy, from what I hear. Dog cookies are baked and very dry. Sheesh, will someone please talk to this so-called doctor?

Nobody is sure what caused this in the first place. One of the ideas is that when I lick my paws to get rid of the snow and ice, I've ingested (another big word) some road salt, which could cause this to happen. Now I have to wear these stupid little booties on my feet when we walk along the road. They make me look like an over-groomed poodle. Pffft. I wouldn't let anyone take my picture wearing those ridiculous things.
*All of these pictures are pretty old. I'm much more beautiful now.
Thanks for listening.
Love,
Xena
Friday, January 15, 2010
My Anniversary Present
On January 6, Rick and I celebrated our anniversary. I told him not to get me anything, mainly because I had no idea what to get for him. I feel like we're past tangible gifts. I'd rather focus on having a nice day together, sharing some terrific meals and enjoying everyday conversation.
I think I've now changed my mind! Look at this ring he made for me. I absolutely adore it. It has become my new favorite piece of jewelry and my new wedding band. The domed circle is mokume gane and the band is argentium silver.


Rick can be a real sweetheart sometimes. And then other times, well, that's a story for another day.
I think I've now changed my mind! Look at this ring he made for me. I absolutely adore it. It has become my new favorite piece of jewelry and my new wedding band. The domed circle is mokume gane and the band is argentium silver.


Rick can be a real sweetheart sometimes. And then other times, well, that's a story for another day.
Thursday, January 14, 2010
January Birthstone -- Garnet
In honor of all with January birthdays (me included!), I'll share with you some new earrings in my etsy shop featuring garnets.
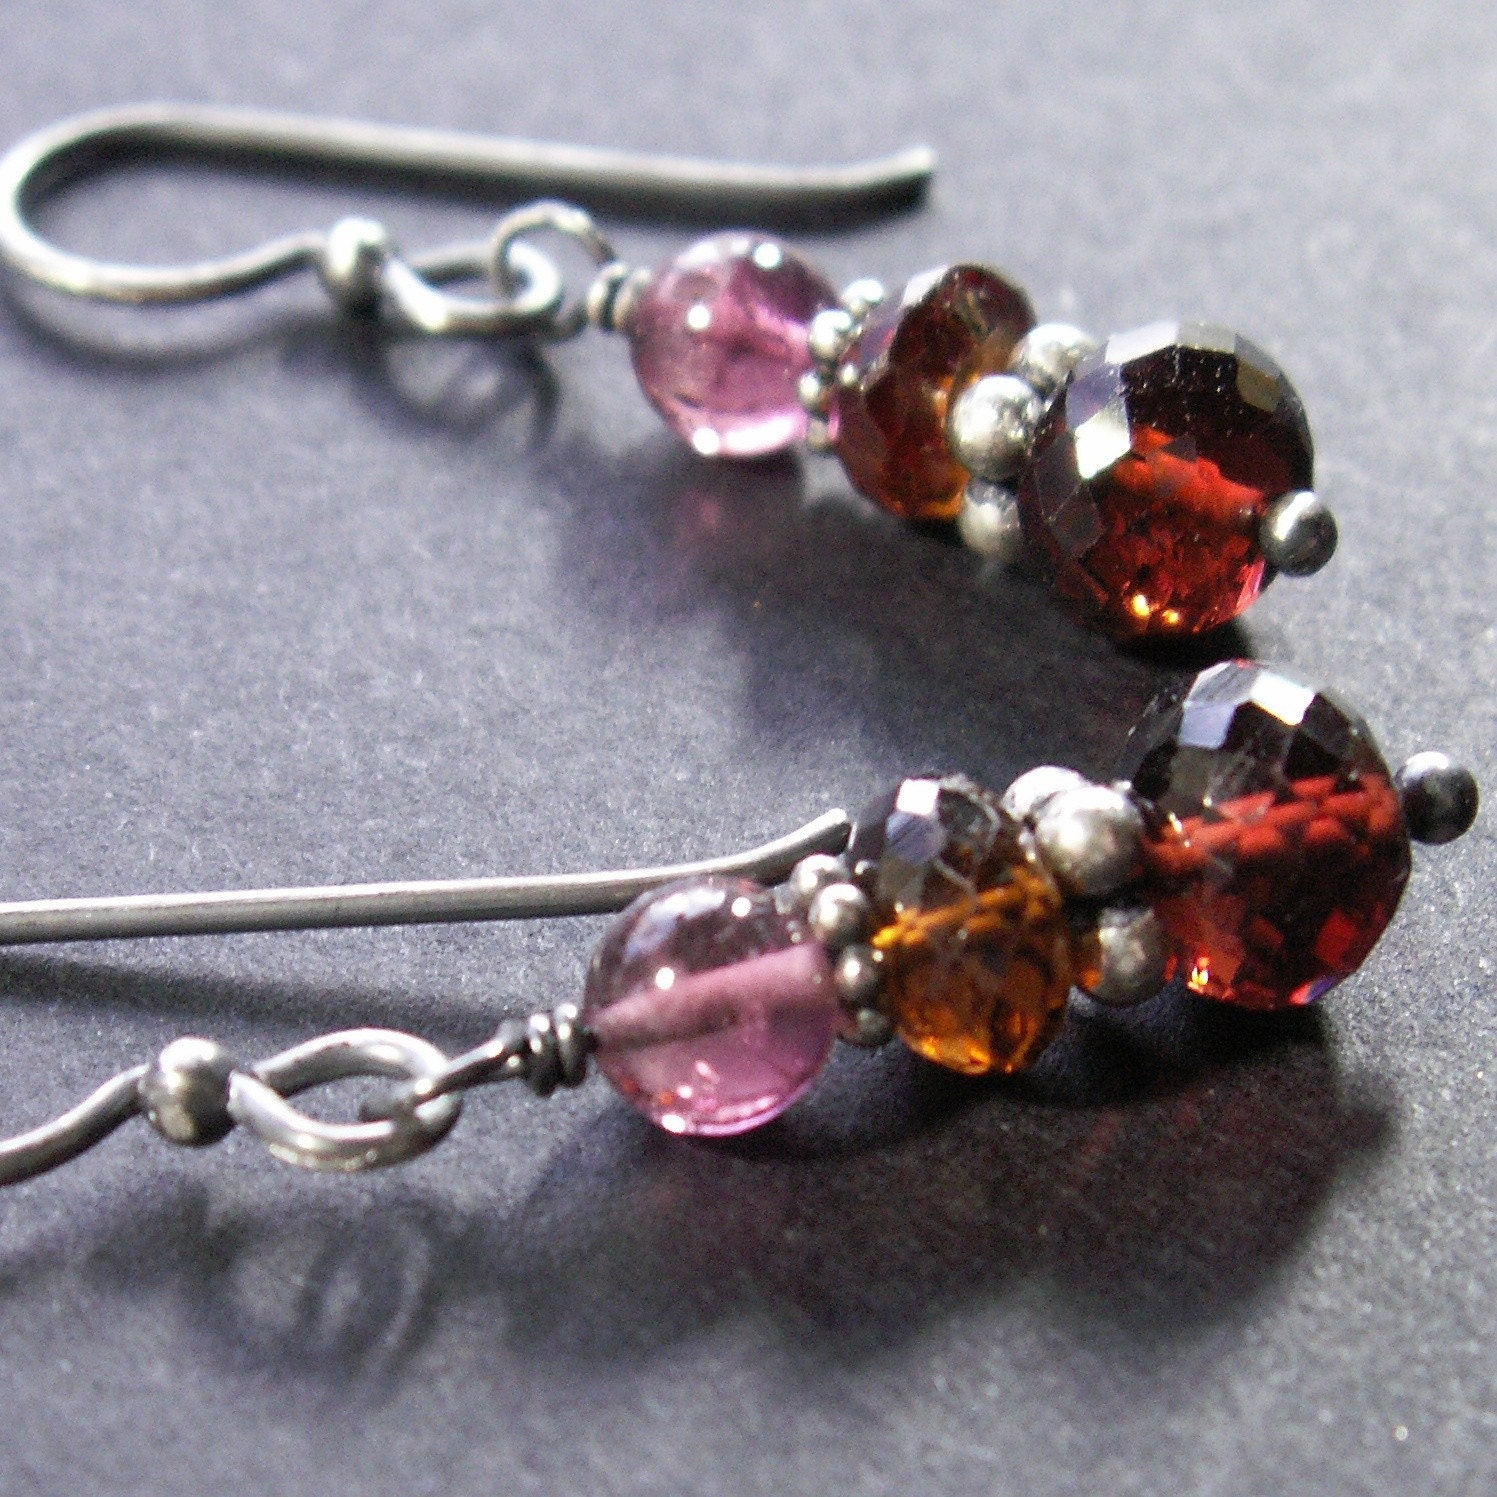
This first pair has both traditionally colored garnets in a deep burgundy color. Above them are the less common Mandarin garnets which are decidedly burnt orange in color. At the very top, I added a raspberry pink tourmaline bead.
Next is a more conservative pair of earrings. The bottom rondelle is the same as the ones in the first pair of earrings, but I get a completely different look by pairing them with a different set of beads and findings. Above the rondelle is a Hill Tribe silver beadcap with a leaf motif and a smaller round garnet bead.
Happy birthday to all January babies!
Click on either of the photos to go directly to the listings in my etsy shop.
This first pair has both traditionally colored garnets in a deep burgundy color. Above them are the less common Mandarin garnets which are decidedly burnt orange in color. At the very top, I added a raspberry pink tourmaline bead.

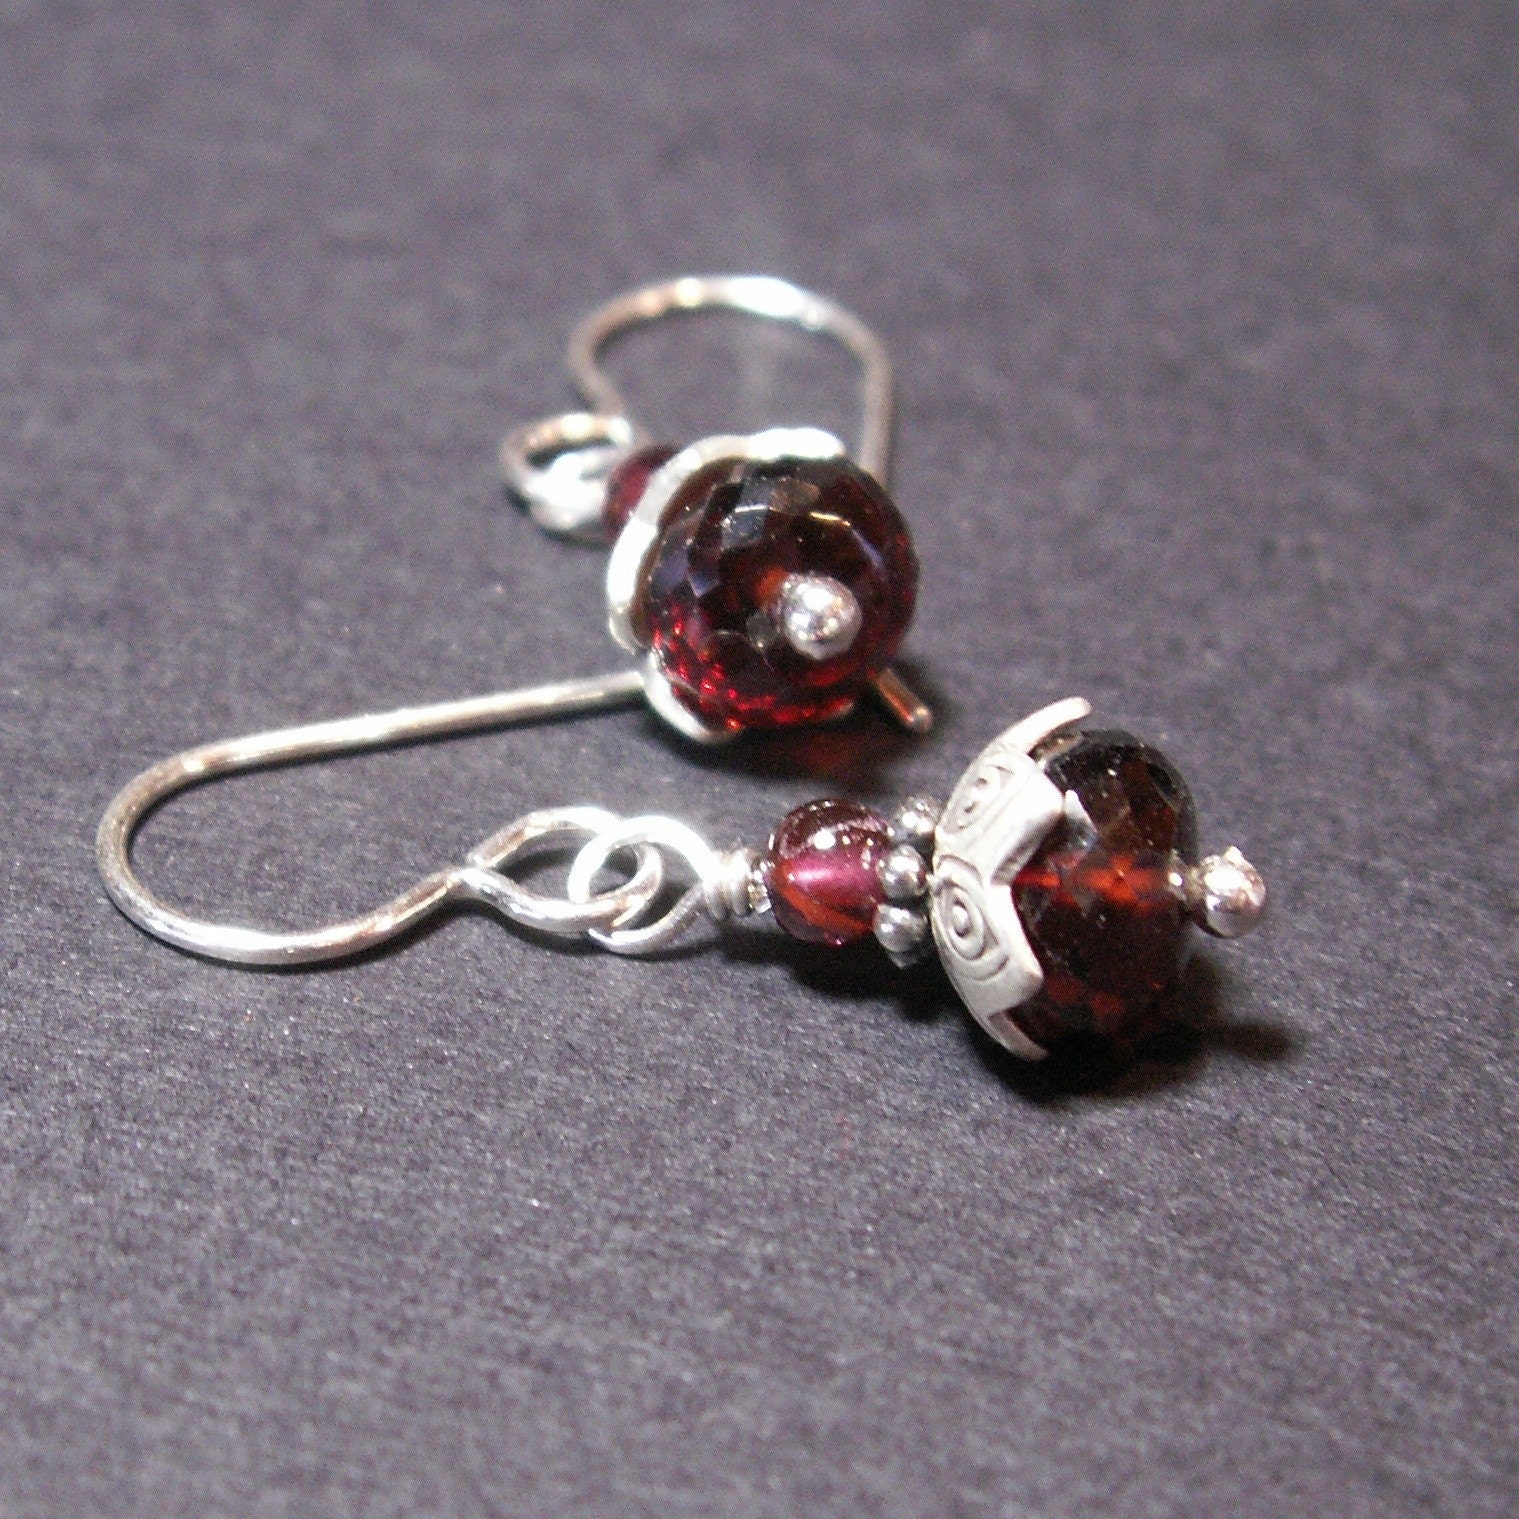
Next is a more conservative pair of earrings. The bottom rondelle is the same as the ones in the first pair of earrings, but I get a completely different look by pairing them with a different set of beads and findings. Above the rondelle is a Hill Tribe silver beadcap with a leaf motif and a smaller round garnet bead.

Happy birthday to all January babies!
Click on either of the photos to go directly to the listings in my etsy shop.
Sunday, January 10, 2010
More Hill Tribe Silver from Artbeads
I have made 2 more pairs of earrings with my new beadcaps from Artbeads. Their selection of Hill Tribe Silver is quite extensive. These beadcaps were too sweet to resist.
For this first pair, I selected faceted vintage glass beads in a deep olive green. I topped them with Hill Tribe beadcaps with a flower motif, followed by an olive green glass bead and another sterling silver bead.

Next, I chose 8mm amethyst beads and topped them with a beadcap with a scallop design and a smaller amethyst bead.

One observation about these Hill Tribe components is that they can be a bit irregular. I have found that the hole in the bead cap is sometimes off-center. This makes it so the cap does not sit on the bead properly. I have yet to figure out how to use those particular beadcaps.
Disclosure: Artbeads invited me to join their blogging community. I receive these products free of charge in return for honest reviews. I have not been paid for doing this.
For this first pair, I selected faceted vintage glass beads in a deep olive green. I topped them with Hill Tribe beadcaps with a flower motif, followed by an olive green glass bead and another sterling silver bead.

Next, I chose 8mm amethyst beads and topped them with a beadcap with a scallop design and a smaller amethyst bead.

One observation about these Hill Tribe components is that they can be a bit irregular. I have found that the hole in the bead cap is sometimes off-center. This makes it so the cap does not sit on the bead properly. I have yet to figure out how to use those particular beadcaps.
Disclosure: Artbeads invited me to join their blogging community. I receive these products free of charge in return for honest reviews. I have not been paid for doing this.
Friday, January 8, 2010
Aqua Trio . Necklace
Since Pantone has declared that turquoise will be The Color of 2009, I thought I would share this new necklace with you. Turquoise is perennially popular in jewelry and fashion, and this necklace fits right it.
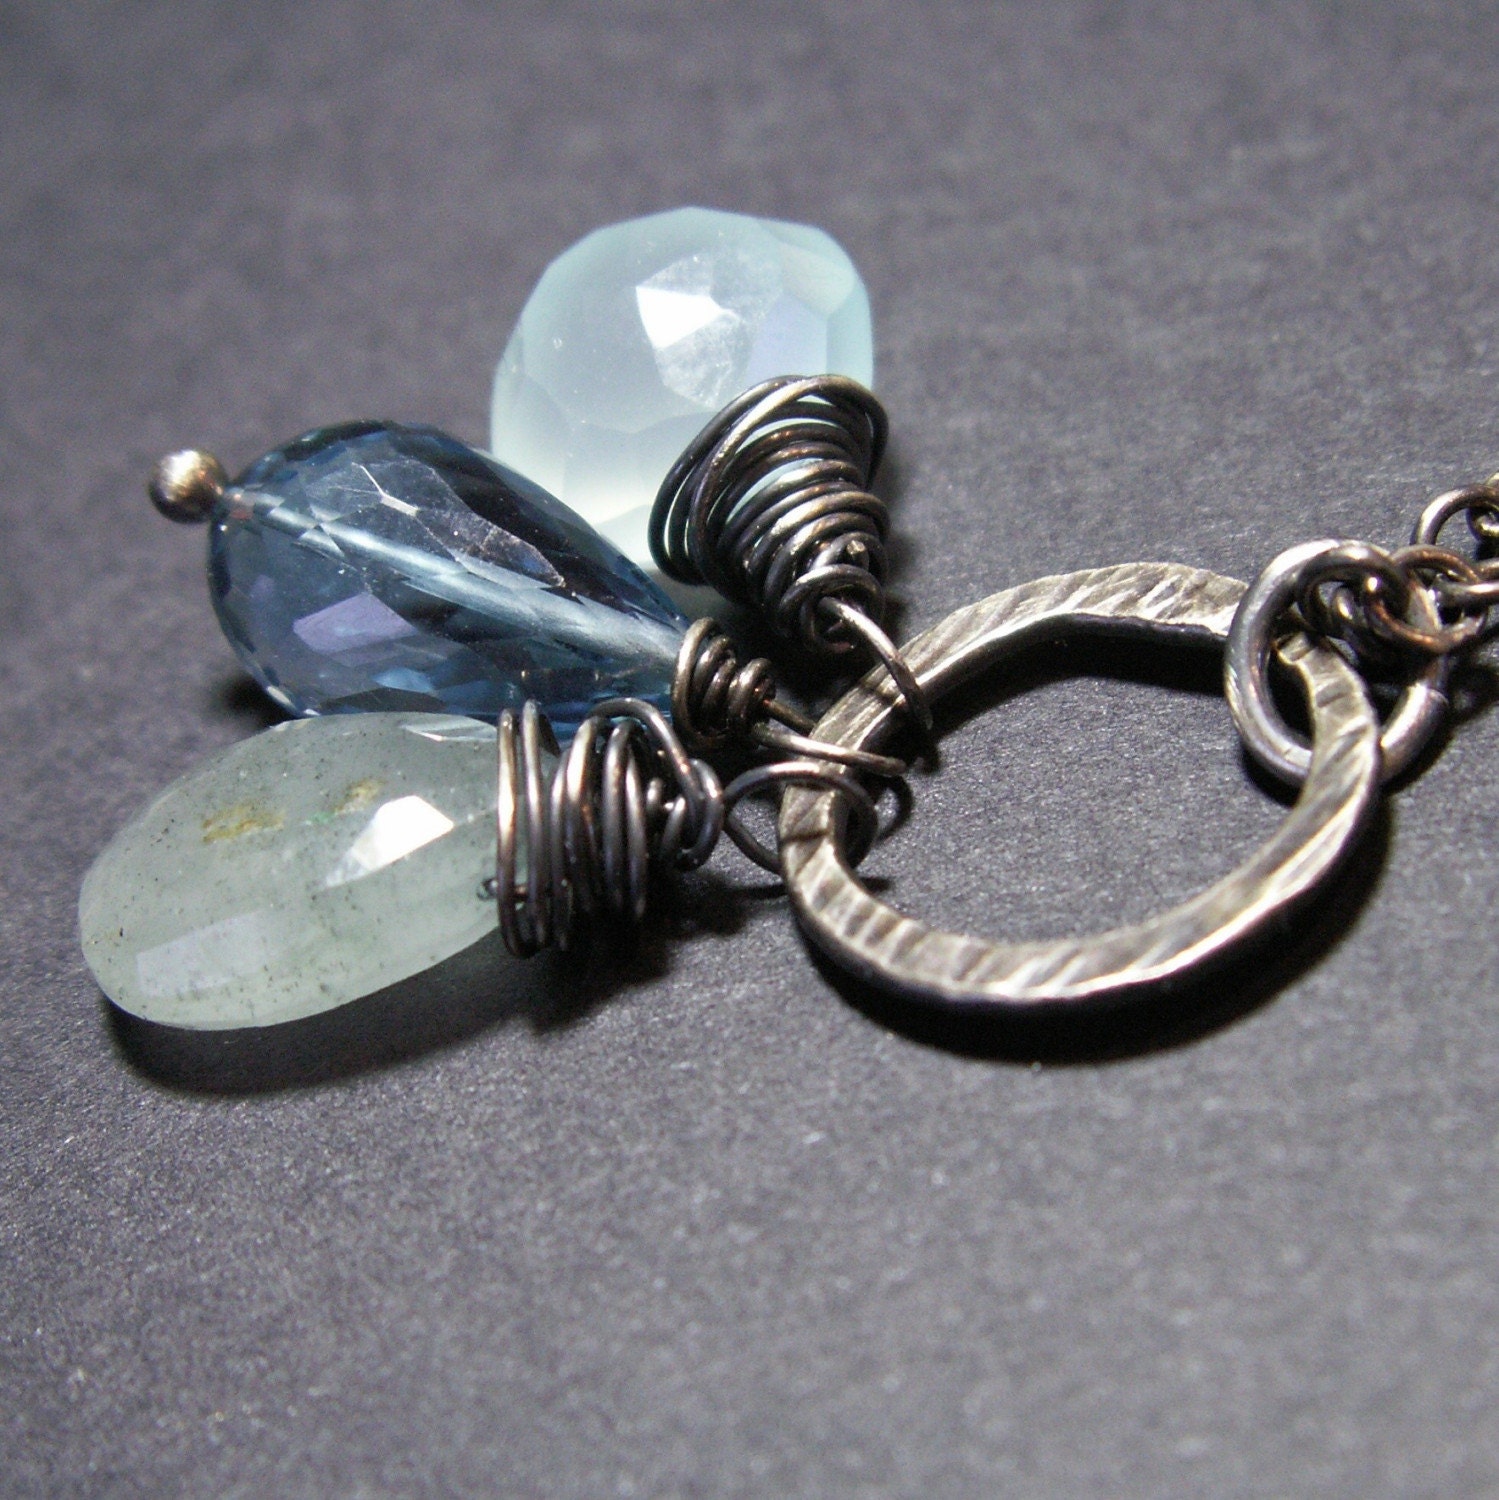
The aqua trio is hanging from a fused circle of fine silver that I textured with a riveting hammer. The three stones are moss aquamarine, London blue topaz and chalcedony. There isn't any turquoise in the necklace at all, just stones sharing that lovely color.
If you want to see some true turquoise, here is a pair of earrings to fit the bill.
 Click on either of these photos to go directly to the associated listing.
The aqua trio is hanging from a fused circle of fine silver that I textured with a riveting hammer. The three stones are moss aquamarine, London blue topaz and chalcedony. There isn't any turquoise in the necklace at all, just stones sharing that lovely color.

If you want to see some true turquoise, here is a pair of earrings to fit the bill.
 Click on either of these photos to go directly to the associated listing.
Wednesday, January 6, 2010
Birch-Nut Squash Recipe
I've blogged before about my friends Dulce & Michael East who own Kahiltna Birchworks. They always give out a little collection of recipes with their syrup. The other day, I actually tried one! It was fabulous.
Baked Birch-Nut Squash
2-3 acorn, butternut or delicata squash (I used 2 delicata)
1 apple, peeled and diced
1/4 cup butter (I used about half that amount)
1/4 cup birch syrup
2 TBSP honey
1/2 tsp cinnamon
1/2 tsp ground ginger (I used fresh, just because I had some on hand)
1 cup chopped walnuts or pecans
Cut squash in half. Scoop out seeds. Place in pan and bake at 350 for 30 minutes .
Melt butter in saucepan.. Add the rest of the ingredients . Simmer for about 5 minutes. Spoon into squash halves and bake about 20 minutes longer.
This was a great accompaniment to the sauteed chicken breasts and tossed salad that I served the other night.
Tuesday, January 5, 2010
Artbeads.com - Silver
Once again, I was invited by Artbeads to sample some of their amazing bead selection, this time from their silver collection. In exchange for these free samples, I have agreed to blog about them here.
Those of you that read my blog regularly know that I favor simple designs. The Thai silver beadcaps that I chose from Artbeads are perfect for my designs. Here's a photo of the 4 different items I selected: 3 different styles of stamped beadcaps and some multi purpose Bali silver spacers, which one can never have too many of.

So far, I've made two pairs of earrings with these silver products. These spacers are so perfect for larger beads. Here's the link to all of the Bali silver offerings at the Artbeads website. I selected some decent sized pink quartz cubes and pink freshwater pearls, separated by the Bali spacers. They add just the right accent.

Next, I selected the beadcaps with the leaf design, which can be found at the Artbeads website under Hill Tribe silver beads and components. I used beautifully plump garnet rondelles to sit below the beadcaps. They fit perfectly under the beadcaps. I then added a small Bali spacer and a 4mm garnet bead. Sweet and simple!

Those of you that read my blog regularly know that I favor simple designs. The Thai silver beadcaps that I chose from Artbeads are perfect for my designs. Here's a photo of the 4 different items I selected: 3 different styles of stamped beadcaps and some multi purpose Bali silver spacers, which one can never have too many of.

So far, I've made two pairs of earrings with these silver products. These spacers are so perfect for larger beads. Here's the link to all of the Bali silver offerings at the Artbeads website. I selected some decent sized pink quartz cubes and pink freshwater pearls, separated by the Bali spacers. They add just the right accent.

Next, I selected the beadcaps with the leaf design, which can be found at the Artbeads website under Hill Tribe silver beads and components. I used beautifully plump garnet rondelles to sit below the beadcaps. They fit perfectly under the beadcaps. I then added a small Bali spacer and a 4mm garnet bead. Sweet and simple!

Monday, January 4, 2010
Pink and Black . Necklace
Recently listed in my etsy shop, this necklace features a classic color combination, with a twist. The briolette of pink opal has some black and caramel inclusions -- caramel being the "twist". I think this must make it a less than perfect specimen, but I think the colors add quite a bit of interest.
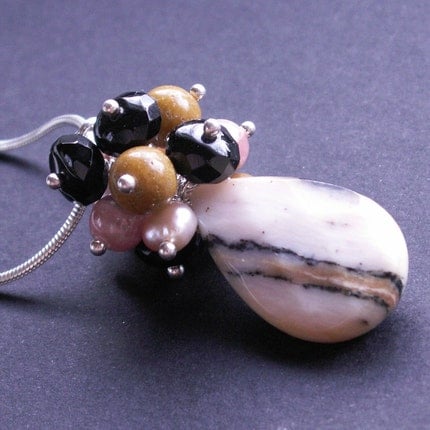
The cluster on top is composed of faceted black onyx, pink freshwater pearls, rhodochrosite and camel colored agate. Click on the photo to go directly to the listing.

The cluster on top is composed of faceted black onyx, pink freshwater pearls, rhodochrosite and camel colored agate. Click on the photo to go directly to the listing.
Sunday, January 3, 2010
New Book for a New Year
The other day, while at Barnes & Noble, I saw this book in the crafting section. I think I had read about it somewhere -- Somerset Studio, perhaps. I was intrigued by the title and I'm always on the lookout for materials to spark my creativity. The author, Rice Freeman-Zachery is well known in the crafting world and has written other books and numerous articles for Belle Armoire and Somerset Studio.

The book appears to focus on creativity from the perspective of a wide variety of artists, working in many mediums. There are exercises to do and plenty of great visuals. This is the type of book I will work my way through slowly.
If any of you have read this book, I would love to hear from you!

The book appears to focus on creativity from the perspective of a wide variety of artists, working in many mediums. There are exercises to do and plenty of great visuals. This is the type of book I will work my way through slowly.
If any of you have read this book, I would love to hear from you!
Subscribe to:
Comments (Atom)

