Showing posts with label jewelry. Show all posts

Thursday, December 5, 2013

SALE Time!

For those of you that did not see this on Facebook, I'm having a big sale in my etsy shop.

Use coupon code DEC20 to get 20% off your entire order! Don't forget to click "Apply" after you enter the code.

This sale will be going on through December 15.

This is a new pair of earrings in my shop, perfect for the holidays!


https://www.etsy.com/listing/171849625/red-pearl-earrings-moonstone-keshi-pearl


 Click the photo to go directly to the listing.


Saturday, October 26, 2013

Enamel Components

I've been working on some simple enamel components for earrings and necklaces. I want the focus of these pieces to be the color, hence the super-simple designs. I did a blog post a week or 2 ago about making copper circles for this enameling session. Now I'll show you how some of them look with COLOR.


Each pair you see here will be a pair of earrings. The small circles are the ones I made in the above referenced blog post. They were domed very slightly. I used some dome up, some dome down. Both orientations seemed to work fine. The long teardrops are shapes that I purchased. All of the pieces are counter enameled with black on the back. This provides stability to the enamel.

I have another earring series to complete. These will be double dangles -- one circle hanging below another. I'm planning some very fun color combinations for those!

Another shape that I purchase as-is are these cute flowers. These will be put on a brass jump ring and hang from antiqued brass chain. This will help me keep the price point low ($24). I have some customers who have purchased several as gifts because of this attractive price.


I also offer these necklaces with hearts, which are on order. I hop they are in Monday's mail so I can get a bunch done before the Bad Girls of the North show next weekend! 


Wednesday, October 16, 2013

Making Copper Circles

There are several ways to cut out discs from metal sheet.

1 . You can saw them by hand using a jeweler's saw. I've done this, and while it is satisfying, it takes a bit of time and the result is almost never a perfect circle. Not that there's anything wrong with an "organic" circle, but it you're looking for a neat  disc, this is not the best method.

2. A disc cutter like this one from Evie's Tool Emporium is a great alternative. The prices in this etsy shop are always reasonable and the service is awesome. You can see this listing by clicking on the photo, but be sure to check out the rest of the shop too!

For me, this type of tool is great. It takes quite a bit of strength and a very stable surface to get good, clean circles. I'm working with 20 ga copper sheet, so sometimes it's hard for me to get through with one blow of the hammer.

Enter Rick. He suggested I make the trip out to his shop (it's really not far -- just on the other end of our 2 acres :-). There, he introduced me to the arbor press.


Basically, the arbor press does the hard work for you. You pull down sharply on the lever and it acts as the hammer, punching out he circle with relative ease. I have a video of this , but can't figure out how to upload it to my blog. (This is causing me great frustration, as I can't even find it on my computer. It should be in the cloud file, shouldn't it?)

Anyhoo, here are the little copper circles after I domed them. Even though these discs are small (less than 1" in diameter), I used a large dapping punch because I wanted a very shallow dome. Next step is to drill holes at the top and enamel them. Some will get holes top & bottom so I can do a double-dangle style earring.


As always, thanks for tuning in and check back soon for finished enamel earrings!


Friday, October 11, 2013

Romance is Alive!

Have no fear my friends, romance lives. At least in Alaska.

I received an email from a local guy -- in my head, he's young, very cute and athletic -- asking if I could replace a pair of earrings that his girlfriend lost. He purchased them from me 4 years ago. He remembers that specifically. I have no recollection of these earrings, but when he describes them, I kind of know what he's talking about.

He decided to send me a rough sketch of the earrings:

Rough sketch??? That's a drawing he did with some sort of CAD program, right? Bottom line, I knew exactly what he wanted. Lucky for him (and his girlfriend), I had 2 (yes, only 2) of those marquis cut prehnite stones left. They weren't quite a matched pair, but when I was done with the wire wrapping, they were indeed a pair :-)

These are the completed earrings:


This is the response I received from him when he saw this photo:


They look almost exact. 
I'll take them. 

Am I good, or what?
 
The next email I received from him:
 
Thank you so much. I called her and told her to expect replacement ear rings and she teared up on me. Those ear rings had kind of come to symbolize the first couple months of our relationship. When they were lost a few days before we had to say good bye. It was rough on her. 

Thank you so much. It made my year.
 
 
Of course, that made me tear up too. It's so special to be able to have an impact on the lives of others with something so simple as a pair of earrings. Now I need a tissue ...

Viva Romance!


Wednesday, September 18, 2013

A Bit of Wire Wrapping

I don't normally do this type of wire-wrapping. Anyone who does it regularly must be a bit insane. It's time consuming and the wire is persnickety. I use fine silver wire to keep the persnickety-ness to a minimum. It doesn't work harden the way the sterling silver does.

This first pair of earrings is super long. They look like twigs to me. I wrapped them with a series of  seed pearls and tiny faceted garnets.


For my next pair, I did a more daring color combination: apatite and golden tourmaline. These are shorter, but just a little more elaborate.


I don't have plans to list these in my etsy shop. I have 4 (ack, what was I thinking?!?) craft shows coming up and I need these earrings to keep my selections varied. You may see them on etsy later in the season, f they don't sell. But I hope they do!

Saturday, September 14, 2013

Vintage Metal Components

While at the Tucson gem shows earlier this year I found a booth selling some very unique vintage components. They were heavy gauge and not your typical overstocks from now defunct jewelry manufacturers. From their weight, these pieces seemed almost industrial. The whimsical patterns on some of them had me questioning what kind of industry might use such things.

Once I decided to not care what their original purpose in life was, I scooped up a small batch of them to use in some simple earring designs.

I bought a whole series of these domed steel charms. The patterns vary, but are floral, overall. They must have been stamped from a large sheet of a continuous pattern. They're really pretty cute.


How about these? They're like a cross between a peace sign and Pi. I heart them.


This next pair is different -- they're copper and are embossed with a stylized scallop pattern. The natural patina adds another level of interest.


And now for my favorites. These copper charms are heavily patinated and are dramatically long. I spent quite a bit of time deciding what to do with them. As with the other charms, I finally decided that simple was best.


If you have any idea what these may have been used for in their former lives, please let me know! In the meantime, I love them as jewelry components.

Click on the photos to go directly to the listings in my etsy shop!

Sunday, July 14, 2013

A Sale in My Etsy Shop!

Hey guys -- I'm having a sale in my etsy shop. You can use coupon code SUMMER20 to get 20% off your entire order through Tuesday July 16! If you haven't visited recently, there are plenty of new items for you to choose from.

Here's a small selection of what you will find in my shop.


Happy Shopping!

Thursday, June 6, 2013

Lampwork + Gemstones = COLORPLAY

One of the funnest things about creating jewelry is the color play involved. Gemstones are full of natural color. Pearls can be naturally colored, dyed or heat-treated to attain wonderful colors. And lampwork beads? Where do I begin to describe the amazing colors and combinations thereof that are found in these art glass beads?

Just about a year ago, I purchased a bunch (49 to be exact) orphan lampwork beads from Firelily on etsy. Here's a photo of the whole lot.


They are amazing and they've been sitting on my worktable for a full year. I would occasionally fondle them or just peer into their awesomeness. Inspired by something I saw on etsy the other day, I finally decided to use some of these works of art.

First, I sorted through them to separate out the pairs, to be saved for earrings. I know they are all supposed to be orphans, but I definitely found lots of pairs. With some of the remaining beads, I made a series of pendants. Each bead is paired with a gemstone (also orphaned) and made into one of two styles of pendant. In one style, the lampwork bead and the gemstone are wired together in chain-like fashion, making for an articulated pendant. The other style hard-wires the two elements together.

These photos capture most of the 21 necklaces I made.


I do not plan to list these in my etsy shop, so if you see something you like (or would like to see more photos of), let me know and we can work something out. Enjoy the colors!

Thursday, May 16, 2013

COLOR!

I don't know about you, but I love color. I love almost all colors and I love most of them together. Some of my most popular earrings feature what some would consider bizarre color combinations. Even when these pieces are not big sellers, they are certainly eye-catching and draw customers to a display of all of my jewelry, like at a craft show.

This is what I'm talking about:


And this too:


If you really want to learn about color theory, get some reasoning behind why these combos work (or don't) you need to head over to my friend Brandi's blog. Not only does she explain color theory in perfectly understandable terms, she offers up some really delicious color palettes based on lovely pieces of art. She also talks about design and photo editing. Trust me, you'll like it over there. She also has a fun Facebook page here.

Wednesday, May 8, 2013

Working on a New Design

Every once in a while an idea strikes and we must drop everything and work on it RIGHT NOW. That exact thing happened one day last week. I was literally in the middle of making a pair of earrings when an image of this pendant popped into my brain. I had to try and make it.


I planned it all out: used a Sharpie to mark where to drill the holes, made 3 copper headpins with the torch (quench them in ice water to get that pretty pink color), cut the lengths of sterling and brass wire. Of course, the last hole I drilled didn't go so well and I scratched the sterling disc very badly. That's OK, this is only the prototype.

The part I didn't plan at all was how to finish the piece. In other words, the back is a mess! The copper headpins became rivets and they are neatly hammered flat on the back. The other wires? They're just there. I'm thinking I need another disc, a bit larger and made from copper, for contrast, that I can rivet to this main piece. I will do it with a spacer of some sort so the wires on the back have a place to hide.

If you have a more creative and artistic idea for how to finish this, I would love to hear it!

Wednesday, May 1, 2013

New Earrings and a New Keyboard!

My online activities have been limited for the past 8 days because my keyboard broke. No, it didn't break all by itself. Jet was under my desk, the cable got stuck on his head somehow, he got spooked and ran. The keyboard suffered.

I went directly to amazon (On my iPad because without a keyboard, going anywhere online is difficult. Couldn't believe amazon.com WAS NOT in my browser history!) and ordered a new, wireless one. It is a dream!! And it wasn't even expensive.

In the meantime, making listings on etsy was tricky business. I had to create the listing on my iPad and save it to draft mode. Then, I would go to my computer and add the photos to the listing. Tedious to say the least. What I learned is that it IS possible, just very inconvenient.

Anyway, here are a couple of pairs of earrings I listed in the past week.


You can click on any of the captions or the photos to go directly to the listings in my etsy shop!


Friday, April 5, 2013

Oak Leaf and Acorns

Recently listed in my etsy shop, this necklace is one-of-a-kind. I drew an oak leaf outline on copper sheet, sawed it out, textured it with a leaf pattern and oxidized it to highlight the pattern. The center rib is oxidized brass that I riveted (with handmade rivets) to the leaf. It looked a bit lonely, so I added some brass acorns dangling alongside.


The leaf is fairly large, so it needed a long chain for visual balance. You can see some more photos of it here.

Thursday, February 21, 2013

Triangles and Wire

Sometimes the simplest jewelry designs are the most enduring. Back in November I did a blog post about resurrecting an old style of earrings that I got tired of making. In that post I proclaimed that I would work on those earrings the very next week. HA! Three months later, I finally did it. I need to remember to NOT commit to such tight time frames any more.

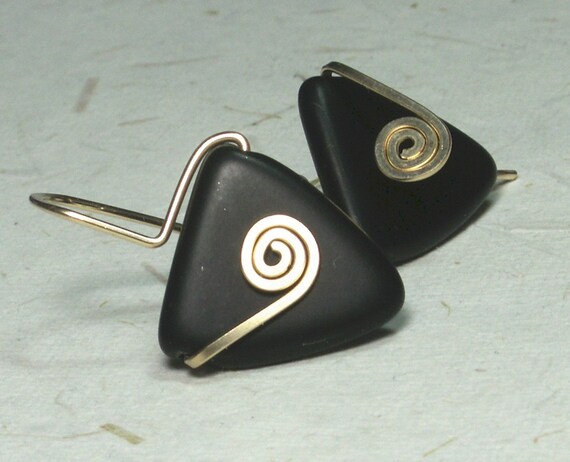
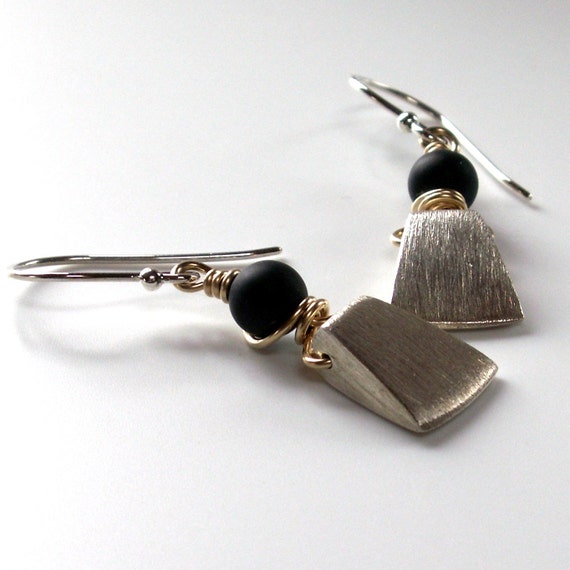
Back to the earrings. They really are very simple. I start with a length of 20 ga wire and make a tight spiral. Hammer (or roll) to flatten, form in and around the triangle glass bead, make the hook part and finish. It took me a bit (2 pairs)  to remember some of the finer points of the forming. But then it went rather quickly.


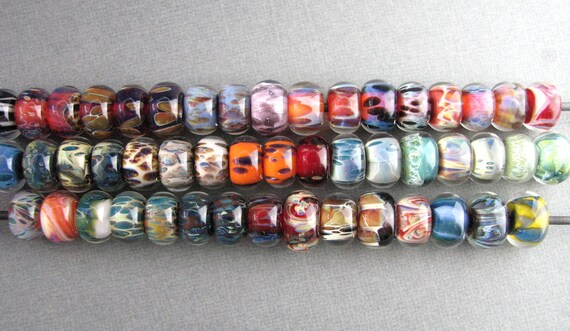
There are 22 pairs in the photo above. Some are done with sterling silver wire and some are with gold filled. Some are larger triangles (12 mm) and some are small triangles (7 mm). Some are transparent, some are opaque and some have a matte finish. There are a couple of pairs with a metallic finish and a couple of pairs where the glass has graphic patterns.


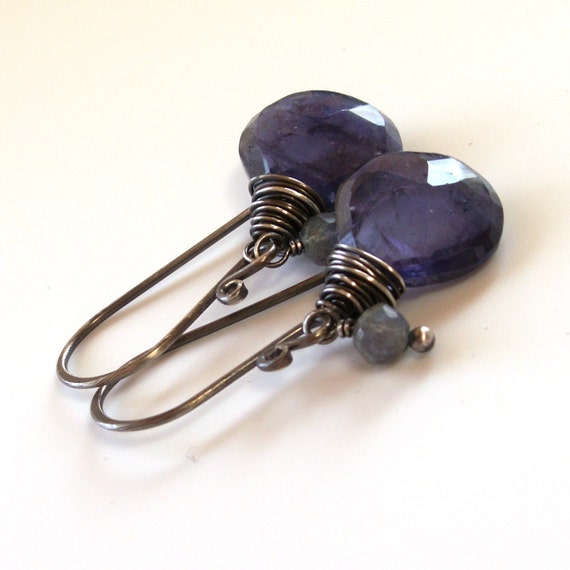
Cobalt blue, transparent, large, sterling silver


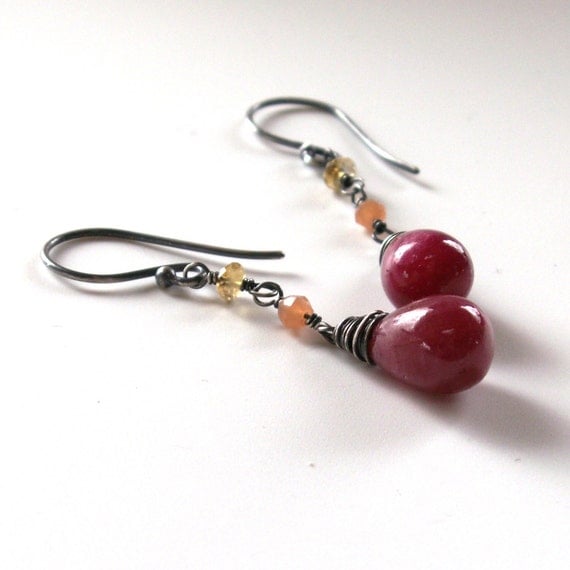
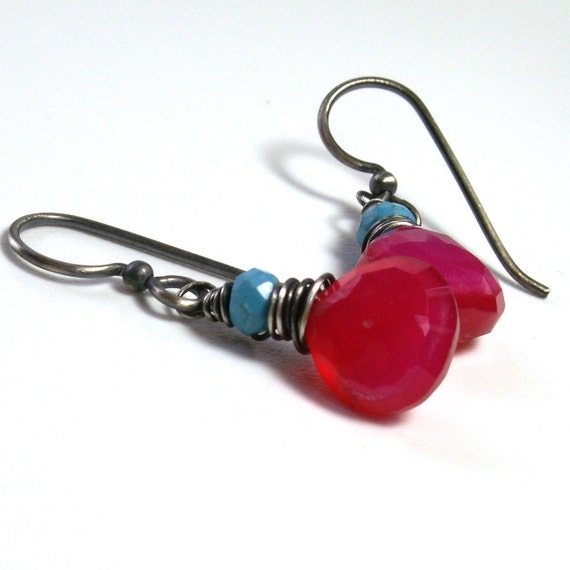
In the center: red, transparent, small, gold filled
In the foreground: bronze metallic, opaque, small, gold filled
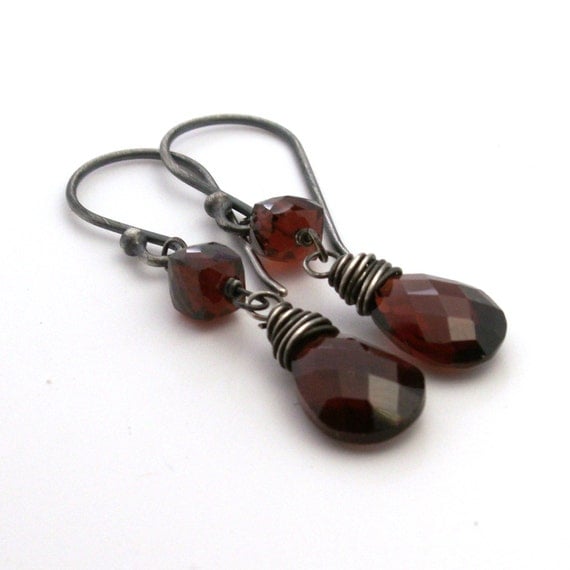
In the background: amber, transparent, large, gold filled


Cobalt blue, opaque (matte finish), large, gold filled


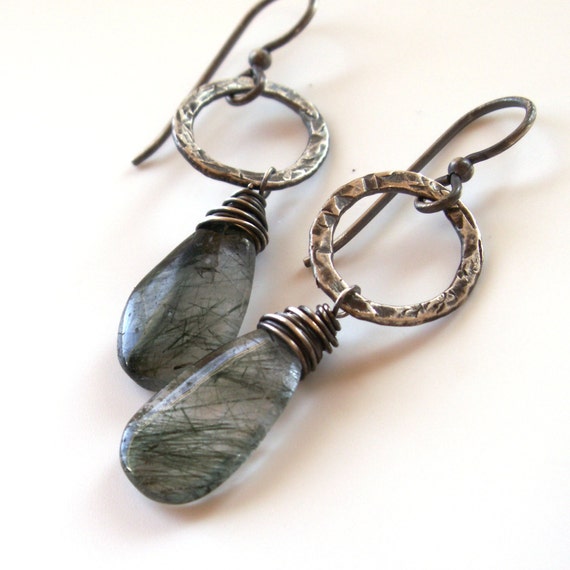
Teal, translucent, large, sterling silver

I'm not sure which pairs will end up in my etsy shop. It will depend on which ones photograph well and which ones I can recreate, based on how many glass triangles I have in stock in any particular color. The sterling ones will be $25 and the gold filled will be $28.
If you see a pair that you would like to have, let me know!

Thursday, January 24, 2013

Wire Wrapped Necklaces

I used to dread making necklaces like these. It was boring and tedious ... just keep repeating the same motions over and over. Now, I think of it as therapeutic. And of course, I'm a lot quicker at it, which helps a great deal.

Having said all that, it felt like forever until this necklace was long enough to go around the neck twice without using a clasp. I can envision wearing it with a linen colored silk sheath style dress.


It was worth the time it took. I alternated champagne colored pearls and smoky quartz rondelles for a earthy, warm look. Here's a close-up:


I've worked on several necklaces in this same style. Here's my favorite. The beads are fluorite and vary in color but are mostly shades of purple and seafoam, traditional fluorite colors. The shape is also quite enticing: faceted stylized cubes.


These pieces are too tricky to photograph for me to list them in my etsy shop, so I'll probably reserve them for local sales at craft shows.

Friday, November 16, 2012

What's On My Work Table?

I haven't done one of these posts in a very long time. While there have been lots of things going on with my work table, this particular picture of it is something I don't think I've shown you before.

I decided to resurrect an old style of earrings that I made for many years ... and then stopped making. This happens because I tire of the design or the components become unavailable or my customers stop buying it. These earrings disappeared because I tired of making them. They were good sellers for many years and now I feel the need to reintroduce them.


As you can see, the design centers around these triangle glass beads that have the holes across the top. And yes, they come in lots of colors and two different sizes. Here's a look from a different vantage point.


Don't forget, you can click on the photo to get a larger view.

And what do I do with these triangles, you ask? This is the only pair I ever photographed and they sold on etsy back in 2008.


Pretty cool, huh? One length of 20 ga wire, made into a spiral, then flattened and formed through and around the bead. I will probably work on these earrings next week and I plan to list some in my etsy shop!

Wednesday, June 27, 2012

A New Earring Design!!

I've been plugging away, building earring and necklace inventory for our busy Alaskan summer tourist season, relying on tried and true designs.  Then, just 2 days ago, a new idea popped into my head.  It's actually a variation on a design I did a few years ago and allowed to fizzle out.  I love when this happens -- just when you think you'll never come up with something new, there it is!

I started with one of my sterling silver tornado elements and wrapped size 15 seed beads all around it.  Yes, I have done this part before.  The new variation is the dangle on the bottom.


I will probably list a few pairs in my etsy shop eventually and the rest will be for my booth at the Alaska State Fair and my fall craft shows.

Whiskey Quartz cubes with gold seed beads


Garnet Briolettes with rosy seed beads


Amethyst Briolettes with purple seed beads

And yes, there are plenty more pairs completed and several more in the planning stages!

Tuesday, April 24, 2012

Volcano Arts :: Enamels

I just returned from a short stay/class at Volcano Arts in California.  It was sort of a last minute trip and I wasn't sure what I would work on this time.  I thought I wanted to make a sterling silver ring with something decorative (not sure what) riveted to the top.  Christine convinced me to try my hand at enameling a small copper cut-out to rivet to the ring-to-be.

Well, the ring project never got off the ground!  It quickly turned in to a pendant, which I know I will wear more that the ring anyway.  The copper flower was just too big for a ring, at least for me.  I used heavy gauge sterling silver sheet for the base of the pendant and the 2 pieces of enameled copper are riveted to it with a handmade copper rivet.


I love it!   I had big plans to do something fancier with the bail, but I forgot to anneal the silver before adding the enameled pieces, so I was limited as to how much manipulation the silver would endure.  The best laid plans ...  There's always more to learn when working with metals.

At this point, I was in love with the idea of enamels and proceeded to spend the rest of my class time making more enameled components.  Anyone who loves color, and has a healthy respect for heat and fire would be right there with me.

Lest you think this is just about sprinkling on some enamel powder to get this magic to happen, there are a series of steps that must be completed before the Fun With Color begins.  This series of components all required the following:
  • cut, saw or punch out a shape
  • mark the center
  • dome
  • drill the center hole that you marked earlier
  • clean with fine grit sand paper and pumice

I like the idea of layers of color for use in a piece of finished jewelry.  I had so much fun choosing the color combinations.  Of course, Christine has every possible color, so much time was spent ogling tempting color charts.


Aren't they cute?  I'm anxious to get started incorporating these into some pendants!

Friday, December 30, 2011

Sapphire and Seed Pearl Necklace

Each year, right about now, I donate a piece of jewelry to be auctioned during the KAKM Art Showcase.  KAKM is our local public tv station and the art auction is a huge fundraiser.  It is televised for three consecutive nights in mid February.  I find it very exciting to watch my handcrafted jewelry getting ever increasing bids during this live auction every year.

The piece I selected for this year's auction features lots of little sapphire briolettes and a series of tiny white seed pearls.  The base is a piece of sterling silver wire that I shaped by hand and hammered flat for strength and to make a nice surface for the seed pearls to rest on.


Emerging from the top of the wire work are small rondelles of crystal quartz, leading to sterling silver oval rolo chain, one of my favorite chain styles.


And a couple more photos of it:


I don't usually do that type of wire wrapping because it takes a lot of patience.  Patience that I generally lack.  But this time, the piece really needed it and once I put my mind to it, it didn't take as long as I thought it might.