After stacking beads on a headpin for creating a pair of earrings, we most often make a wrapped loop in order to attach the drops to earwires. I make 2 types of wrapped loops: neat and messy. But that's a topic for another post. This post is about the neat type of wrapped loop. Chances are, you have a favorite method of creating said wrapped loop. Take a close look at the last pair of earrings you made. You will notice that they do not look the same when viewed from the front as they do when viewed from the back.
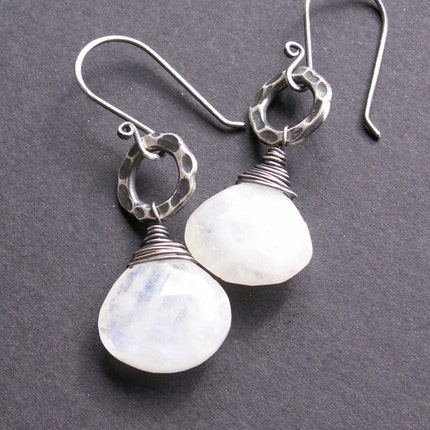
This first photo shows one drop facing one way and the other drop facing the other way. Can you see the difference in the wrap? This may seem like a minor point, but in a simple pair of earrings, if each one is not suspended from the earwire in the same direction, it can really stick out like a sore thumb.

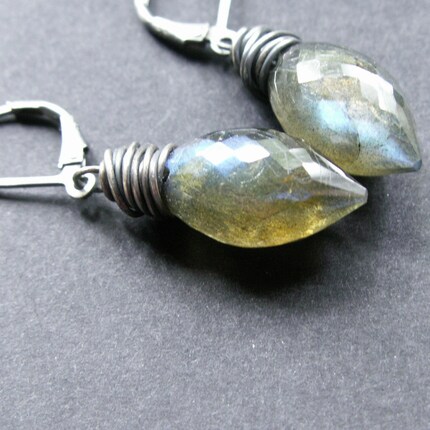
I won't try to tell you which way is right and which way is wrong, I only suggest that you assemble both earrings the same way. I always hang my drops as seen below, because I see this side of the wrap as "the front". You may see it the other way. Just be consistent!

This first photo shows one drop facing one way and the other drop facing the other way. Can you see the difference in the wrap? This may seem like a minor point, but in a simple pair of earrings, if each one is not suspended from the earwire in the same direction, it can really stick out like a sore thumb.

I won't try to tell you which way is right and which way is wrong, I only suggest that you assemble both earrings the same way. I always hang my drops as seen below, because I see this side of the wrap as "the front". You may see it the other way. Just be consistent!